

If you're a garlic lover like me, you know it can instantly elevate any dish-but prepping it can be a hassle. That's why it helps to have garlic ready to go before you start cooking. In this post, I'm sharing simple tips for peeling, storing, and making fresh garlic paste to make your kitchen prep easier and faster.
Want to Save This Recipe?
Enter your email & I'll send it to your inbox. Plus, get great new recipes from me every week!
By submitting this form, you consent to receive emails from Minstry of Curry
If you've cooked Indian food at home, especially curries and biryanis, you've likely come across recipes that call for ginger paste and garlic paste. While store-bought versions are convenient, I always prefer making my own. It's quick, easy, and the fresh, preservative-free flavor of homemade garlic paste truly makes a difference-especially in dishes where the aroma and taste of garlic shine through.
I like to keep both peeled and whole garlic on hand since I use it so often in my everyday cooking. Peeled garlic is super convenient, but I also stock up on whole garlic bulbs-they last for weeks at room temperature and are great to have as a backup. To keep them fresh longer, I store the bulbs in a cool, dark spot away from sunlight, or sometimes in the fridge, where they can stay good for months.
When I'm ready to make garlic paste, the first step is always peeling the garlic.
How to peel garlic
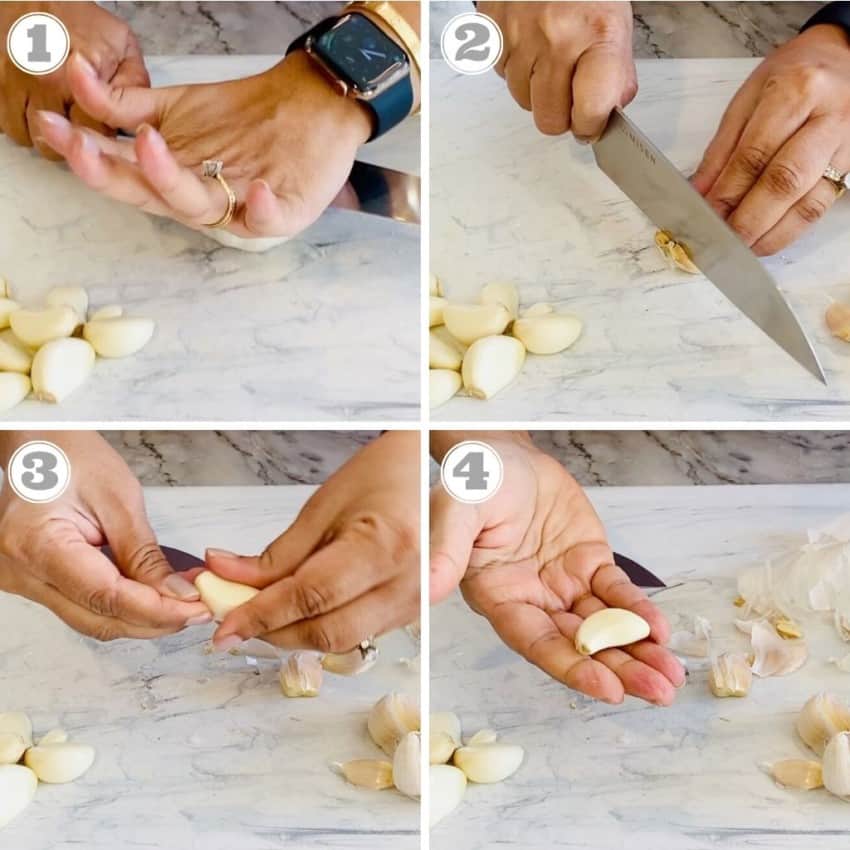
Start by separating the cloves. The easiest way to do this is by placing the garlic bulb on a cutting board and gently smashing the top (root end) to loosen the individual cloves. Once separated, you can peel the cloves using one of two easy methods:
Method 1: Cut the top hard part of each clove and then peel the skin off (photos 2 - 4)
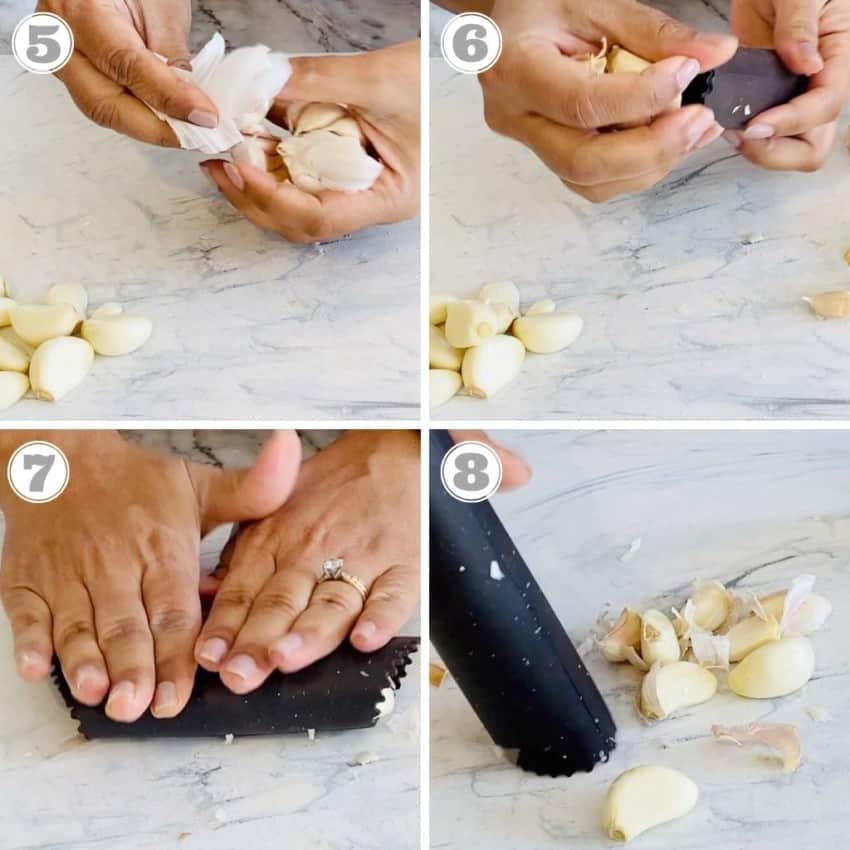
Method 2: Use a garlic peeler tube. These silicone tubes are inexpensive and make peeling garlic super easy. Simply add separated garlic cloves in the tube, 8 to 10 at a time, and roll the tube on a flat surface by applying gentle pressure on the top. Most of the peels will come out and you can simply pick up the peeled cloves (photos 5 - 8)
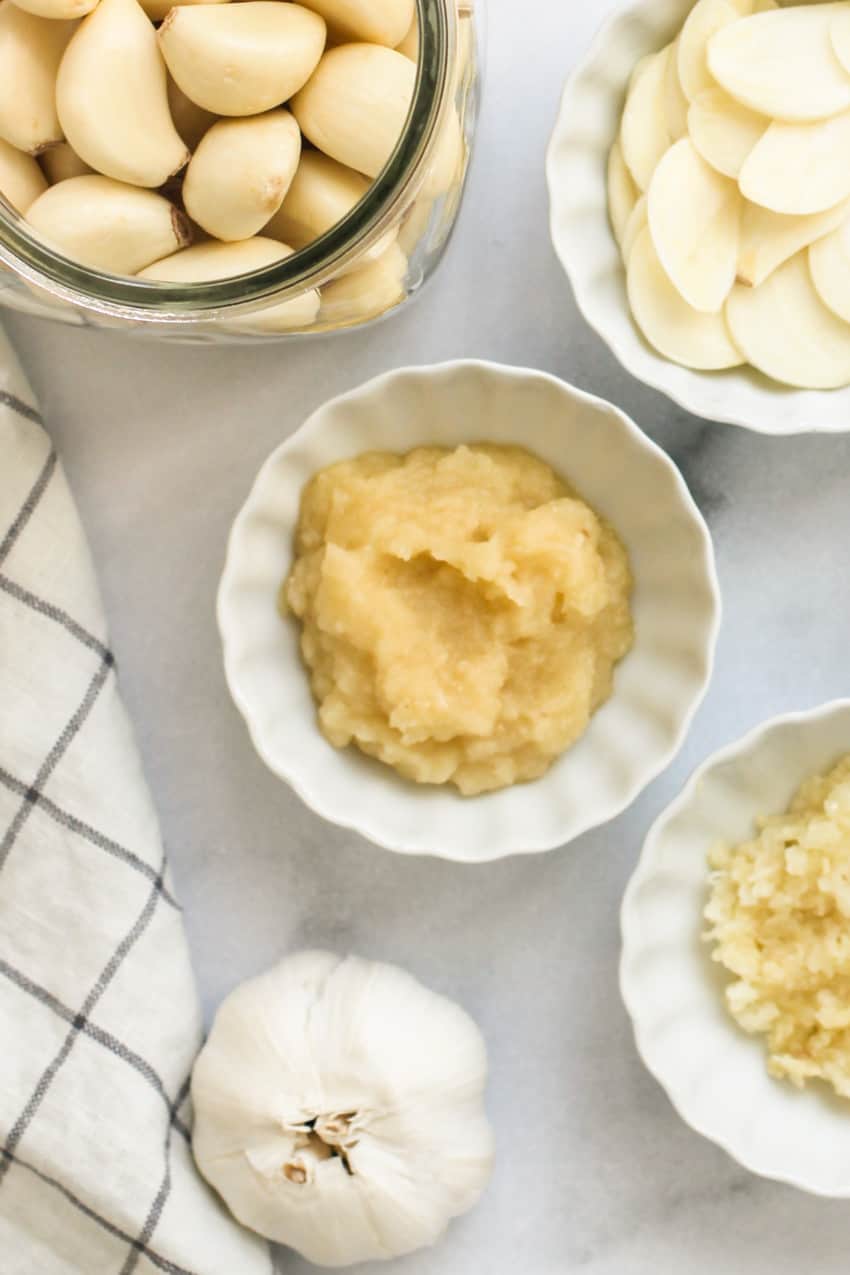
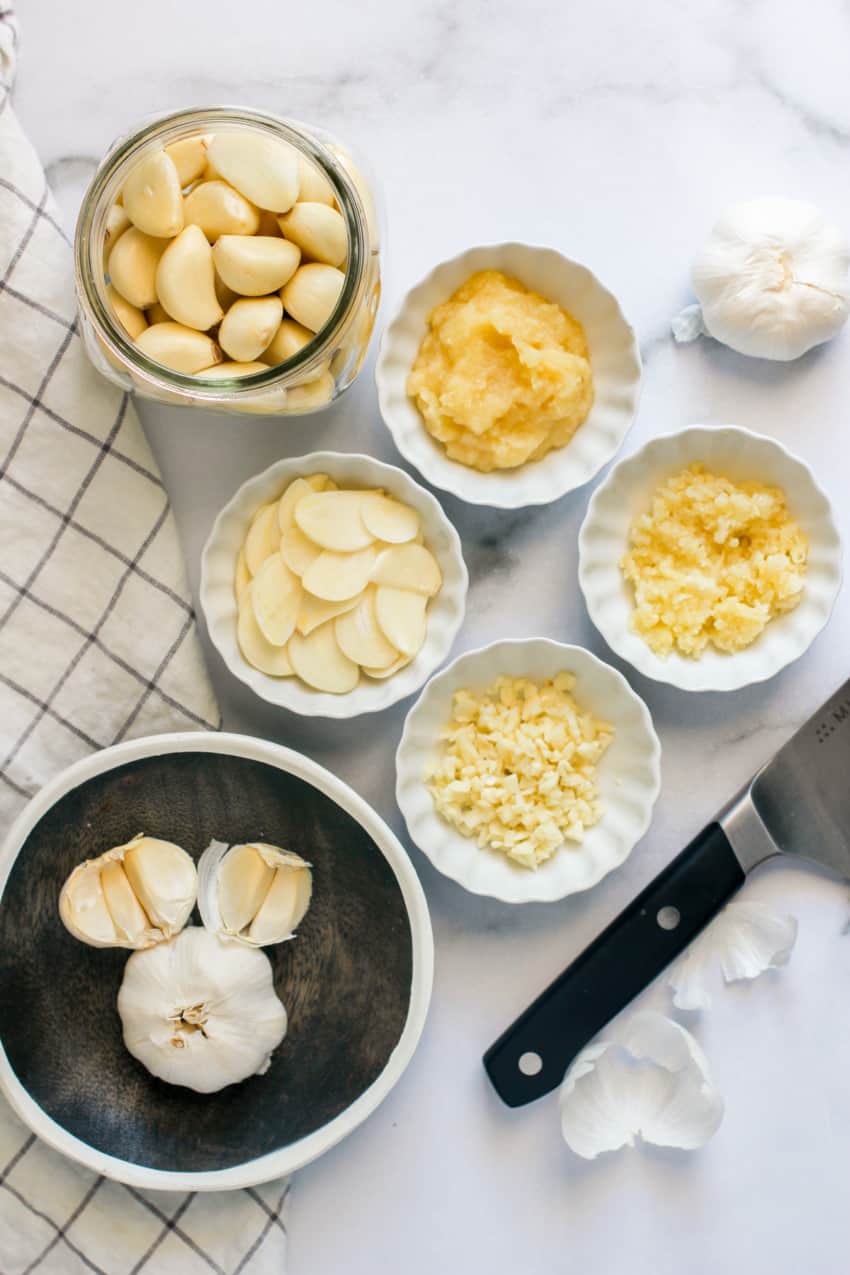
Once you have the garlic cloves ready, you can store them in an airtight container in the refrigerator for up to a month. Depending on the recipe, you can chop, slice, or press them as needed. For Indian cooking, I highly recommend making garlic paste-it pairs perfectly with ginger paste and is incredibly convenient to have on hand. A helpful tip to remember: one garlic clove usually yields about one teaspoon of garlic paste.
How to make garlic paste
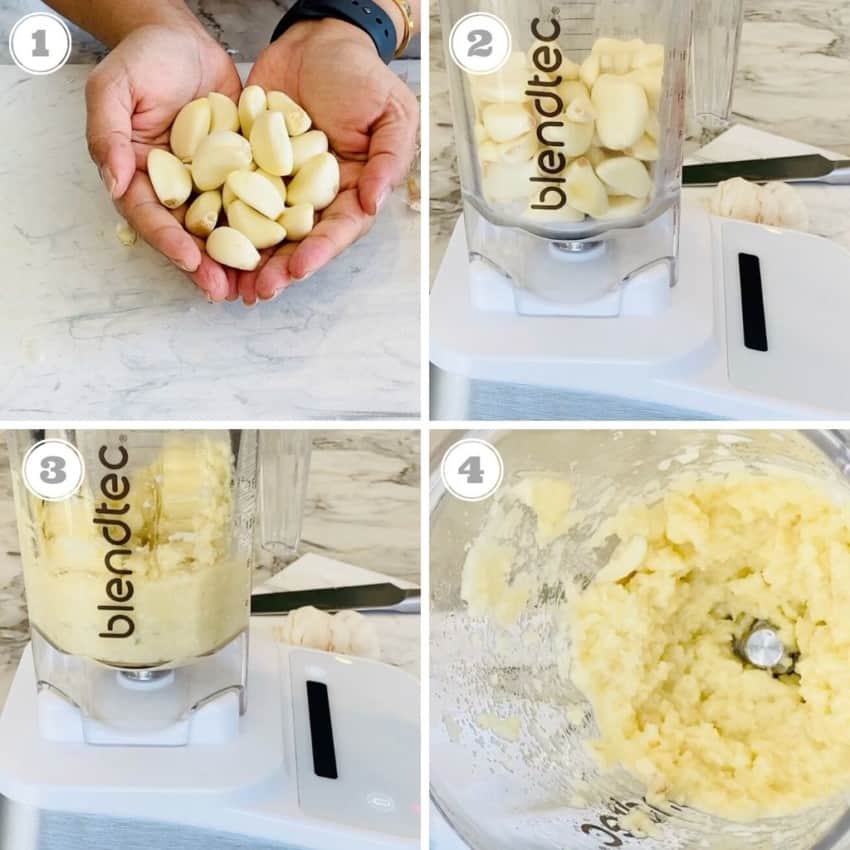
Add peeled garlic cloves to a blender and blend them to make a smooth paste. I really like the Blendtec twister jar for making pastes, chutneys, and dry spice blends. You can also use a food processor for this. NOTE: There is no need to add any water during blending but if for some reason your blender does not blend it finely, you can add 1 to 2 tablespoons of water to it (Photos 1 - 4)
Storing
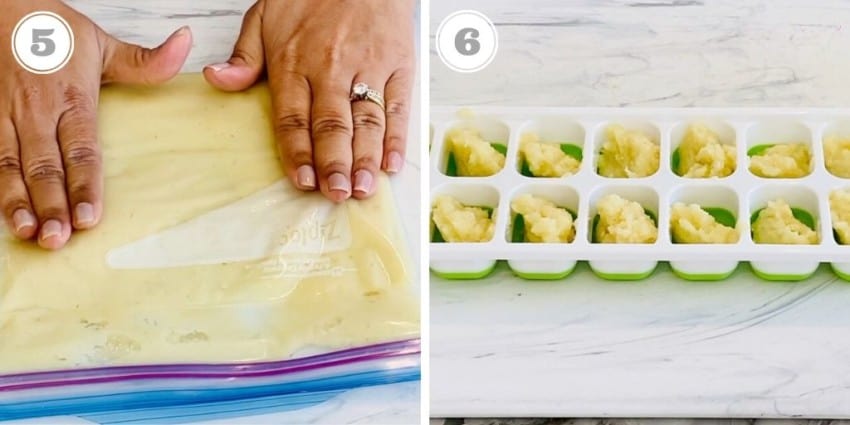
Option 1: Freeze the garlic paste in freezer zip-lock bags or in silicone trays. If using freezer zip lock bags, remember to make thin layers of the garlic paste so it's easy to break off smaller pieces when needed. You can use multiple zip lock bags for this. Frozen garlic paste not only retains the fresh flavors but also does not change its color (photos 5 - 6)
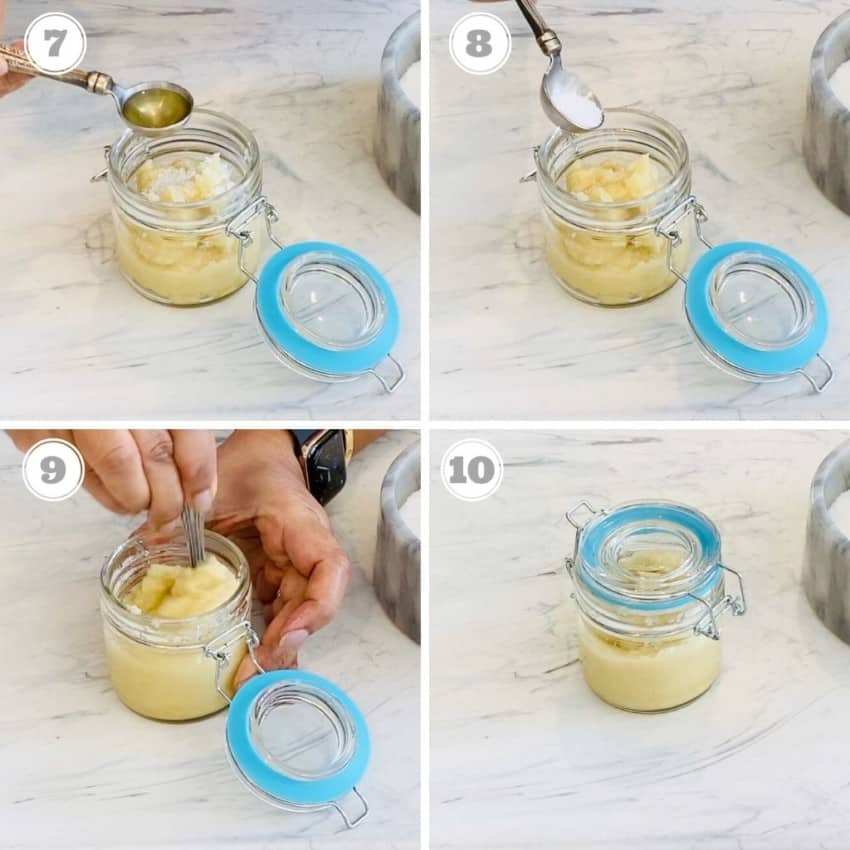
Option 2: You can also store the garlic paste refrigerated in a glass jar for up to 5 days. To keep the garlic from turning bluish-green, stir in a little bit of oil and salt to the paste (photos 7 - 10)
How to Use
- To use the frozen garlic paste, simply pop out the cubes of garlic paste one at a time. You can add frozen garlic paste cubes directly to the dish you are cooking
- You can also take out several cubes at a time and store them in a small glass jar for 3 to 4 days
- Similarly, with the garlic paste in the zip lock bags, you can break a small piece out as needed and add it to the dishes. You can also keep the freezer ziplock bag in the refrigerator for 3 to 4 days
More Indian Cooking 101's
★ Tried this recipe? I'd love to hear how it turned out! Leave a comment and let me know, or snap a quick pic and upload it-I love seeing your creations. If you're on Instagram, tag @ministry_of_curry so I can check it out. Your feedback means so much to me and makes all the time I spend perfecting each recipe totally worth it. Thank you!
Homemade garlic paste
Ingredients
- 2 cups peeled garlic cloves
Instructions
- Add peeled garlic cloves to a blender and blend them to make a smooth paste. I like to use the Blendtec Twister Jar for making pastes, chutneys, and spice blends. You can also use a food processor for this.NOTE: There is no need to add any water during blending but if for some reason your blender does not blend it finely, you can add 1 to 2 tablespoons of water to it
- For maximum freshness, freeze garlic paste in freezer zip-lock bags or silicone trays. If using freezer zip lock bags, remember to make thin layers of the garlic paste so it's easy to break off smaller pieces when needed. You can use multiple zip lock bags for this. Frozen garlic paste not only retains the fresh flavors but also does not change its color
- For weekly meal preps, refrigerate the garlic paste in a glass jar for up to 5 days. NOTE: To keep the garlic from turning green, stir in a little bit of oil and salt to the paste.
Video
♥ Subscribe to our Youtube Channel for tasty and easy video recipes. Looking for more Instant Pot recipes? Check out our delicious Instant Pot Recipe board on Pinterest.

Monika Agwani says
Made my first batch of organic ginger paste.Thank you for idea to keep the paste frozen.