

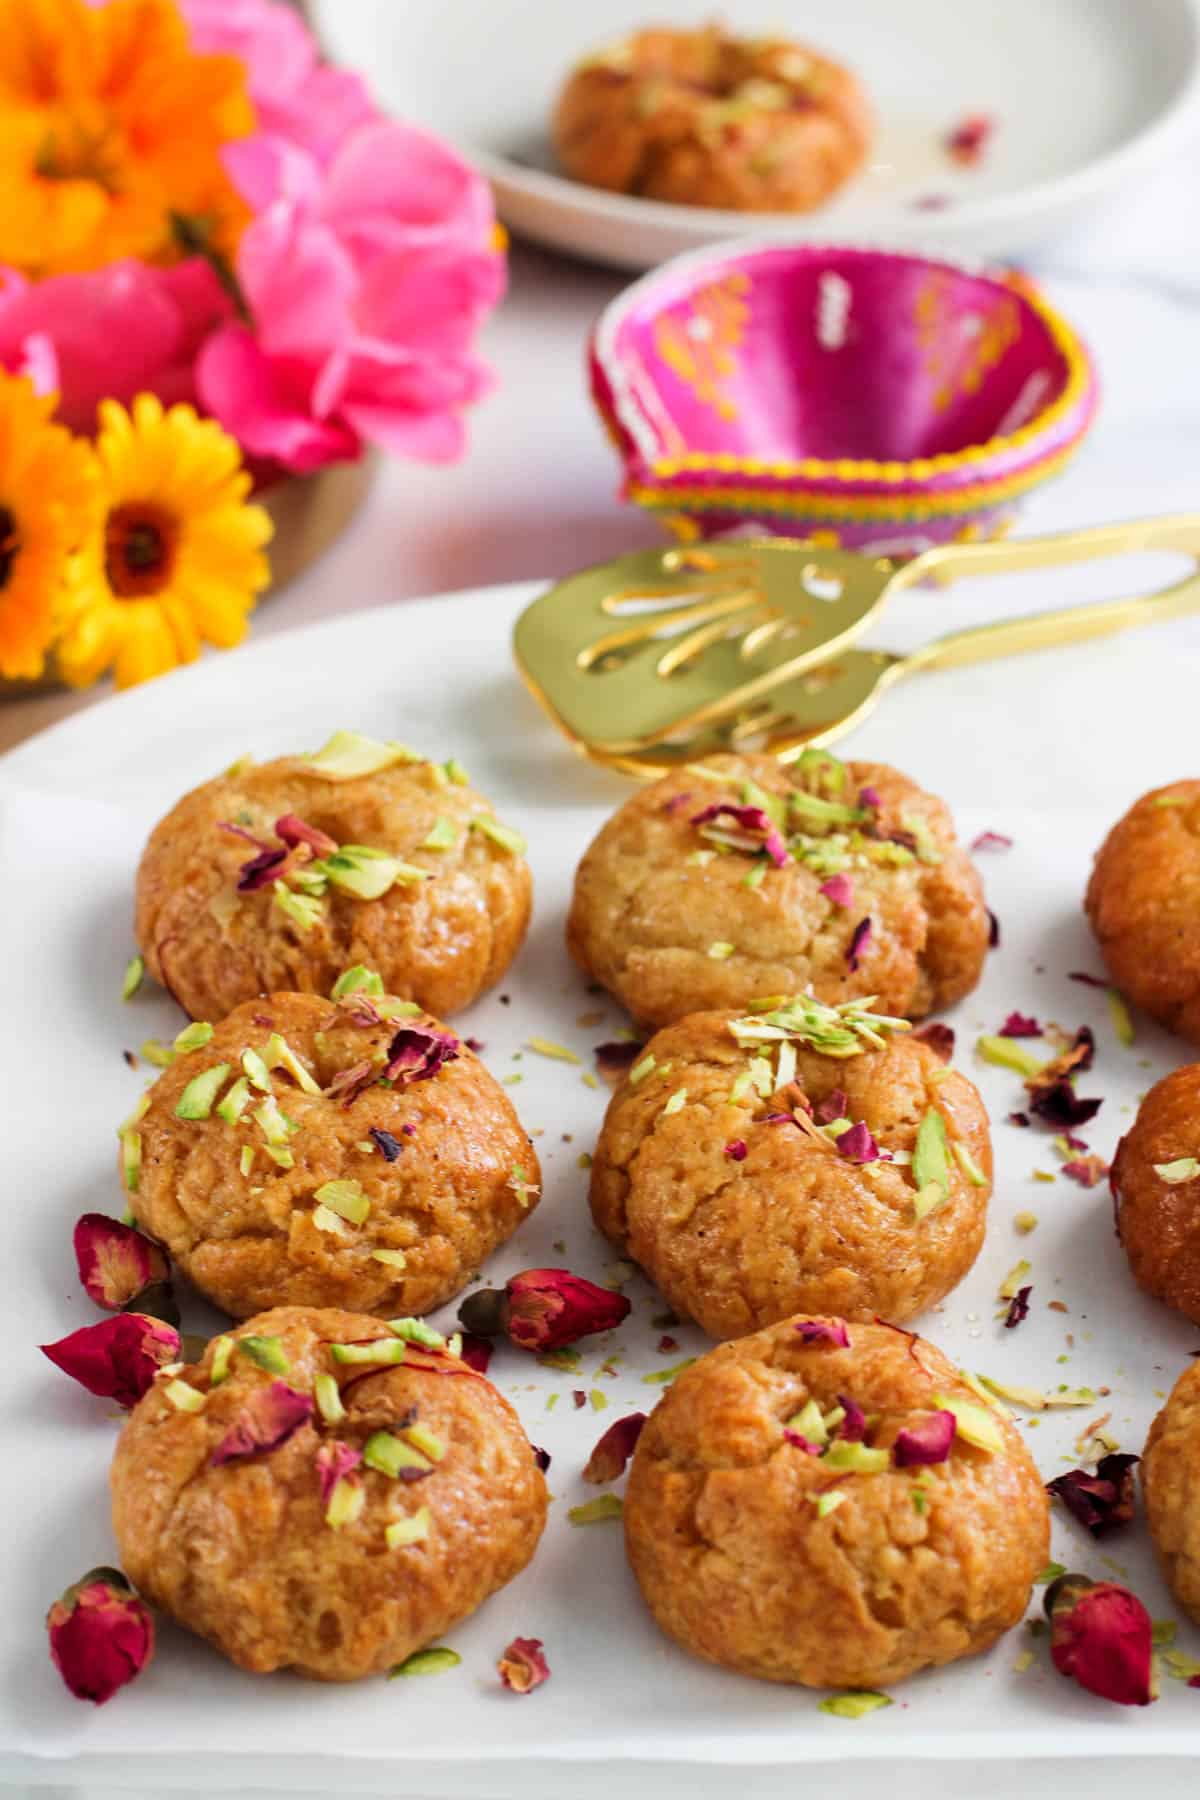
Balushahi is a heavenly Indian dessert that dresses up any celebration! These pretty little yogurt cakes are shaped into donut-like rounds, which are fried, then bathed in a luxurious rose and cardamom syrup. The result is a sweet flaky surface, a tender cakey interior, and the pure pleasure of beautiful Indian flavors - ghee, rose, cardamom, and saffron.
Want to Save This Recipe?
Enter your email & I'll send it to your inbox. Plus, get great new recipes from me every week!
By submitting this form, you consent to receive emails from Minstry of Curry
Also known as "Badushah" in Southern India, this special dessert can be found in many Mithai (Sweets) shops. They are a favorite sweet during Diwali and make a lovely addition to your Faral! Once you learn how easy and quick Balushahi is to make at home, you can delight your guests by making it for festivals, celebrations, and parties!
A few basic pantry ingredients and spices form the base of this recipe. I will take you through making the flavored sugar syrup and 3 cooking methods:
- Air Fried Balushahi
- Traditional Deep Fried
- Baked in the oven
Each of these yields a scrumptious, finger-licking dessert. I love using the Air Fryer for this recipe to create a lighter, guilt-free version of one of my favorite sweets!
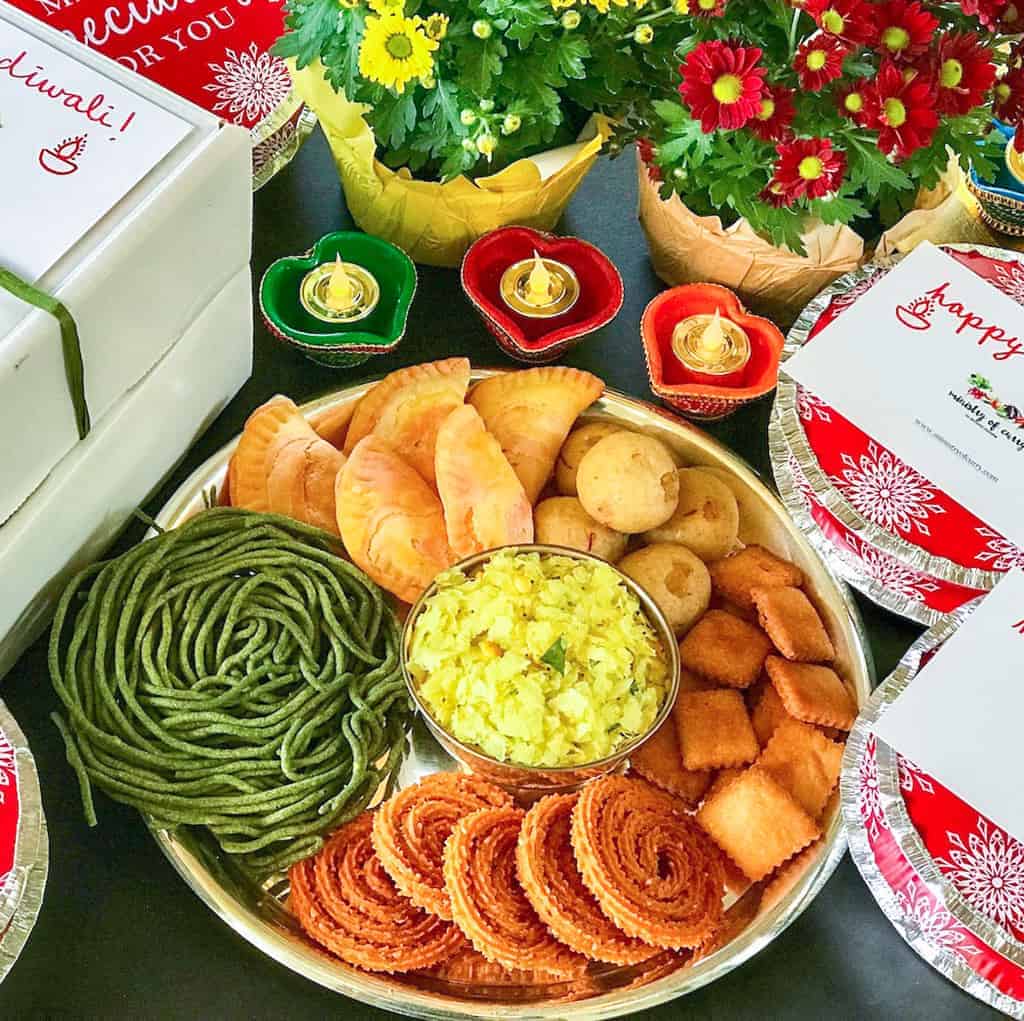
What is Faral
"Faral" is a term used in Western India to describe all the sweet and savory goodies that are made during Diwali. Faral is offered to family and friends visiting your home during the festive season, and it is also exchanged with neighbors. Some of the common Diwali Faral foods include Ladoo, Chakli, Shankarpali, Chivda, Sev, and Karanji, just to name a few. It is amazing to see the presentation and taste the variations of everyone's family Recipes.
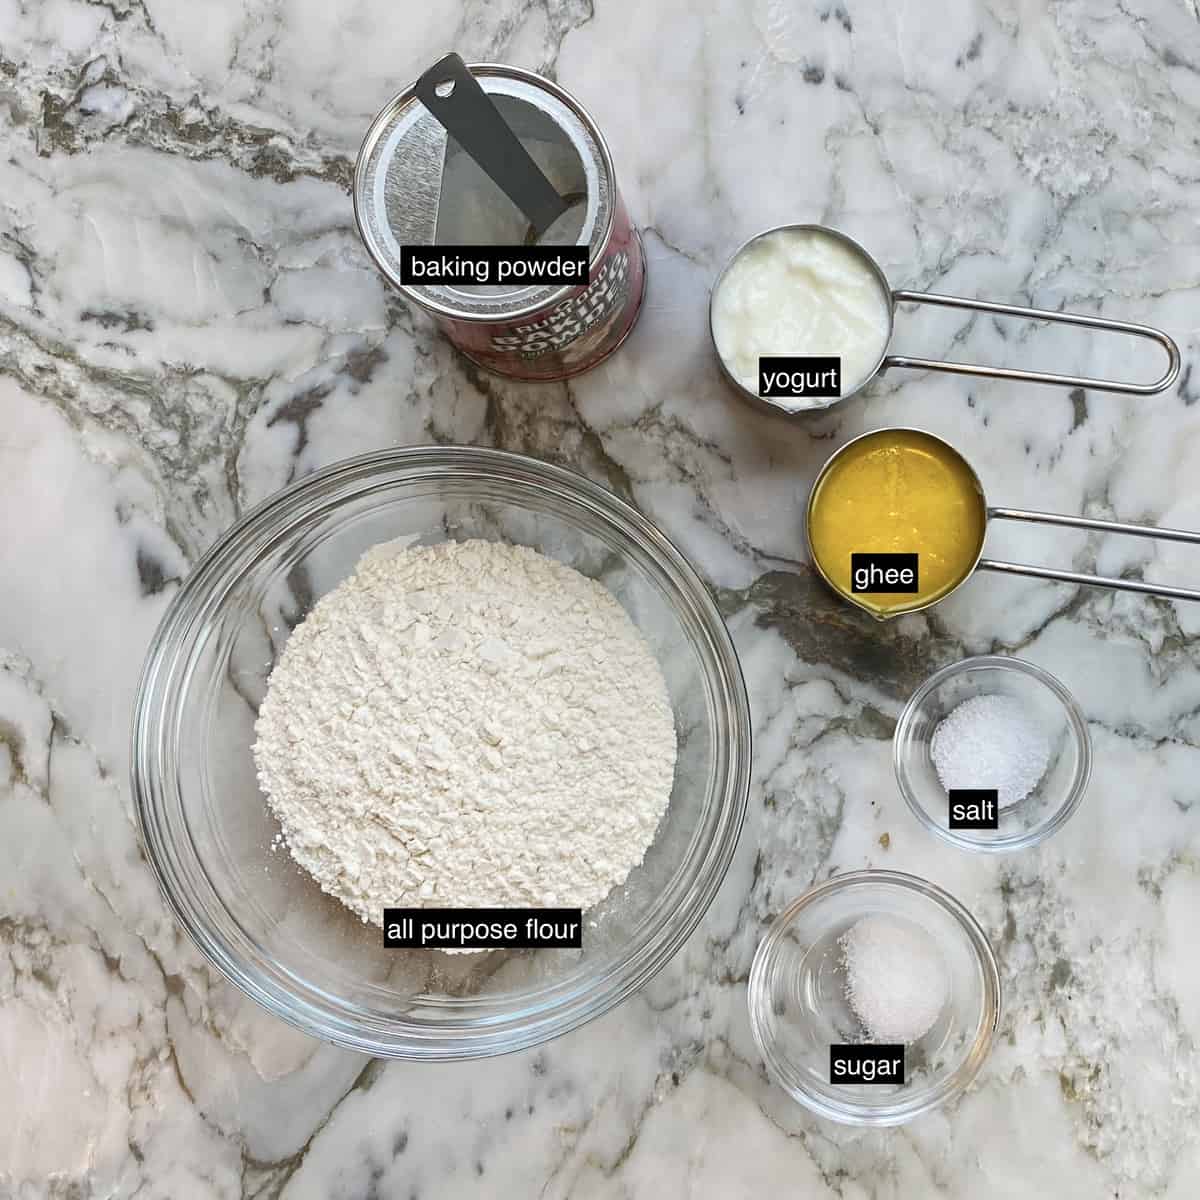
About the Ingredients
This is a 2-part recipe. The first part is making the dough with all-purpose flour (maida), ghee, and yogurt. The addition of the baking powder helps add a lighter texture, especially for the air-fried and baked versions.
Part two of the ingredients is used to make the cardamom and rose flavored sugar syrup, also known as "Chasni". The addition of lemon juice prevents the syrup from crystallizing as you wait for the dough pieces to cook.

Tips
- Sift the all-purpose flour. Make the dough with light hands and knead it just until the dough ball comes together
- Shape the discs with light hands. Usually, the traditional Balushahi have thumbprints, but I make a donut-like hole to ensure they cook evenly, especially in the air fryer or oven.
- Check out my detailed notes below on how to make the one-string sugar syrup. Undercooking the syrup will make the Balushahi soft, while overcooking will make the outer covering too hard.
- Adding lemon juice to the cooked sugar syrup will prevent the syrup from crystallizing. Make sure the syrup is warm when you add the air-fried Balushahi to it
- Allergic to nuts? Simply skip the garnish in the end
How to make one-string Sugar Syrup
Making perfect one-string consistency sugar syrup or "Chasni" is key in this recipe. Here are my tips for making perfect syrup every single time and these tips will also come in handy for other desserts like Rava Ladoo, Besan Burfi, or other Indian sweets that use sugar syrup. Here are all of my tips, and scroll below to the instructions for the photos of this process.
- Use a heavy-bottomed saucepan to make the syrup. I use a 2-quart saucepan. If your saucepan is smaller or thin, it may take you less time.
- Once the sugar dissolves and the syrup comes to a boil, lower the heat and allow the syrup to simmer for 6 to 7 minutes.
- Check for one-string consistency. There are 2 ways to do this:
Method 1: This is the traditional method. Add a few drops of syrup to a small plate and allow it to cool for a few seconds. Then dip your index finger in the syrup and press it on your thumb. Slowly open and close the index and thumb fingers and you should see a string being formed between the two fingers. For best results remember to allow the syrup to cool just a bit before you test it.
Method 2: Use a digital thermometer and dip it in the syrup. For accuracy, make sure that the thermometer tip is not touching the bottom of the pan. Once the thermometer reaches 220°F which should be around the 6 to 7-minute mark, the syrup is ready. - Adding lemon juice to the cooked sugar syrup will prevent the syrup from crystallizing as you wait for the dough balls to cook.
Step by Step Process
- In a medium bowl, mix flour, salt, baking powder, and sugar. Add ghee and yogurt, and gently mix to make dough. Lightly press together all the ingredients until the dough just comes together. It's ok for the dough to be uneven. Keep covered for 10 minutes.

- Add sugar, water, saffron, and cardamom to a medium saucepan and bring it to a boil. Lower the heat and add lemon juice and rose water. Simmer for 5 to 7 mins or until you get a one-string consistency. Turn the heat off and reserve.

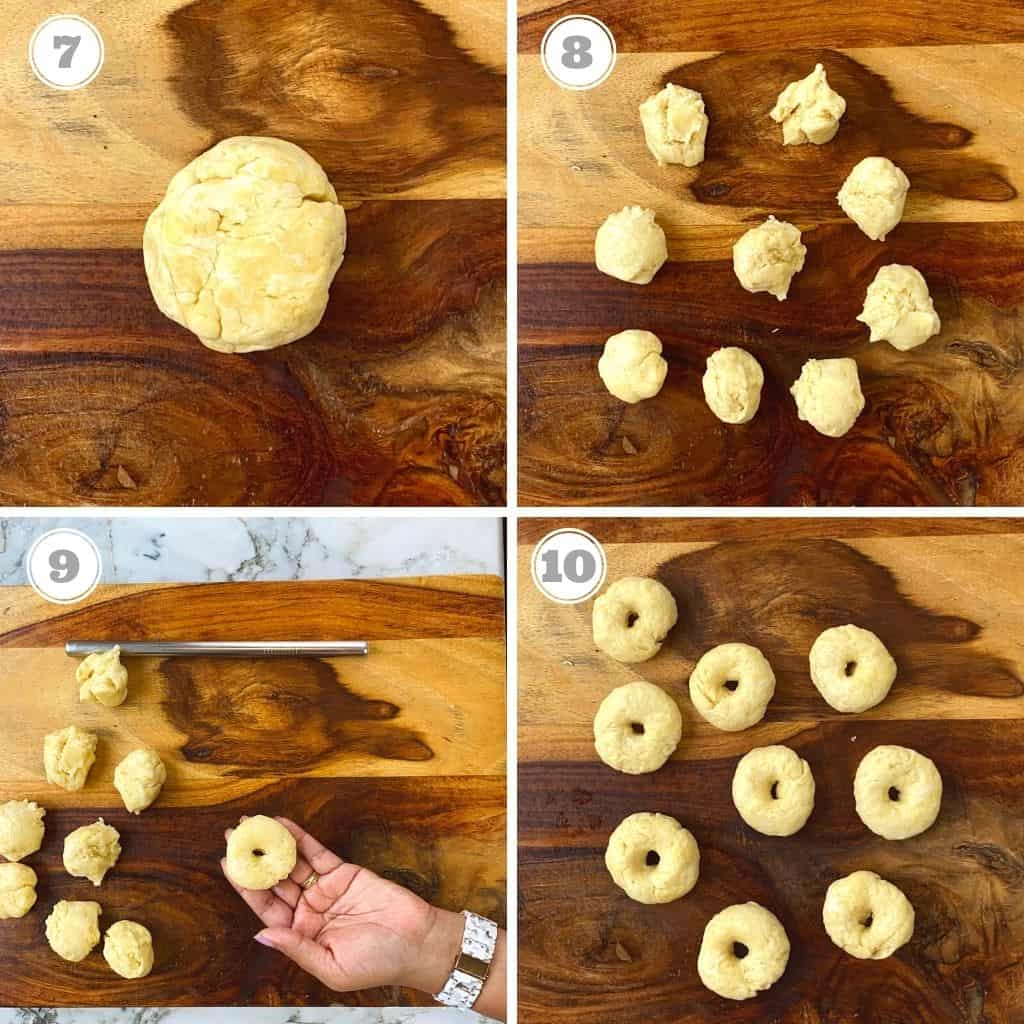
- Lightly knead the dough again and make 9 balls. Shape each ball into a round and then lightly press it down to form a 1.5-inch to 2-inch disc. Using your pointer finger, make a hole through the center. This step helps the center to cook evenly. Repeat with the remaining dough.
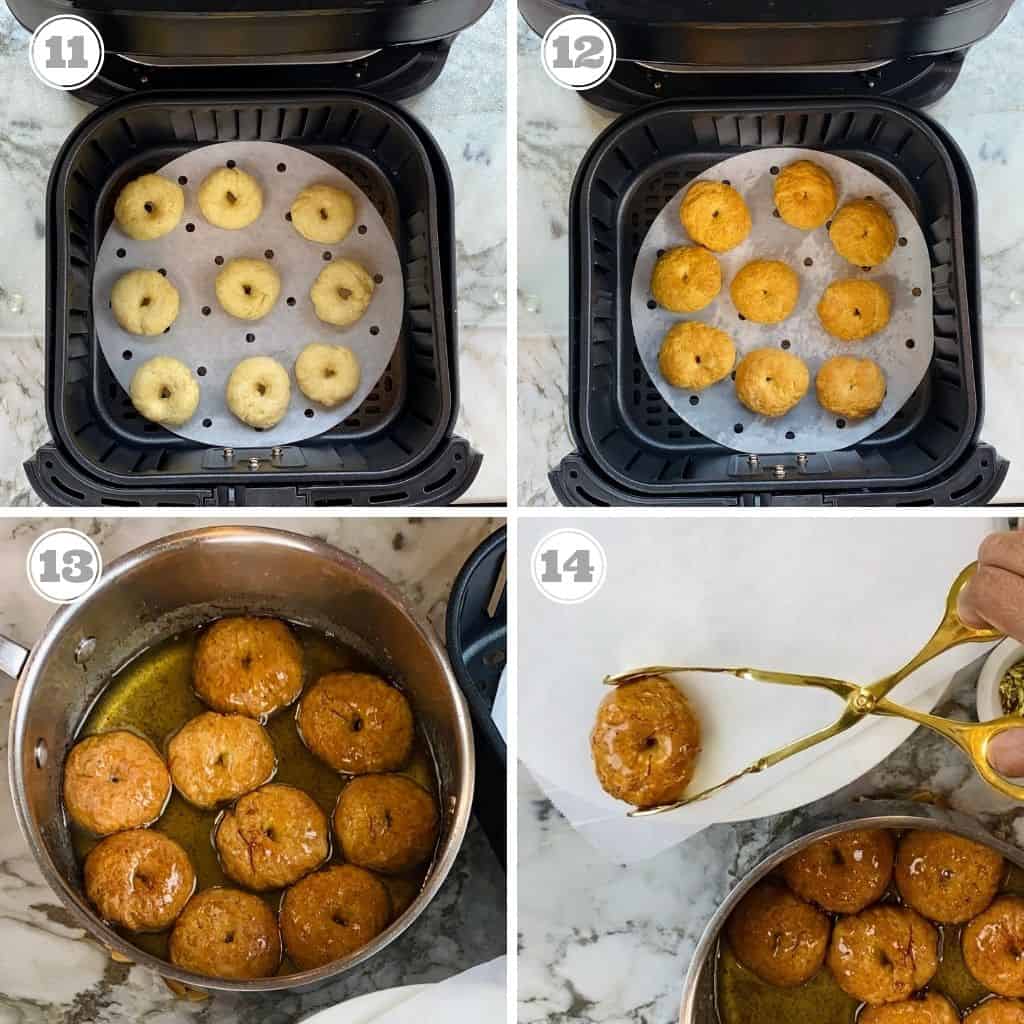
- Place the Balushahi on the parchment paper in a preheated air fryer. Air fry at 320°F for 15 minutes. Once the air fryer is done cooking, take the basket out. If the Balushahi's are not lightly golden brown, air fry again at 370°F for 2 minutes.
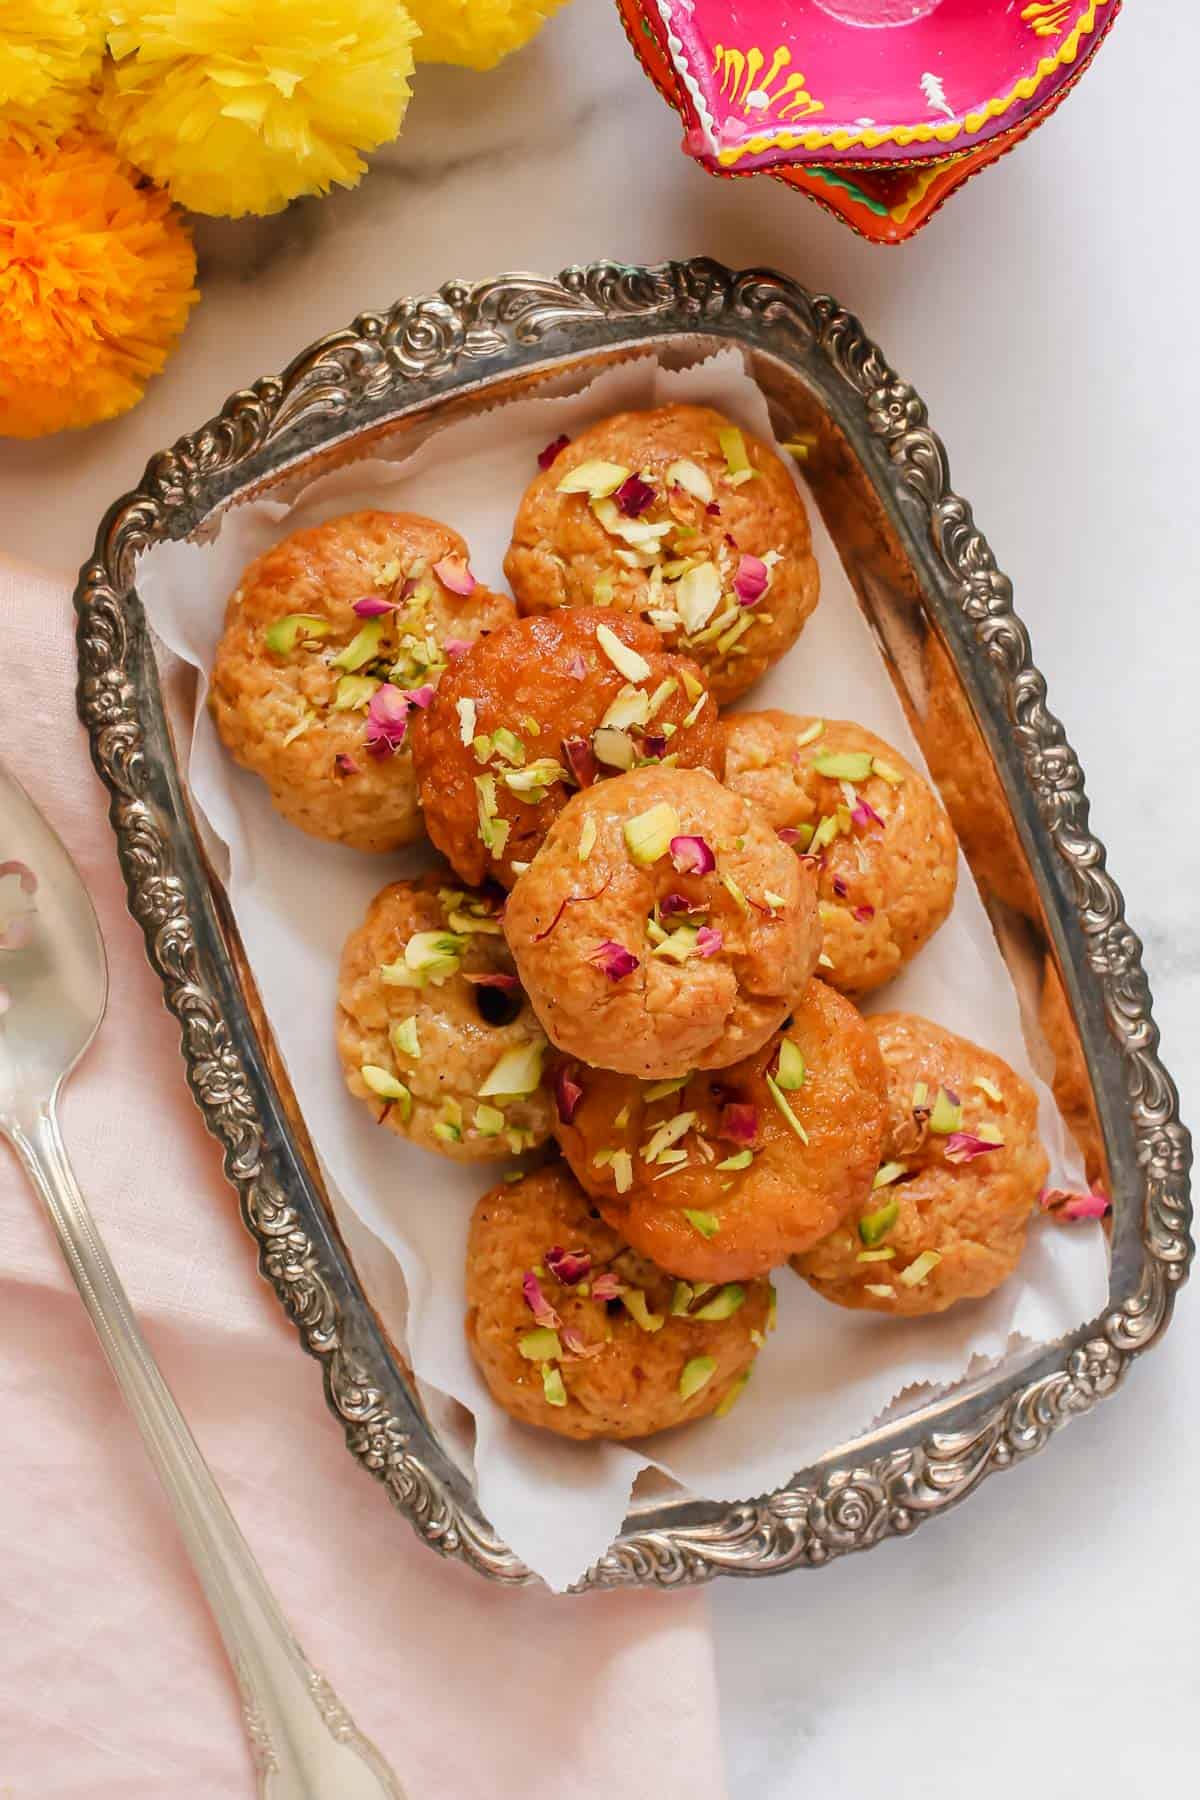
- Gently place the Balushahi in the warm syrup and allow them to soak for 20 minutes. Then take out the Balushahi with a slotted spoon and arrange them on a parchment-lined baking sheet or a platter.
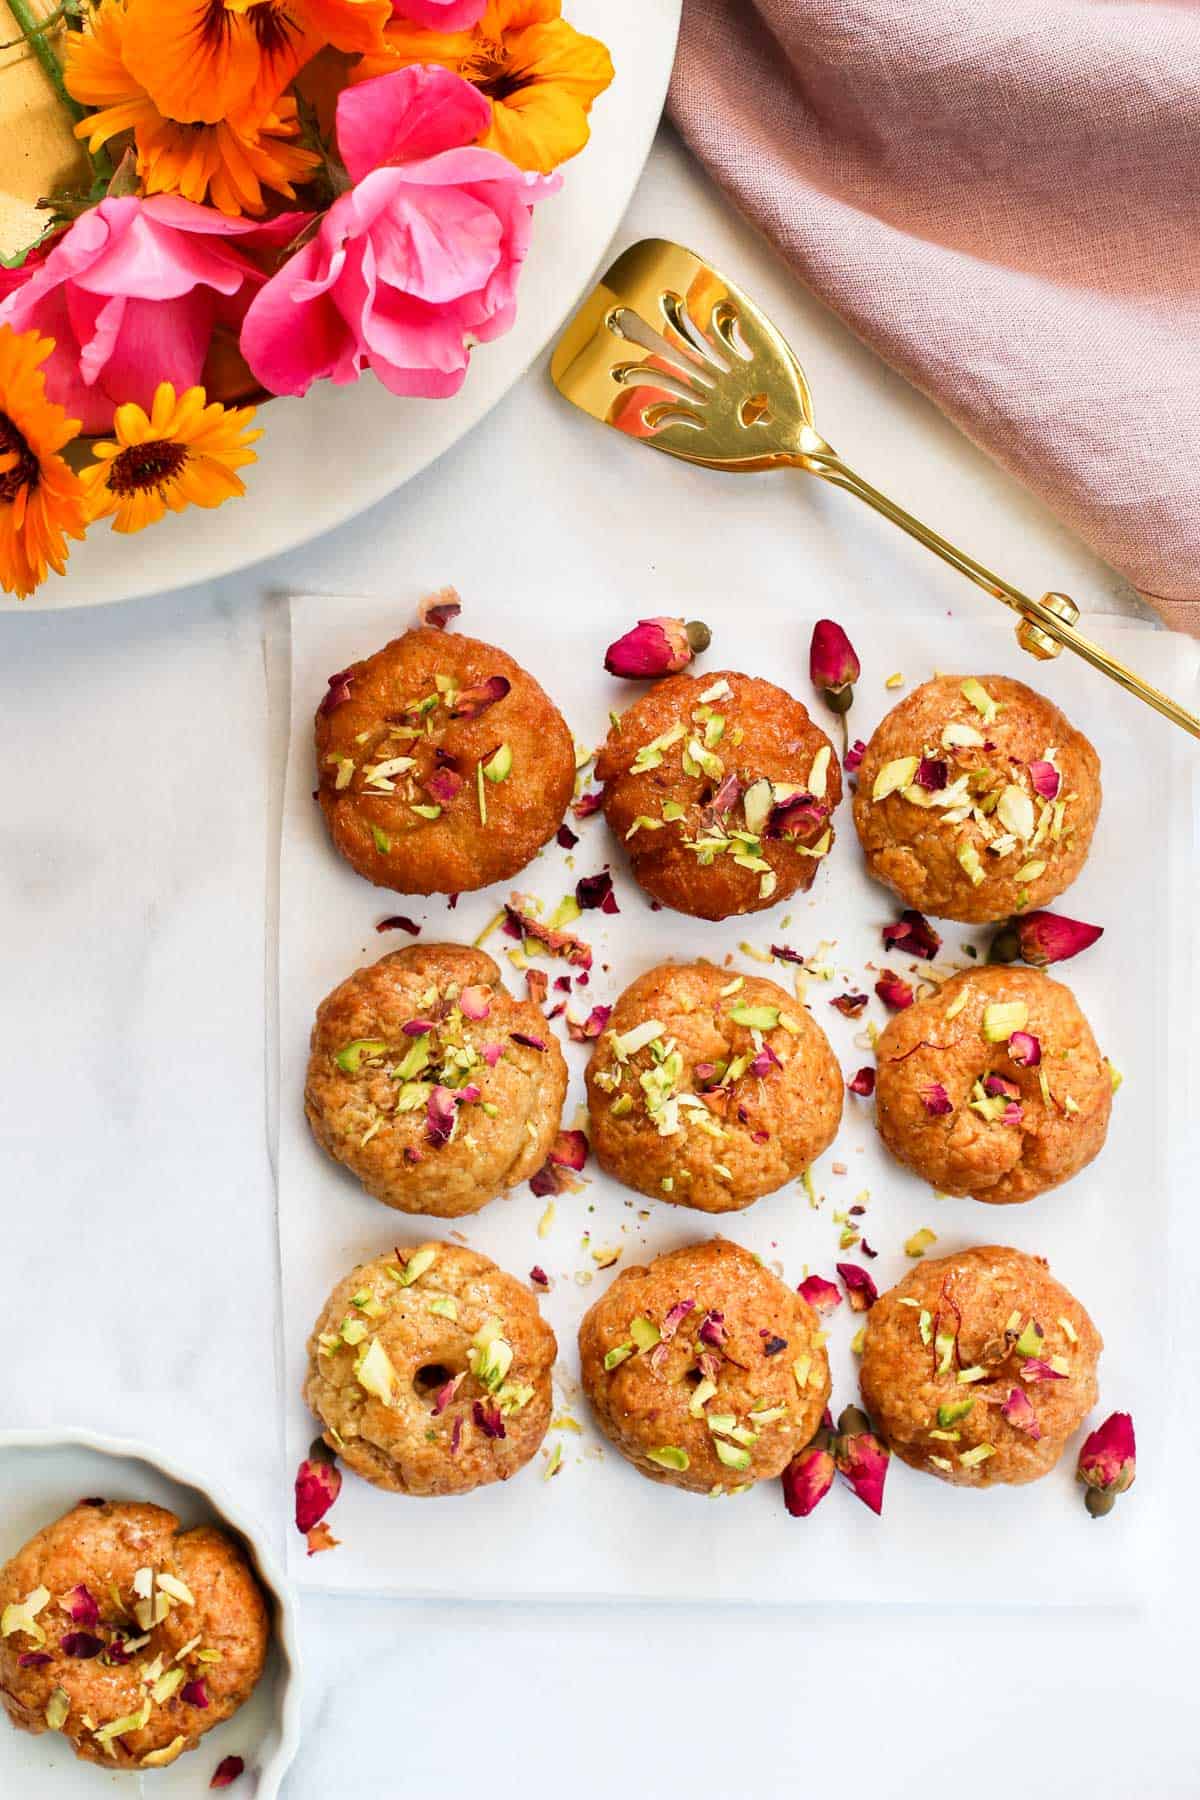
Garnish with sliced pistachios and edible dried rose petals.
Serving
Balushahi can be served as a dessert or as an afternoon snack with a cup of tea. Double up the recipe and make it for your next party or potluck. Since the Balushahi stays well at room temperature, it is perfect to pack for picnics or lunch boxes as a yummy treat.
Storing
Allow them to cool down and store them in an air-tight container. Balushahis stay good at room temperature for a whole week.
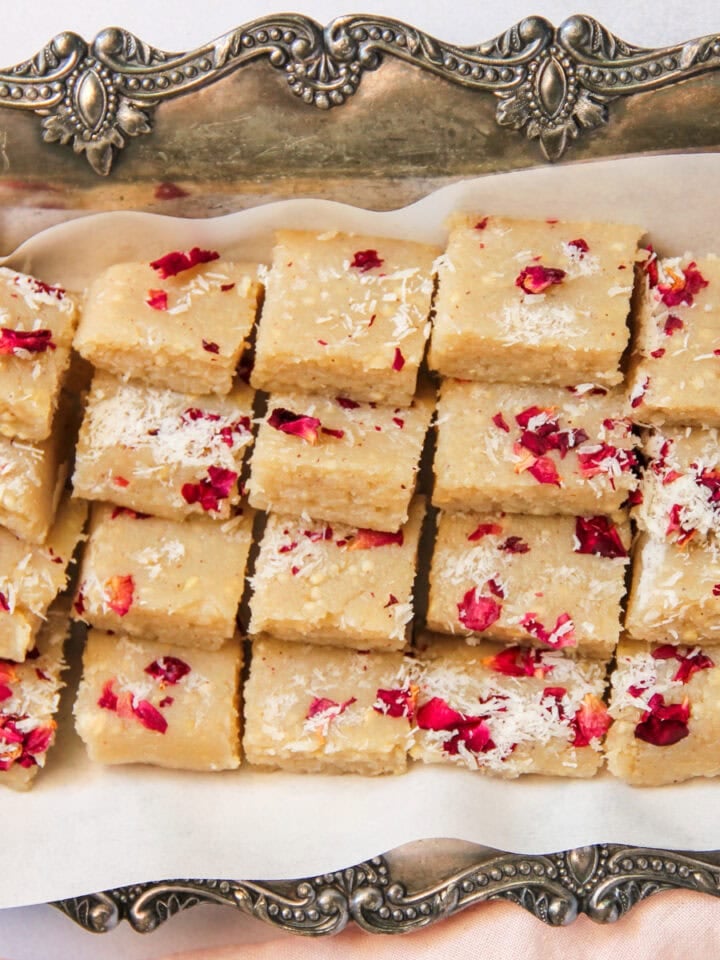
Did you enjoy this Indian dessert? Here are some more Homemade Indian sweets to try:
Recipe

Balushahi / Badushah
Equipment
Recipe Video
Ingredients
- 1 cup maida all-purpose flour sifted (110 grams)
- ¼ teaspoon kosher salt
- 1 teaspoon baking powder
- 1 teaspoon sugar
- ¼ cup ghee
- ¼ cup yogurt
Syrup
- 1 cup sugar
- ½ cup water
- pinch saffron
- ½ teaspoon ground cardamom
- 1 teaspoon rose water
- 1 teaspoon lemon juice
Optional garnish
- 1 tablespoon pistachios thinly sliced
- 1 tablespoon edible dried rose petals
Instructions
- In a medium bowl mix flour, salt, baking powder, and sugar. Add ghee and yogurt and gently mix to make dough. Lightly press together all the ingredients until the dough just comes together. It's ok for the dough to be uneven. Cover the bowl with plastic wrap and keep aside for 10 minutes.
- Make syrup. Add sugar, water, saffron and cardamom to a medium saucepan and bring it to a boil. Lower the heat and add lemon juice and rose water. Simmer for 5 to 7 mins or until you get a one-string consistency. Turn the heat off and reserve.
- Preheat air fryer at 350 for 5 minutes.
- Lightly knead the dough again and make 10 balls. Shape each ball into a round and then lightly press it down to form a 1.5 inch to 2-inch disc. Using your pointer finger make a hole through the center. This step helps the center to cook evenly. Repeat with the remaining dough.
- Line the air fryer basket with parchment paper.
- Place the Balushahi on the parchment paper keeping distance between them.
- Air fry at 320 F for 15 minutes. Once the air fryer is done cooking, take the basket out. If the Balushahi's are not lightly golden brown air fry again at 370 F for 2 minutes.
- Gently place the Balushahi in the warm syrup and allow them to soak for 20 minutes. Then take out the Balushahi with a slotted spoon and arrange them on a parchment-lined baking sheet or a platter. Garnish with sliced pistachios and edible dried rose petals.
Notes
- Sift the all-purpose flour. Make the dough with light hands and knead it just until the dough ball comes together
- Shape the discs with light hands. Usually, the traditional Balushahi have thumbprints, but I make a donut-like hole to ensure they cook evenly especially in the air fryer or oven.
- Check out my detailed notes below on how to make the one-string sugar syrup. Undercooking the syrup will make the Balushahi soft while overcooking will make the outer covering too hard.
- Adding lemon juice to the cooked sugar syrup will prevent the syrup from crystallizing. Make sure the syrup is warm when you add the air fried Balushahi's to it
- Allergic to nuts? Simply skip the garnish in the end
- Use a heavy-bottomed saucepan to make the syrup. I use a 2-quart saucepan. If your saucepan is smaller or thin, it may take you less time.
- Once the sugar dissolves and the syrup comes to a boil, lower the heat and allow the syrup to simmer for 6 to 7 minutes.
- Check for one-string consistency. There are 2 ways to do this:
Method 1: The is the traditional method. Add a few drops of syrup on a small plate and allow it to cool for a few seconds. Then dip your index finger in the syrup and press it on your thumb. Slowly open and close the index and thumb finger and you should see a string being formed between the two fingers. For best results remember to allow the syrup to cool just a bit before you test it.
Method 2: Use a digital thermometer and dip it in the syrup. For accuracy, make sure that the thermometer tip is not touching the bottom of the pan. Once the thermometer reaches 220 F which should be around the 6 to 7-minute mark the syrup is ready. - Adding lemon juice to the cooked sugar syrup will prevent the syrup from crystallizing as you wait for the dough balls to cook.
DS says
Hi Archana , Is it ok to prepare the balushahis and store them in an airtight container for 2-3 days ahead of soaking ?
Archana says
Hi Diana, Yes or you can also cook them fully and store them in an airtight container. They stay well at room temp for 5 to 7 days.
Janhavi says
I’ve been dying to try my hand at these but hesitated because they are deep fried- but not anymore. This recipe has all the deliciousness without the deep frying. It’s so wonderful to have easy recipes like these. It’s easy and clear and the end product is just perfect. Thank you for sharing these recipes with us. My kids loved it so much- they begged me to make it again today after I tried it yesterday. This recipe is a keeper.
Archana says
Thank you for the lovely feedback. I am glad Balushahi's are on repeat in your kitchen too.
Sucharita Iyer says
This recipe turned out really great and was so easy to make. The Badushah was so flaky, and just right firmness on the outside. It had the right amount of sweetness. I have always steered away from this dish because of the deep frying and thinking it is complicated to make but your recipe removed bothose issues. So I’ll be making this again. Only thing is I used convection oven and the 350 degrees and 20 minutes was low. Next time I’ll probably go with 375 and 30-40 minutes. Thanks Archana for such an easy and delicious recipe!
Archana says
Thank you for the lovely feedback.
Anjuli says
Thank you SO much for the air fried and oven method. Now, I cannot wait to make it. Quick Q - yogurt - did you use plain Greek or regular yogurt? Thanks.
Archana says
I use regular yogurt for this recipe