

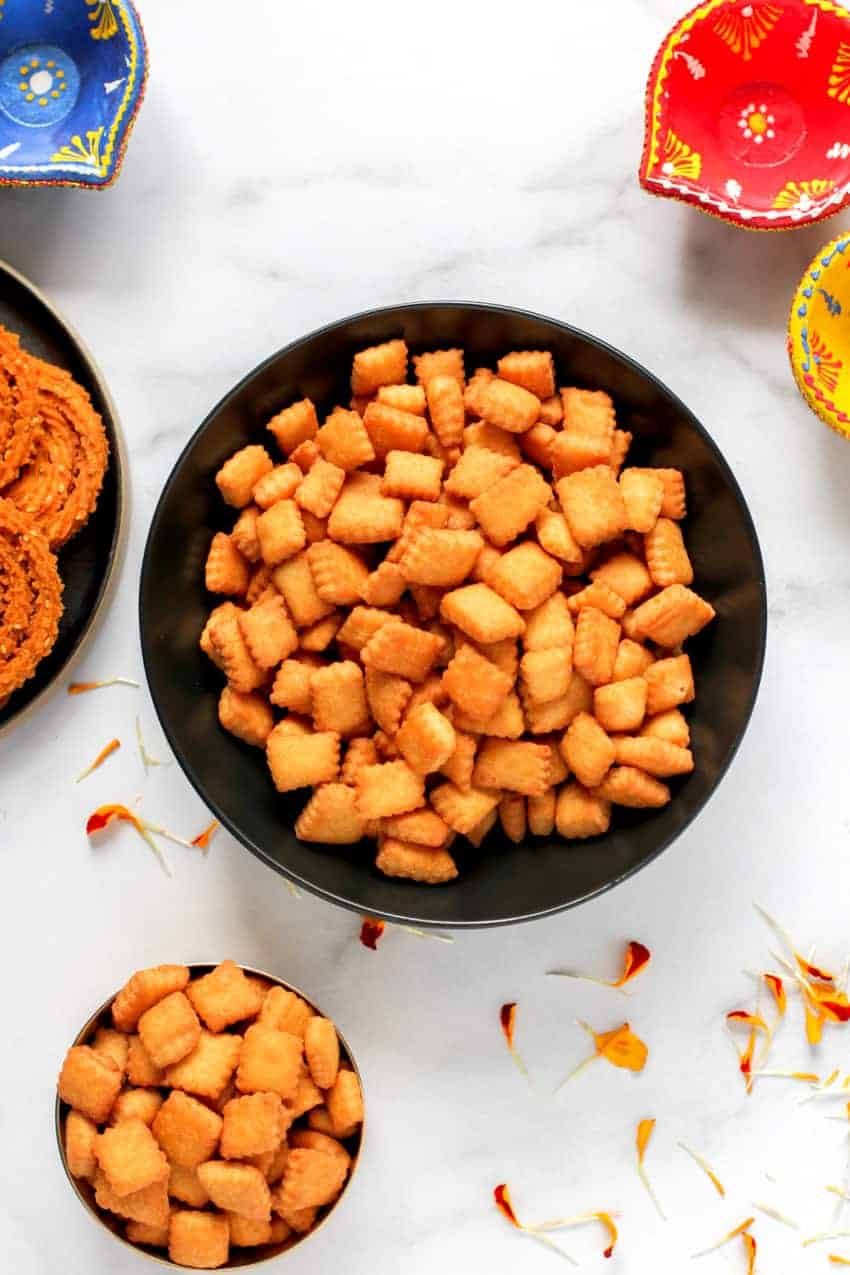
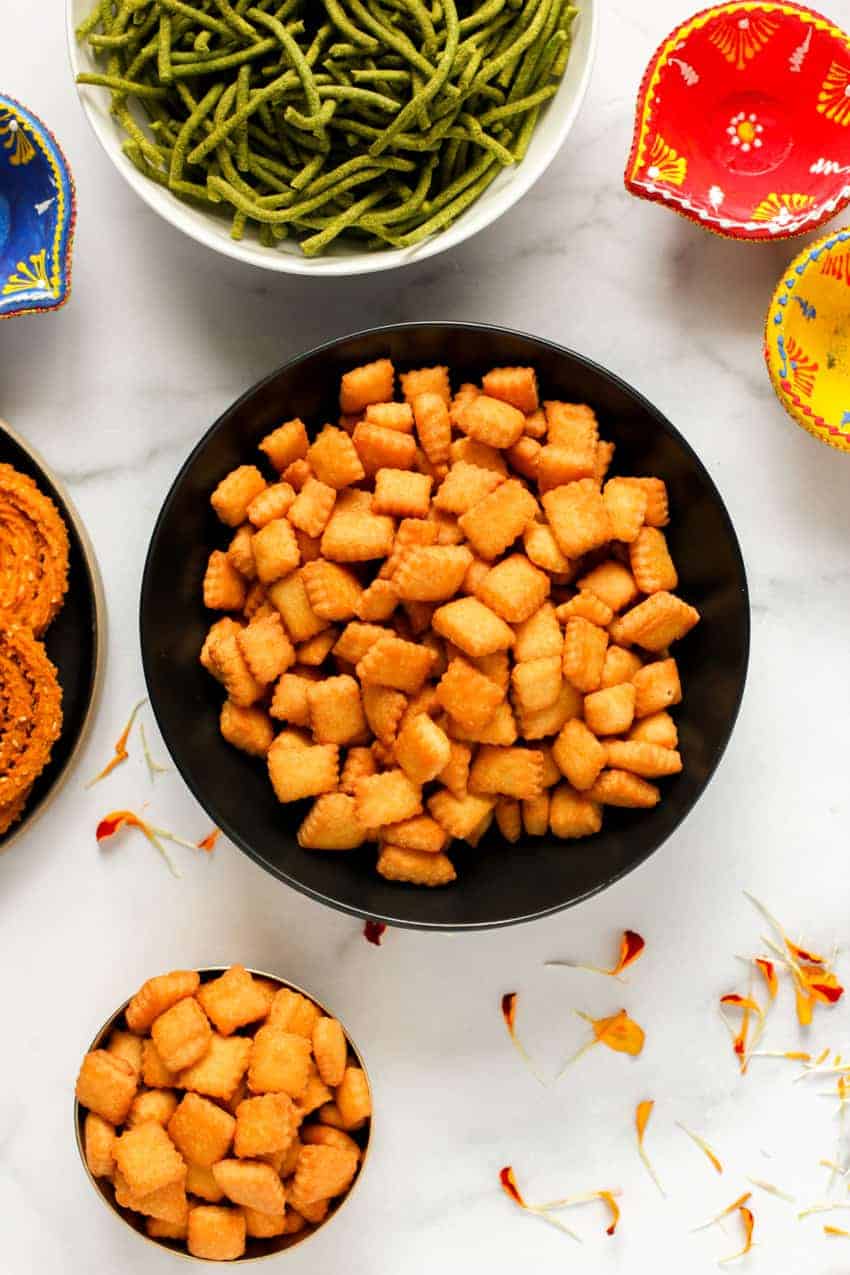
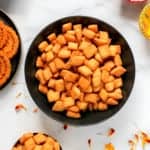
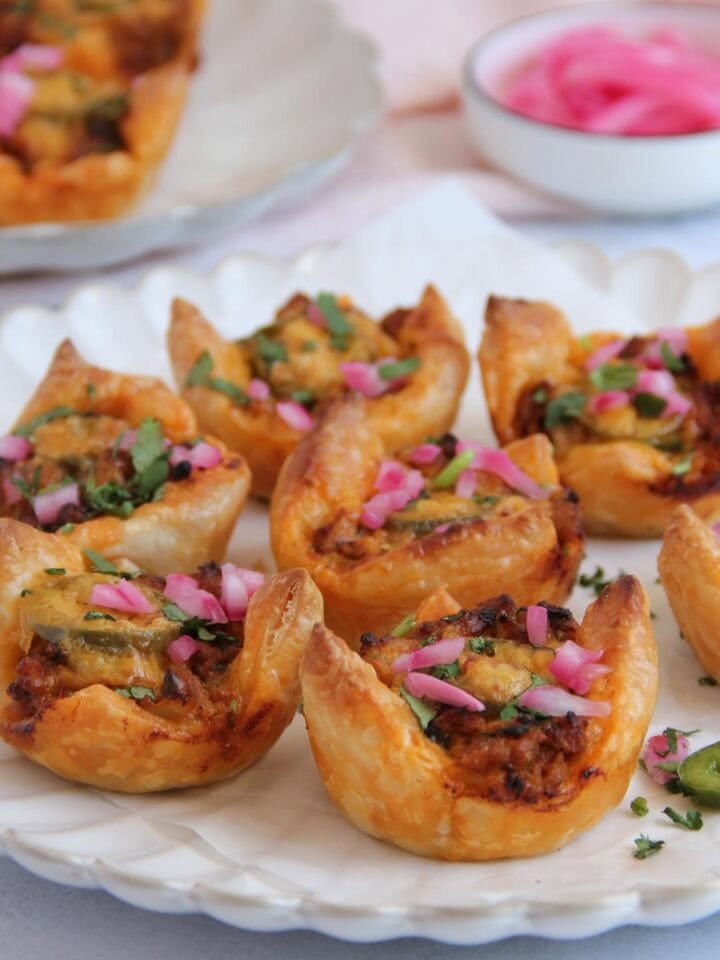
Shankarpali or Shakarpara is a crispy and lightly sweetened snack prepared using just six basic pantry ingredients! Typically made in Indian homes around Diwali, these irresistible bite-sized sugar cookies can be prepared ahead of time and make for a perfect tea-time snack.
Want to Save This Recipe?
Enter your email & I'll send it to your inbox. Plus, get great new recipes from me every week!
By submitting this form, you consent to receive emails from Minstry of Curry
Jump to:
Diwali has always been my favorite time of year, growing up in a Maharashtrian family! The house would fill with the amazing aromas of my mom's sweet and savory Faral. My absolute favorite? Shankarpali! The true test of success was how perfectly "khuskhushit" (crispy) they turned out. Even today, I stick to my mom's no-fail recipe-and trust me, I'm usually whipping up a second batch within days!
In Marathi households, Faral is a delightful spread of homemade sweet and savory snacks prepared during Diwali, creating a festive atmosphere. In addition to Shankarpali and savory Namak Para, other popular Faral items include Chakli, Rava Ladoo, Besan Ladoo, and Karanjis. Each of these treats adds to the joyous celebrations and brings back cherished memories of family gatherings.
Want to know more about Diwali and how we celebrate in my family? Check out this post I wrote on How I celebrate the 5 days of Diwali, my Rituals, and Traditions!!
How to Make Shankarpali
A printable recipe card with exact ingredient measurements and instructions can be found at the end of this post.
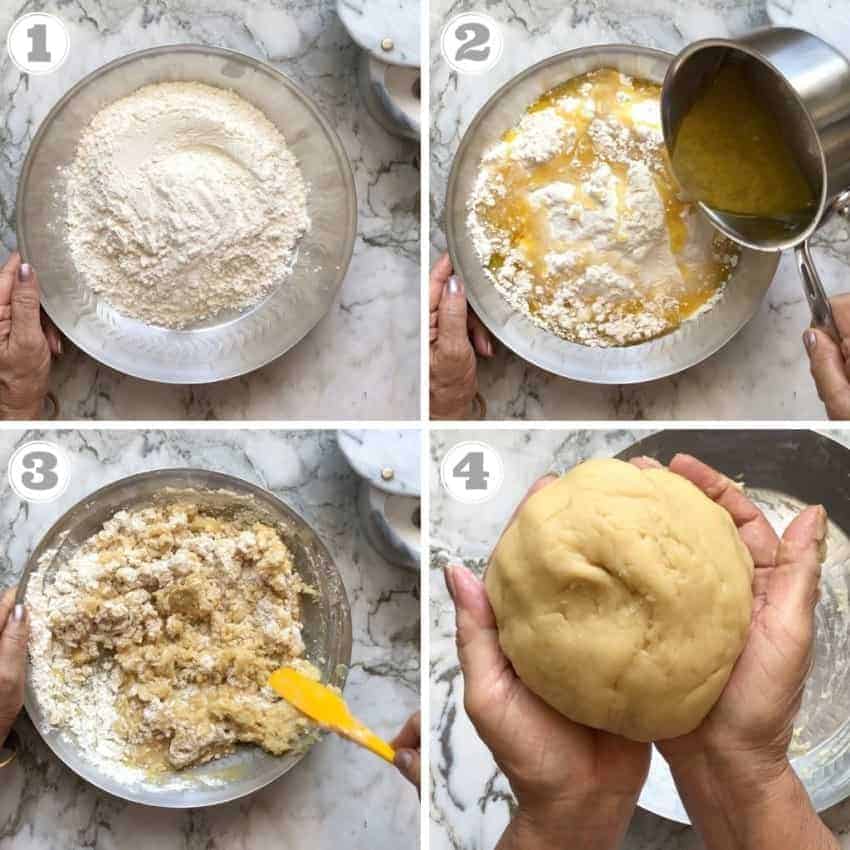
Step 1 - Make the Dough
- Add ghee, milk, and sugar to a saucepan. Cook on low heat, stirring occasionally until the sugar completely dissolves. Allow it to cool.
- In a mixing bowl, add all-purpose flour, salt, and vanilla.
- Gradually add the cooled milk mixture to form a soft dough.
- Allow the dough to rest for 20 minutes. Note: The dough will continue to harden as the ghee starts to solidify.
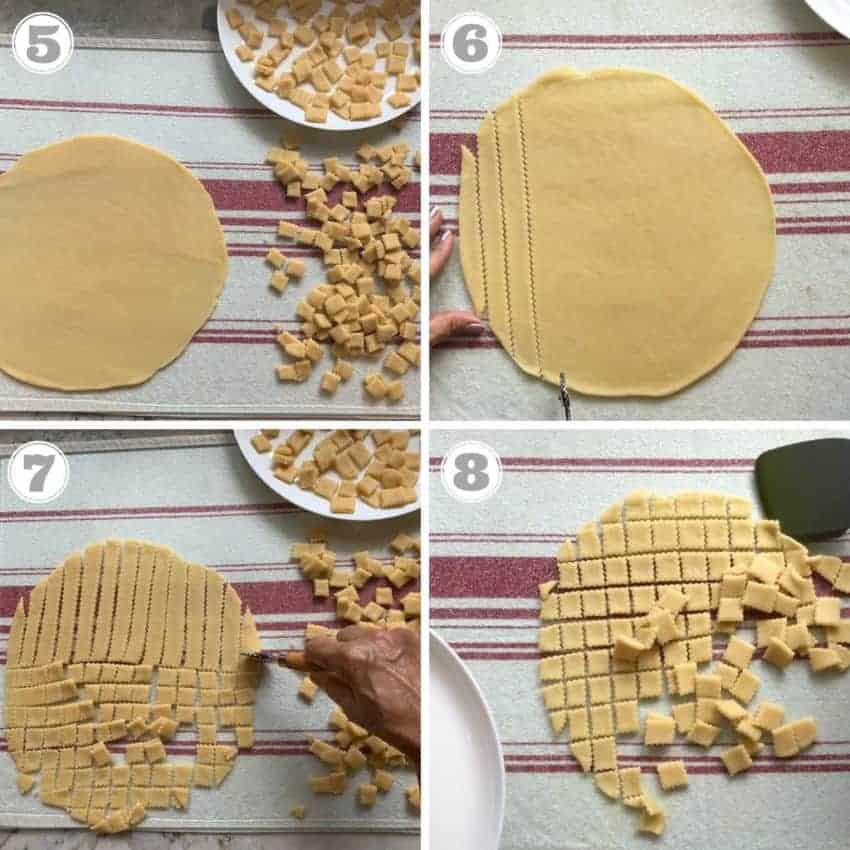
Step 2 - Roll and Cut
- Divide the dough into 4 parts and knead each part to form a round ball. Take one dough ball at a time and roll it into an 8 to 10-inch circle.
- Cut into 1-inch squares or diamonds using a knife, pizza cutter, or a Karanji cutter. Using a silicone or a flat spatula, separate the cut shankarpali and place them in a tray.
Tip: You can finish rolling and cutting all the shankarpali before starting to fry them, or do it in parallel. If you are rolling and cutting them all at once, make sure to separate them in different trays so there is not much overlapping, so they do not stick to each other.
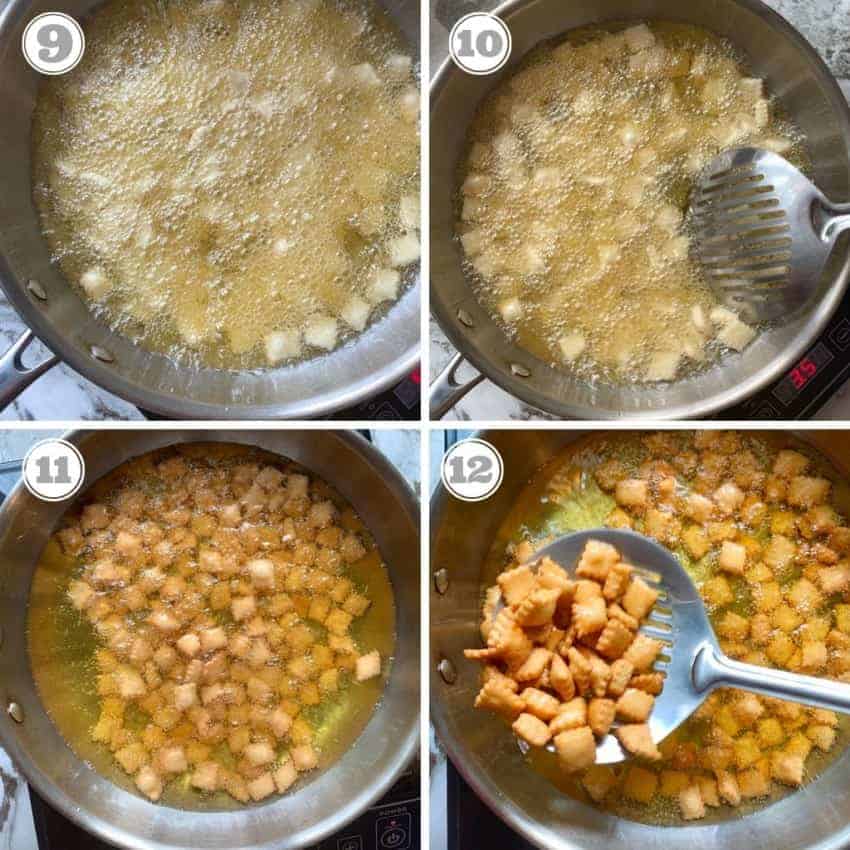
Step 3 - Test the Oil
- Heat oil in a frying pan on medium heat. Before adding the shankarpali, make sure the oil is really hot.
Tip - To check for the right temperature, add one shankarpali or a small piece of dough to the oil. It should start rising up in 5 to 10 seconds; if not, allow the oil to heat up for a few more minutes. If the test dough turns brown in a few seconds, you know the oil is too hot, so lower the heat.
Step 4 - Fry Shankarpali
- Keep the heat on medium-high. Using a slotted stainless steel spatula, pick some of the cut shankarpali and add them to the hot oil. Depending on how big your frying pan is, you can add another handful of cut shankarpali to the hot oil. Wait for a minute and then lower the heat to medium-low.
- Fry the shankarpali on medium-low heat for 2 to 3 minutes as you carefully stir them in the oil.
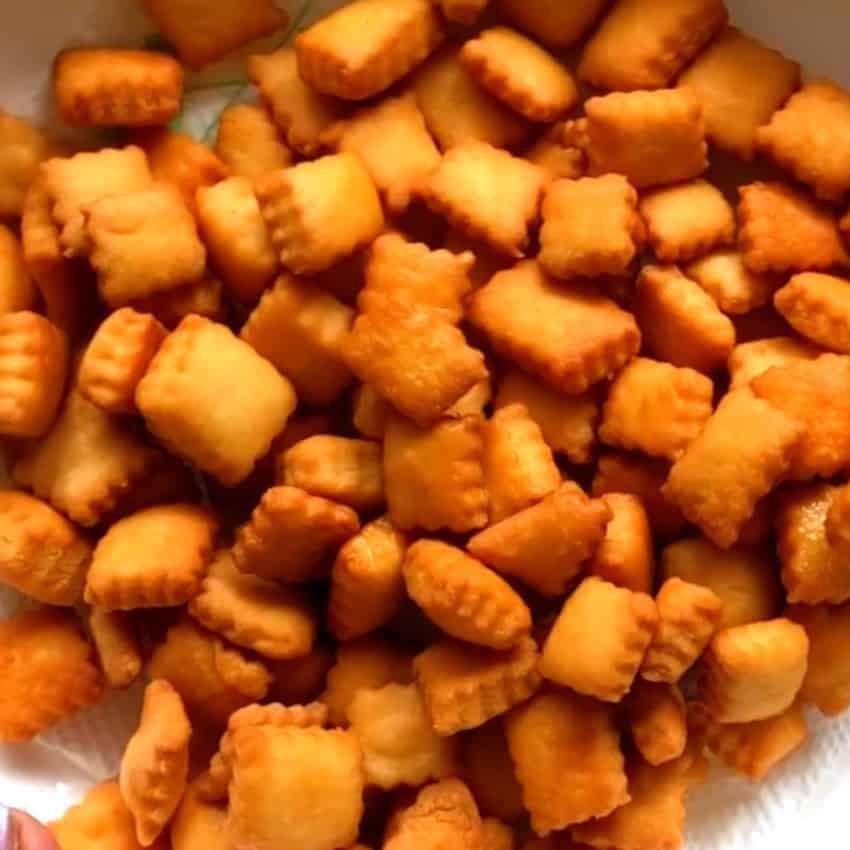
- Once they turn golden brown on both sides, take them out with a slotted spoon that allows most of the oil to drain out easily.
Tip: Reduce the heat when removing the Shankarpali from the pan. This way, you can take your time, ensuring that the ones left behind don't darken too much.
Step 5 - Repeat Frying
- Once the first batch of Shankarpali is removed, increase the heat back to medium to allow the oil to reach the right temperature again. Then, add the next batch of Shankarpali. Continue this process for all the rolled and cut pieces.
Frying Tips for Shankarpali
As you probably know from the recipes I have shared in the past, I am not big into frying. Looking at a pot of hot oil makes me nervous. Over the years, I have used a few tricks that have made me a bit more comfortable with frying.
- My biggest tip is to keep the frying pan on the back burner, which is further away from you. This can prevent any accidents, especially with little kids around.
- If you're new to cooking or frying, it's best to start with a frying pan that has a flat base instead of a traditional Kadai, which has a round bottom. A flat-base frying pan provides better stability and even heat distribution, making it easier to control the cooking process.
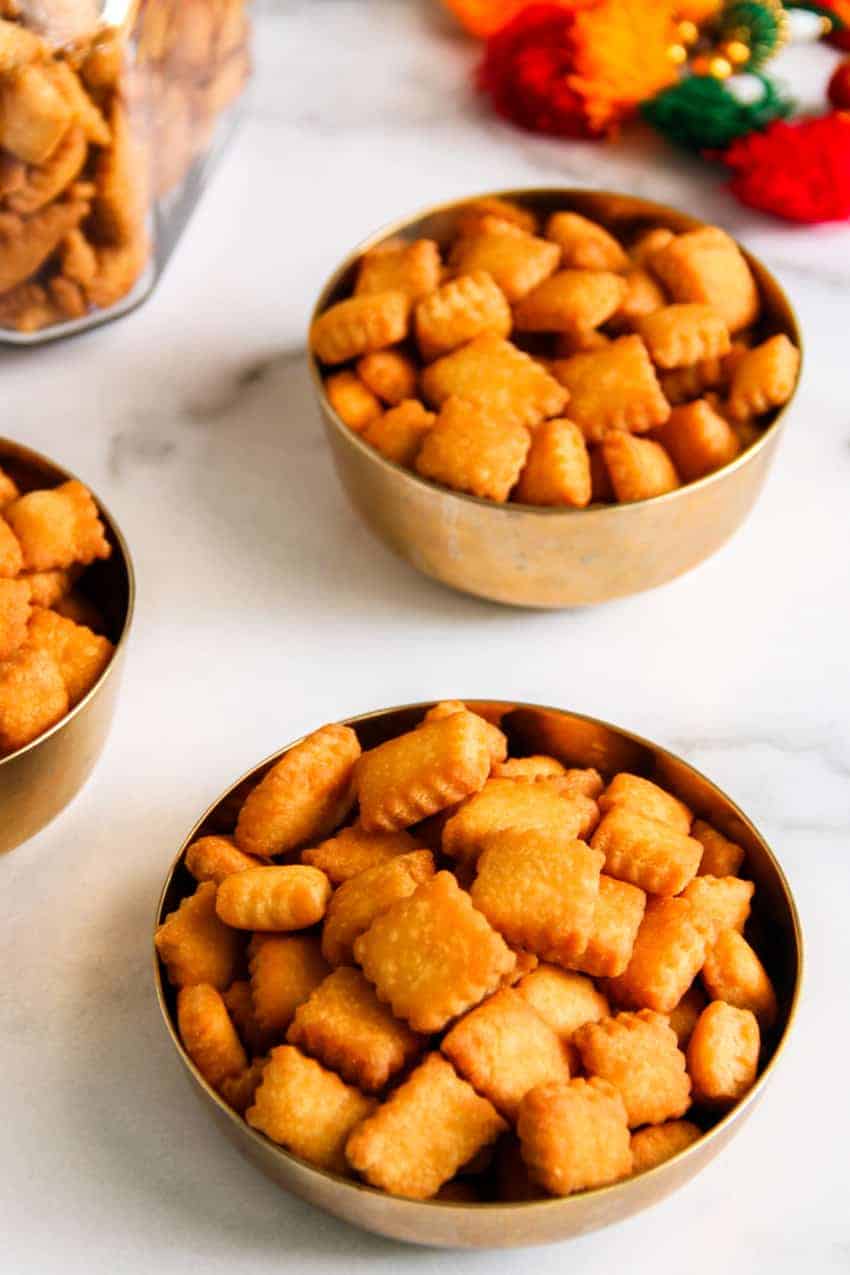
Storing
Allow the shankarpali to completely cool on a large baking tray. Once cooled, store in an airtight container. These shankarpali will stay good for at least a month at room temperature. They also freeze well.
Baked or Air Fryer Shankarpali
I've experimented with both baking and air-frying Shakarpara using this recipe, and I've found that the baked ones turn out a bit harder. So, I definitely recommend air-frying instead! To air fry, just place the Shakarpara in a single layer in the air fryer tray or basket. Preheat your air fryer to 350 degrees and cook for 8 to 12 minutes, turning them over halfway through for even crispiness. Enjoy the delicious results!
★ Tried this recipe? I'd love to hear how it turned out! Leave a comment and let me know, or snap a quick pic and upload it-I love seeing your creations. If you're on Instagram, tag @ministry_of_curry so I can check it out. Your feedback means so much to me and makes all the time I spend perfecting each recipe totally worth it. Thank you!
Recipe
Mom's Foolproof Shankarpali Recipe
Recipe Video
Ingredients
- ¼ cup ghee
- ⅓ cup milk
- ½ cup sugar
- 2 cups all purpose flour
- ½ teaspoon salt
- ½ teaspoon vanilla extract optional
- Oil for frying 1 to 1.5 cups (see notes for air frying)
Instructions
- Combine Ingredients: In a saucepan, add ghee, milk, and sugar. Cook over low heat, stirring occasionally until the sugar fully dissolves. Once dissolved, let the mixture cool.
- Make the Dough: In a mixing bowl, combine all-purpose flour, salt, and vanilla. Gradually add the cooled milk mixture to form a soft dough. Let the dough rest for 20 minutes. Note: The dough will continue to firm up as the ghee solidifies.
- Shape the Dough into Shankarpali: Divide the dough into four equal parts and knead each portion into a round ball. Take one ball at a time and roll it into an 8 to 10-inch circle. Use a knife, pizza cutter, or pastry wheel to cut the circle into 1-inch squares or diamonds. Gently separate the cut Shankarpali with a silicone or flat spatula and place them on a tray. (See photos 5-8 for reference.)Tip: You can either finish rolling and cutting all the Shankarpali before frying or do it simultaneously. If you choose to do it all at once, make sure to separate them into different trays to avoid stacking.
- Heat the Oil: In a frying pan, heat oil over medium heat. Before adding the Shankarpali, ensure the oil is hot enough. Tip: To check the temperature, drop in one piece of Shankarpali or a small piece of dough. It should rise to the surface within 5 to 10 seconds. If it doesn't, let the oil heat up for a few more minutes. If the test piece browns too quickly, the oil is too hot, so lower the heat.
- Fry the Shankarpali: Maintain the heat at medium-high. Using a slotted stainless steel spatula, gently add some of the cut Shankarpali to the hot oil. Depending on the size of your frying pan, you can add another handful. Wait about a minute, then lower the heat to medium-low. Fry the Shankarpali on medium-low for 2 to 3 minutes, stirring carefully in the oil. Once they turn golden brown on both sides, remove them using a slotted spoon to allow excess oil to drain. Tip: Lower the heat while taking them out so you're not rushed, and the ones left in the pan don't darken too much.
- Repeat the Process: After removing the first batch, increase the heat back to medium to let the oil temperature rise again. Then, add the next batch of Shankarpali and repeat until all the rolled and cut pieces are fried.
- Cool and Store: Allow the Shankarpali to cool completely on a large baking tray. Once cooled, store them in an airtight container. They will stay fresh for at least a month at room temperature and freeze well too!
Notes
- Heat the milk just enough for the sugar to melt. This will reduce subsequent cooling time.
- I like to use a glass cutting board or silicone baking mat to roll and cut the shankarpali. This makes cleanup easy and also prevents the countertops from getting scratched.
- Do not fry the shankarpali on very high heat. Make sure each batch is slowly fried on medium-low heat to a perfect golden color. Frying on high heat may result in the outsides turning brown without making the Shankarpali crisp.
- Make sure to lower the heat when taking out the fried Shankarpali and then increase the heat to medium-high to bring up the oil temperature before adding the next batch.
- Drain the fried shankarpali on a paper towel to remove excess oil, if any.
- Allow the Shankarpali to cool down completely before storing them. This ensures they remain crisp for a long time.
- Preheat the air fryer to 350 degrees F.
- Roll the dough slightly thicker than the normal shankarpali and cut.
- Line the air fryer basket with parchment paper.
- Place the shankarpali in a single layer and lightly spray oil over.
- Air fry at 350 degrees for 8 to 12 minutes turning them over halfway through.
Nutrition
♥ Subscribe to our Youtube Channel for tasty and easy video recipes. Looking for more Instant Pot recipes? Check out our delicious Instant Pot Recipe board on Pinterest.
Neha says
What kind of oil do you use for frying?
Archana says
Hi Neha, I like to use avocado oil for frying.
Banu says
Can we replace all purpose flour/maida with wheat flour in this recipe?
Archana says
yes you can.
Medha Rajamanur says
Just make a tray full and each and every shankarpali is savory, khuskhushit! Close your eyes (not literally) and follow the recipe ;). Thanks to mom and Archana
Archana says
Thank you for your feedback Medha. Happy Diwali!!
Shalini Kansal says
My shakarpara turned out very hard , is there a way to soften them 🙁
Thanks
sridari says
I blindly followed your instructions and the proportions given and made the best shakarpara ever. Thank you so much for sharing your recipe.
AGS says
Thanks for sharing this recipe. It was super hit at home. I will now try the savoury version.
AGS says
I forgot to mention - I also applied a coating of powdered sugar while it was draining on a paper towel.
Vaishnavi says
I tried this shankarpale recipe with variations i used ashirwad atta in it and instead of deep frying I baked it in oven at 40O for 25 minutes and let it cool down in the oven and it turned out really good.
Sayalee says
Love this recipe! My son’s favorite.
Sheetu says
Tried it and everyone loved it. Thank u for such a lovely recipe.
Usha says
The title is correct - this recipe is very easy! I’ve never made Shakkar Para before and have been wanting to try, so of course I tried for Diwali this year. I did attempt to bake half the batch but wasn’t paying attention and they got...ummm...well done, let’s say! So I fried the rest and should have done that from the start. Light and crunchy and a perfect treat. And a hit with my son who is a picky eater!
Barkha says
Thanks Archana for the recipe. Very easy to follow. Shankarpare disappeared in a jiffy had to make a second batch as it was my family’s favorite
Nivedita says
These were the shankarpali of my dreams. I did something incredibly stupid while measuring for a double recipe, but was able to recover - I thought I was definitely going to get hard-teeth-breaking shankarpali as a result, but nope they were fantastic. I laughed out loud at your note that these will keep for a month in an airtight container. Good luck with that! If any remain in the box past a few days to test that theory, I feel sorry for you.
Note to anyone making this for the first time: This dough is so greasy that it looks wet. Don't worry, you don't need to add more flour to make it stiffer. Second, mix only as much dough as you can roll out and fry the same day. Since I doubled the recipe, I had to put half the dough in the fridge for a day or two and the second round were distinctly less khuskhushit (flaky).
Archana says
Thank you for the detailed review and your notes!
Yolanda Monteiro says
I made these today using half the quantity of each ingredient. My dough didn't turn out "soft" as you said it should, but the shankarpalis turned our great. I had to use a little water to knead the flour since the milk/ghee/sugar mixture wasn't enough to form the dough. The water could be the reason for the dough not being soft. Thanks for sharing your recipe Archana.
RM says
I had the same experience with halved proportions. But with whole proportions the recipe was perfect! Will make this with whole proportions only going forward because they turn out so delicious, they don't last very long. Thank you Archana!
Smita says
Thanks Archana for sharing the recipe. Came out pretty well. I tried both baking and frying. And believe me baking came out too good. My son likes the baking version more than frying.
Shruti says
Came out great !!
Archana says
Thank you for the feedback!
Megha Jadhav says
Very easy fool proof recipe to follow and all the small tips really help.
Archana Mundhe says
I’m so happy to hear that the tips helped and the recipe was easy to follow!