
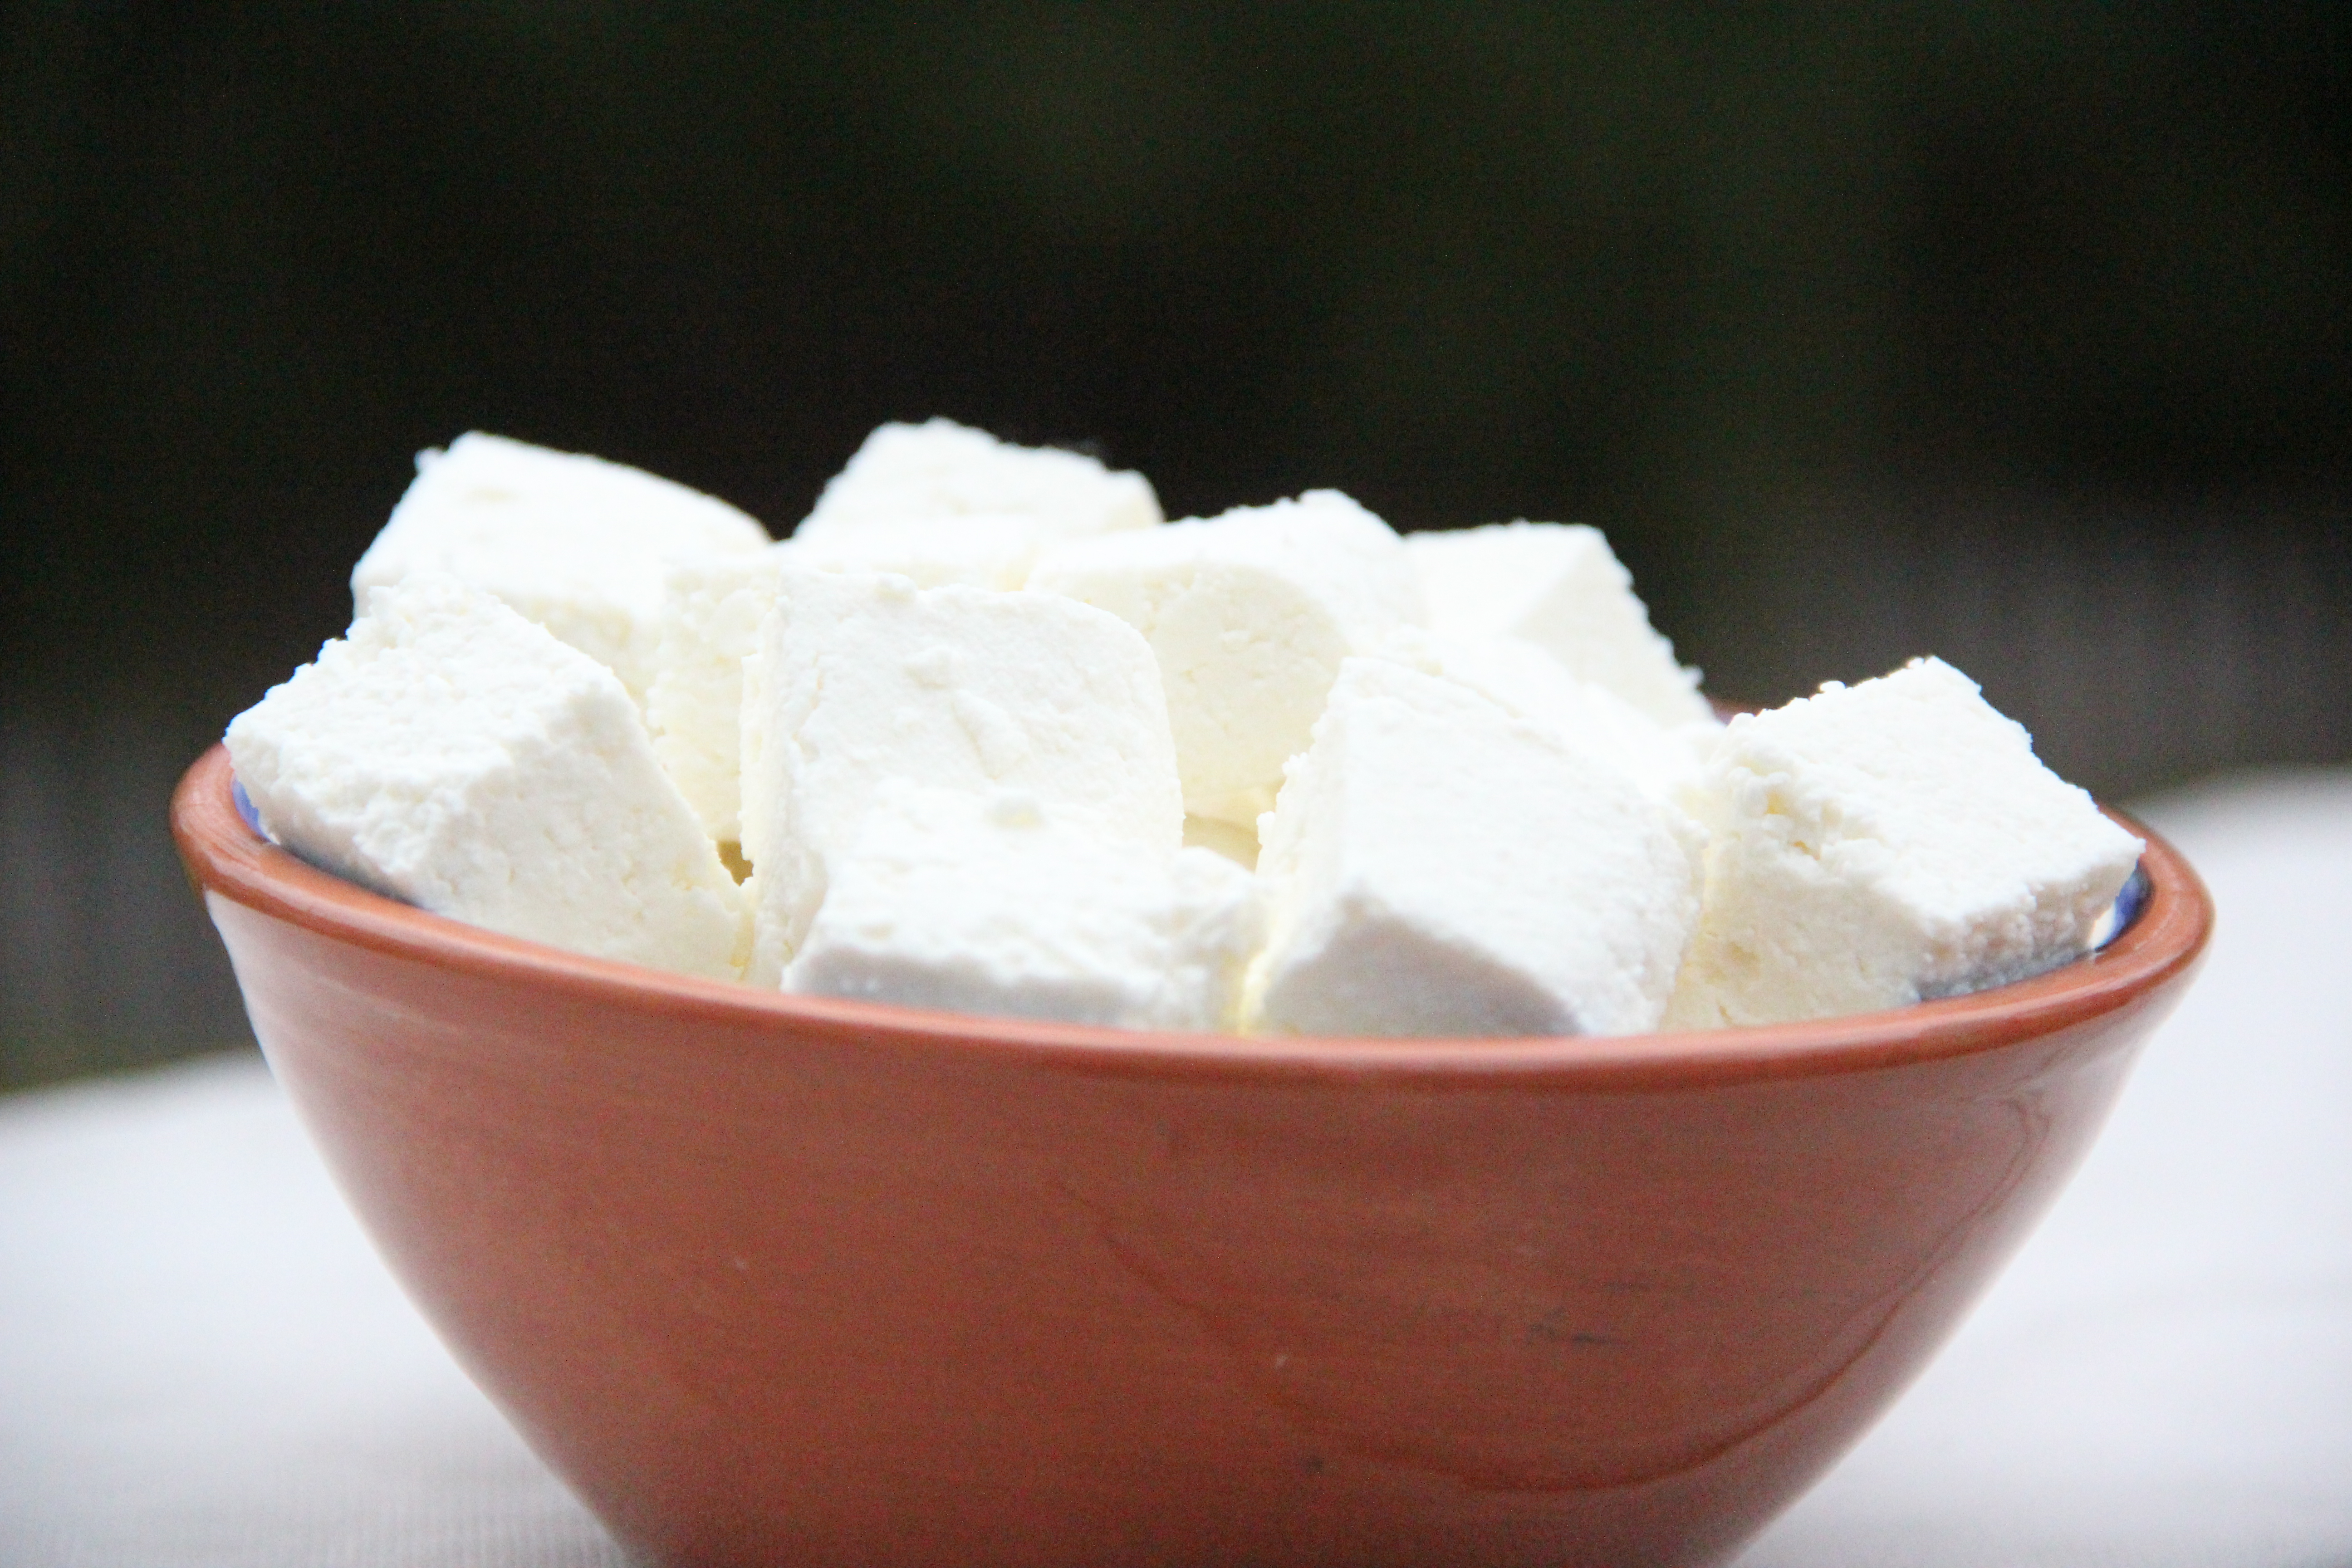
Homemade paneer has a fresh taste and soft, delicate texture that store-bought can't match. The best part is how easy it is to make with just milk and lemon juice. Try it once, and you may never want to go back to packaged paneer; let me show you how!

Want to Save This Recipe?
Enter your email & I'll send it to your inbox. Plus, get great new recipes from me every week!
By submitting this form, you consent to receive emails from Minstry of Curry
Back to basics today! I must confess that it took me years before I finally tried making paneer at home. And even now, I'll still grab store-bought paneer sometimes, but only after checking that it's free from additives or preservatives. If you have the time (or can plan), homemade paneer is truly worth it, and you'll find more simple, foundational Indian recipes like this in my Cooking101 collection.
It's so versatile - you can air fry or grill it on skewers for fun paneer tikka kebabs, paneer parathas, or add it to curries like Palak Paneer, Paneer Jalfrezi, or Paneer Makhani. And when it comes to desserts, nothing beats homemade paneer for making a batch of soft, melt-in-your-mouth Rasmalai.
How to Make Homemade Paneer (Step-by-Step Instructions)
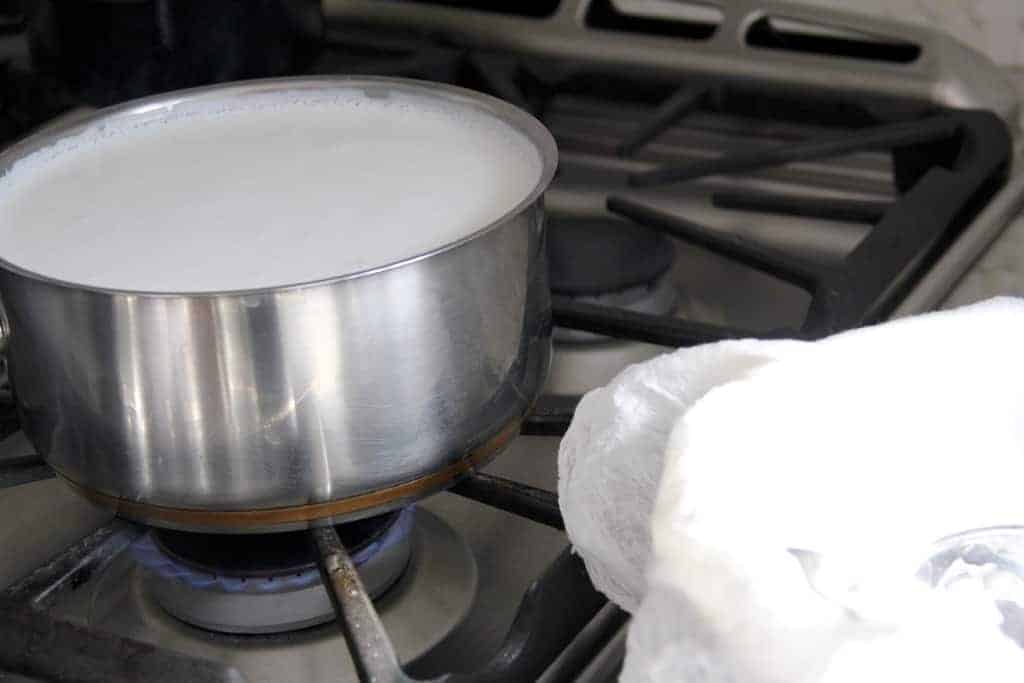
Rinse a heavy-bottomed pot with water. With some water coated on the bottom of the pan, pour half a gallon of whole milk into it and bring it to a gentle boil on medium heat, stirring frequently. Keeping some water in the pot helps prevent the milk from sticking to the bottom of the pot.
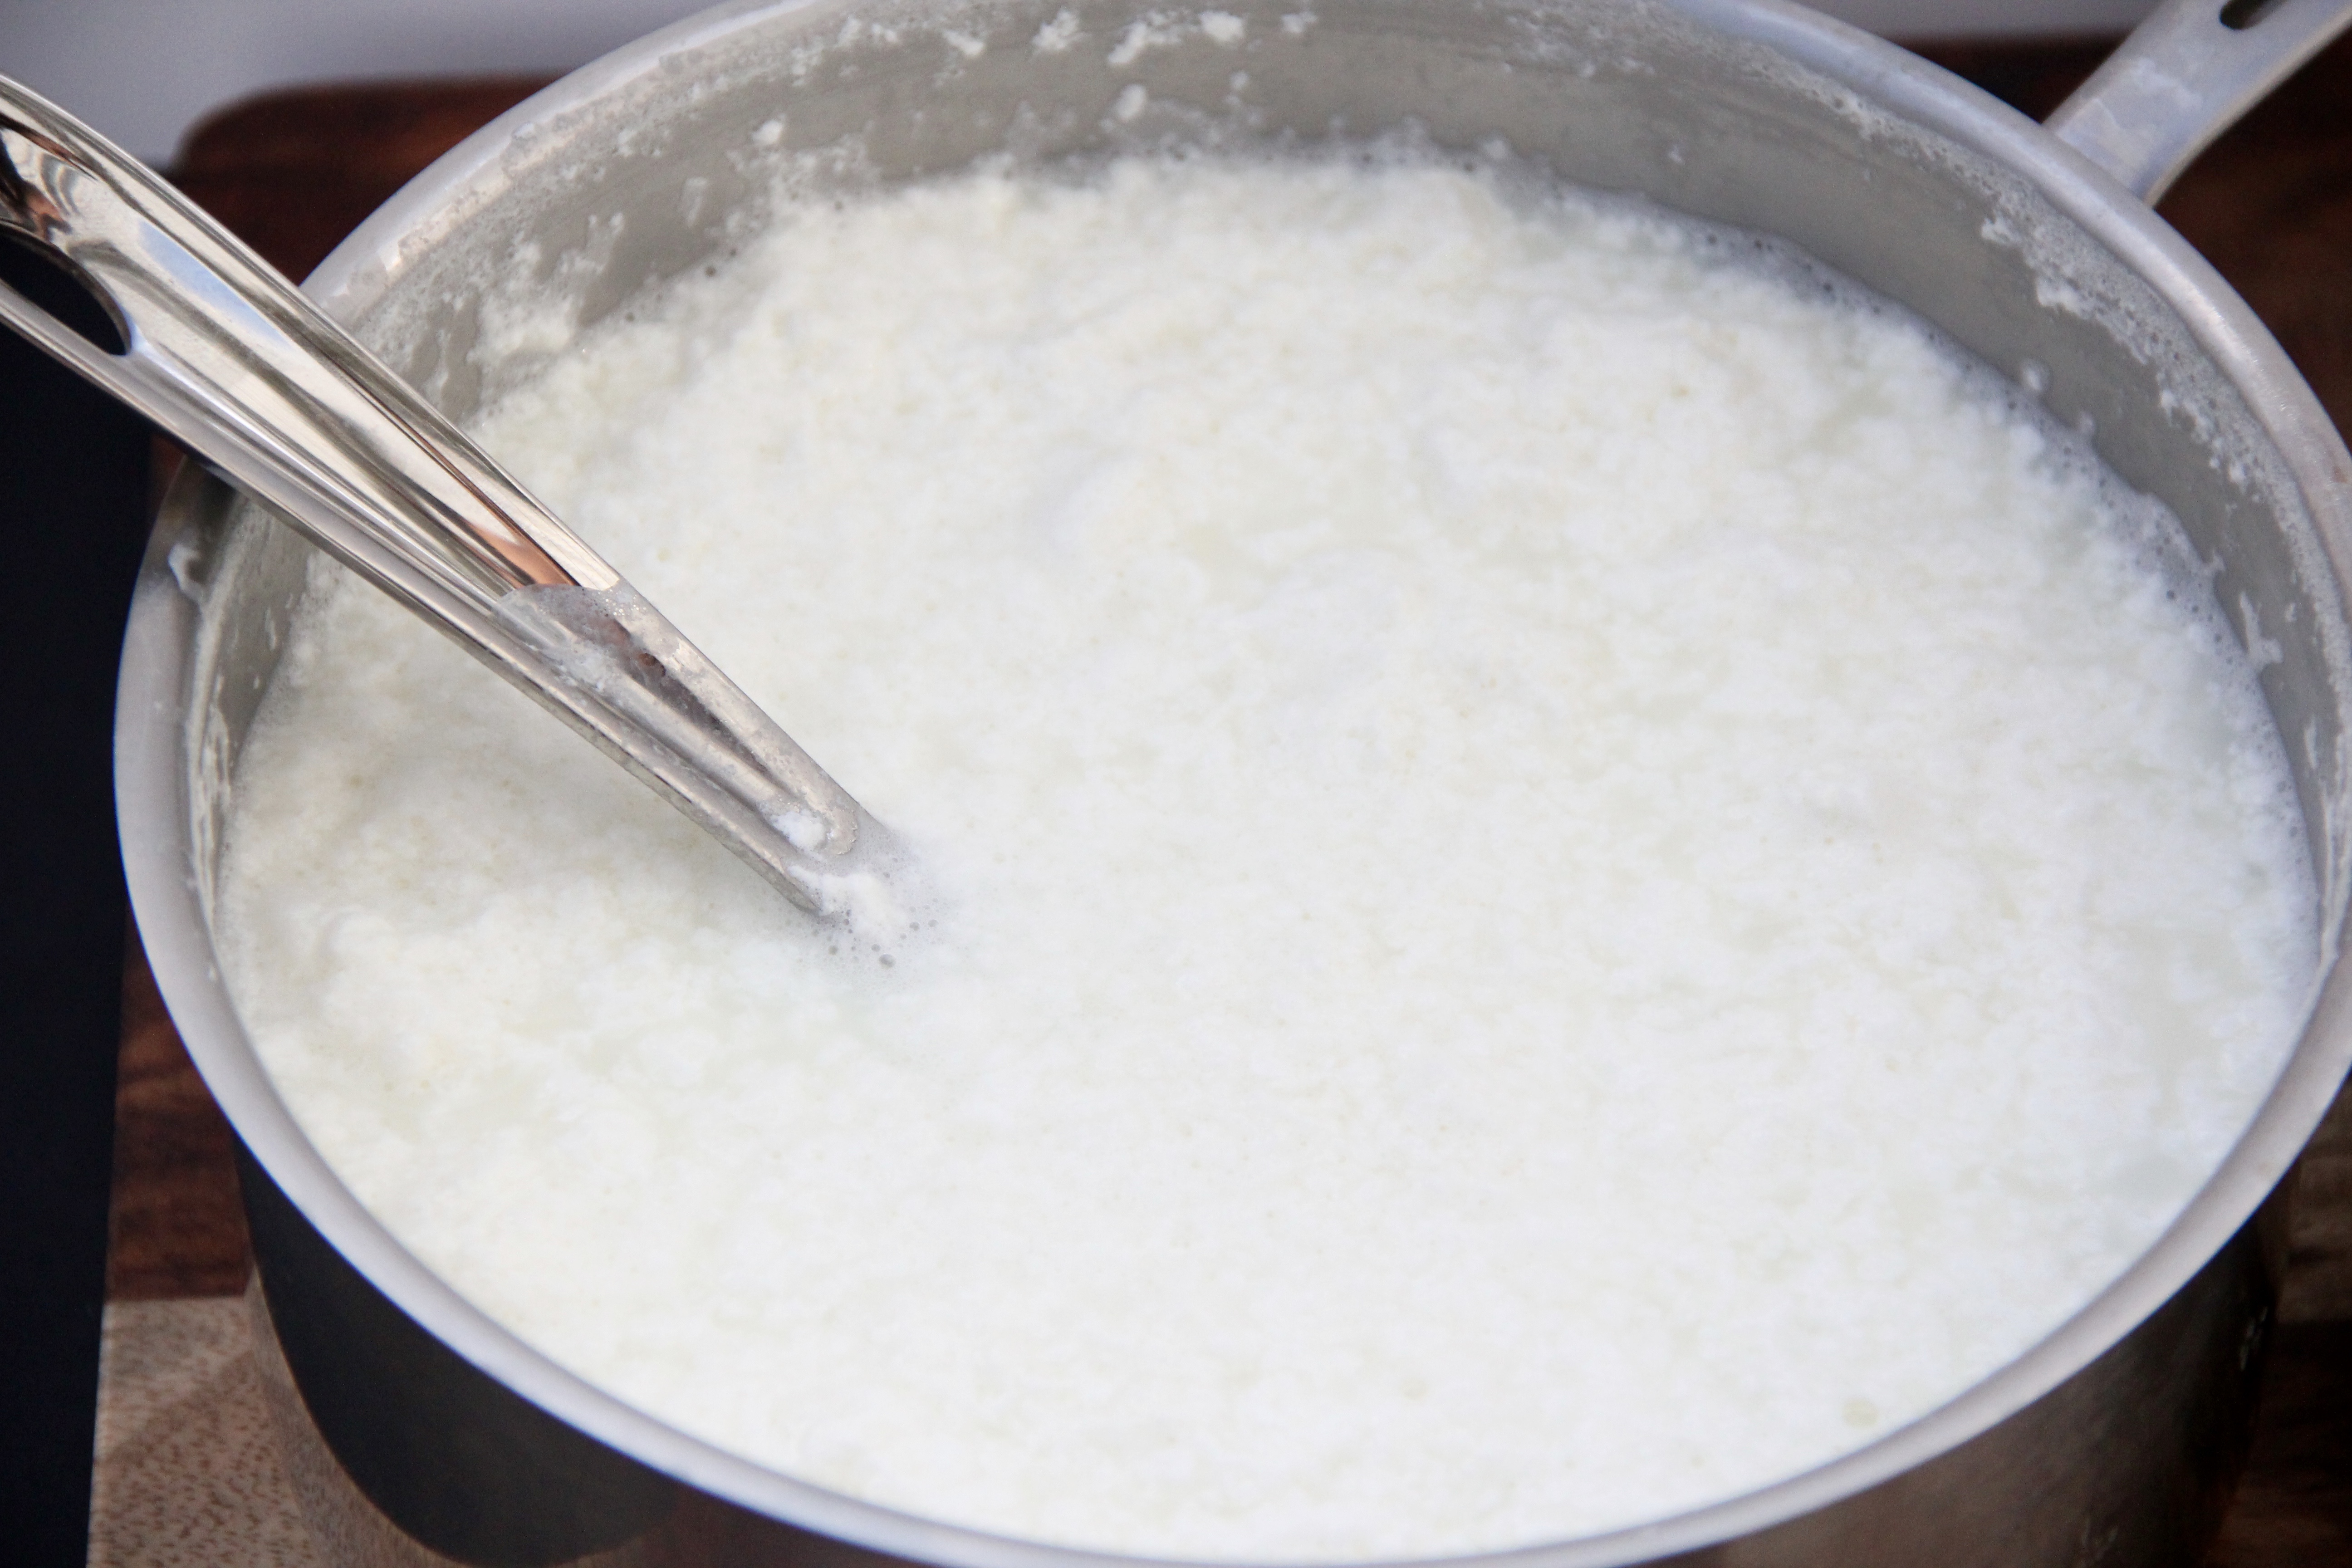
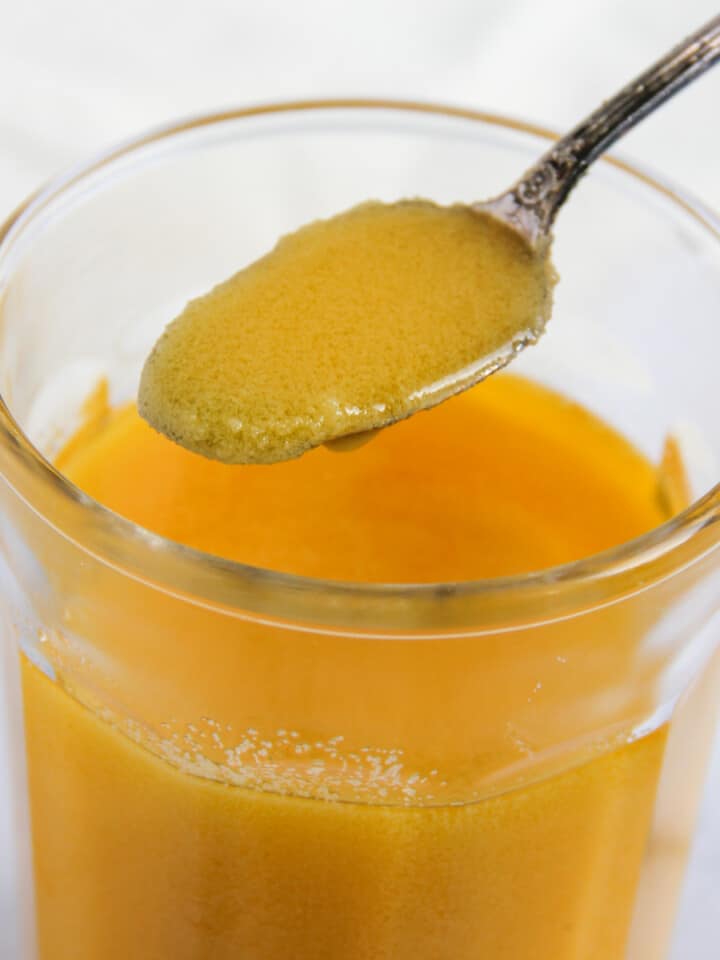
Once the milk comes to a gentle boil, add lemon juice 1 tablespoon at a time and stir the milk as the milk starts curdling. I usually use 3 tablespoons of lemon juice before the milk fully curdles and clear greenish whey starts to separate. Turn the heat off immediately, as the milk will have curdled completely.
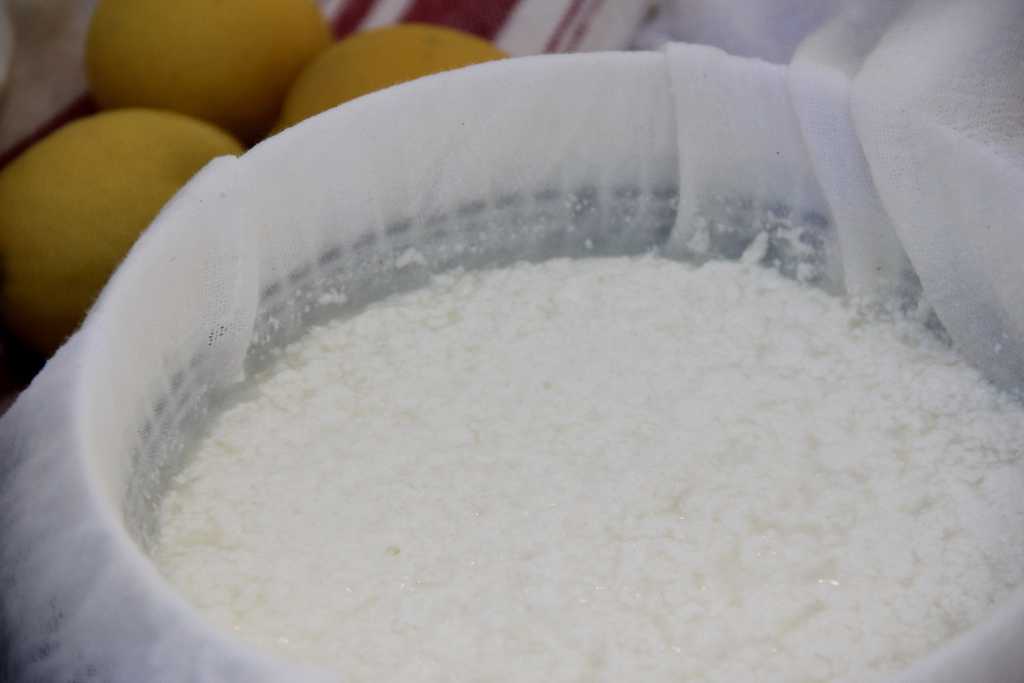
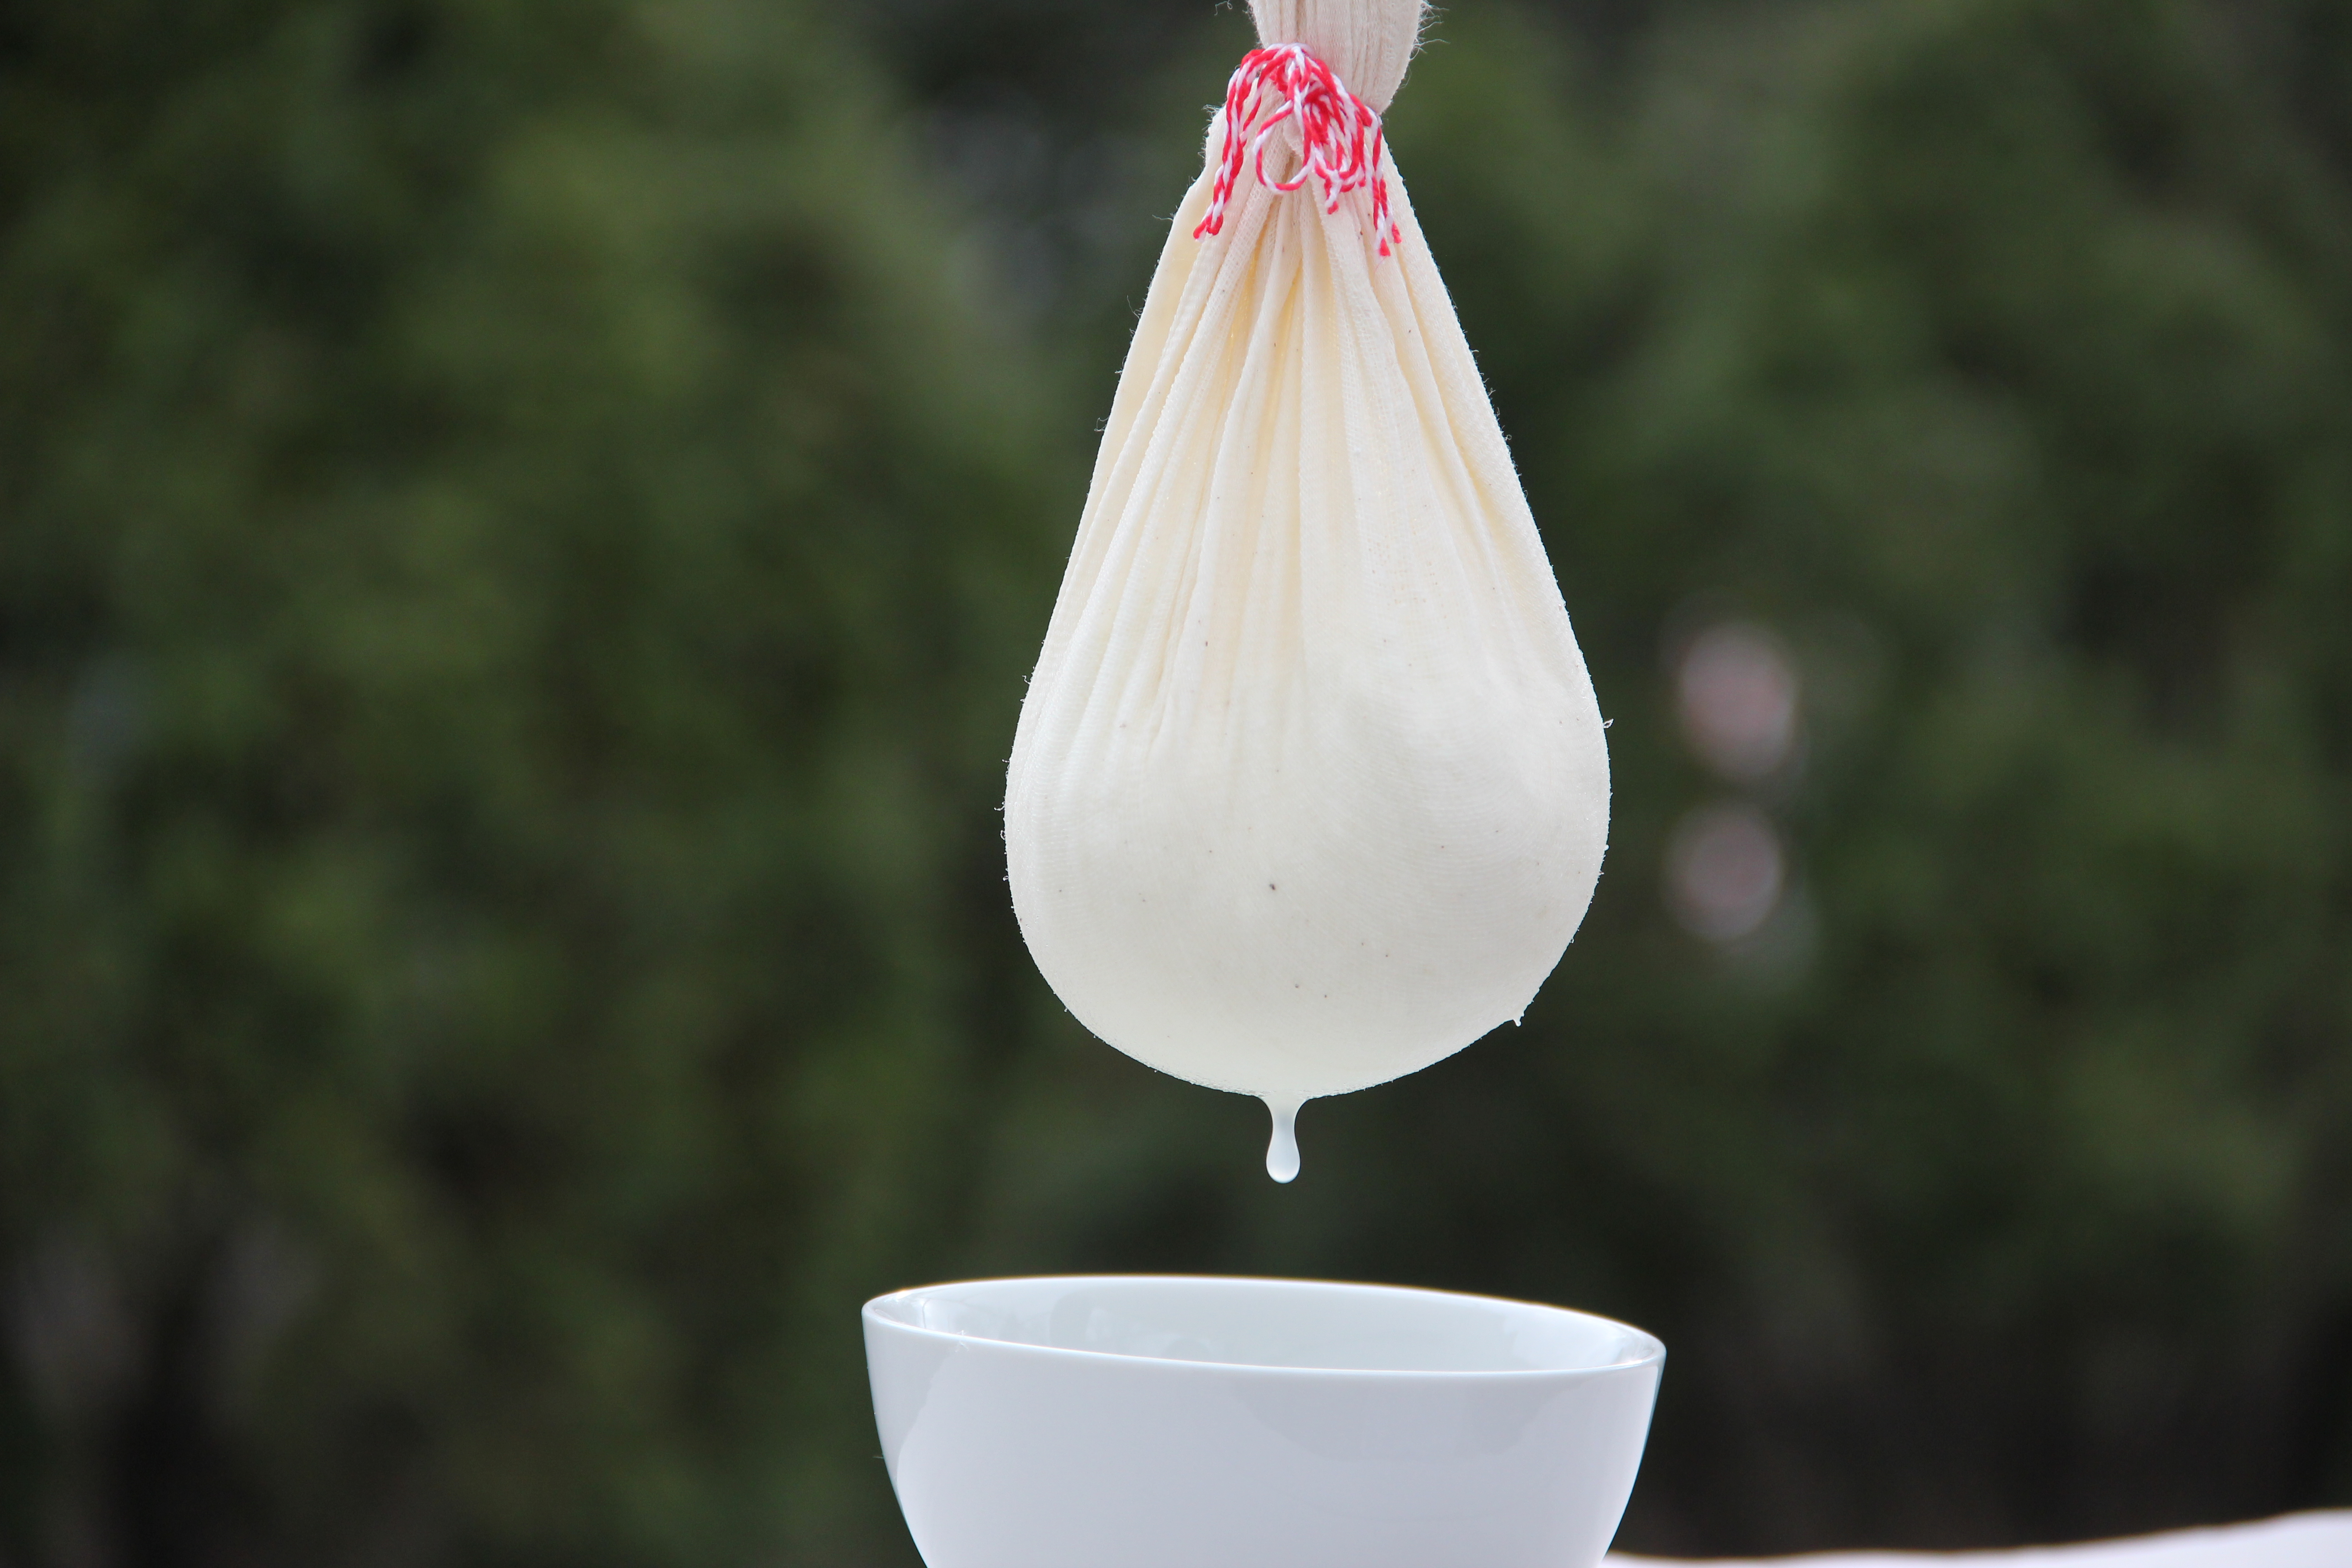
Line a bowl with a double-layered cheesecloth that is long enough to be bundled up and hung later.

Pour the curdled milk on the cheesecloth. Run cold water over it for a few minutes to get rid of the lemon taste.
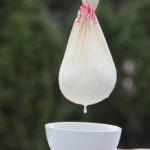
Squeeze out the water from the muslin cloth and hang it up for 30 minutes so all the water can drain out.
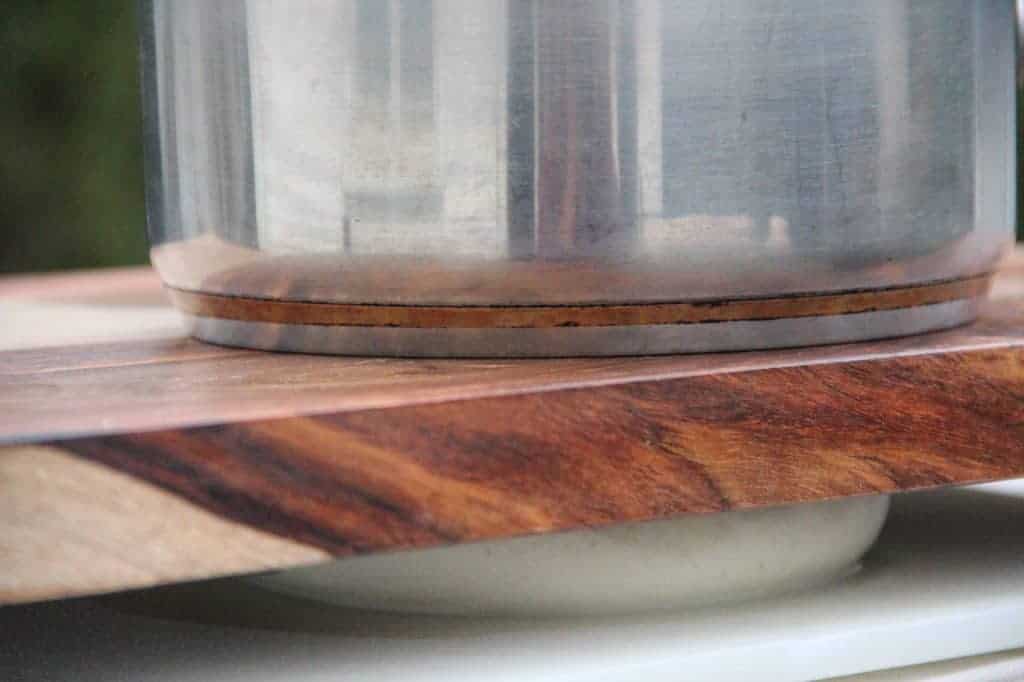
Place the cheesecloth between 2 cutting boards and put a heavy object or pot on top of it for an hour; this removes excess moisture from the paneer and gives a firm texture. Make sure you do not put too much weight as it will dry out the paneer, making it very crumbly.
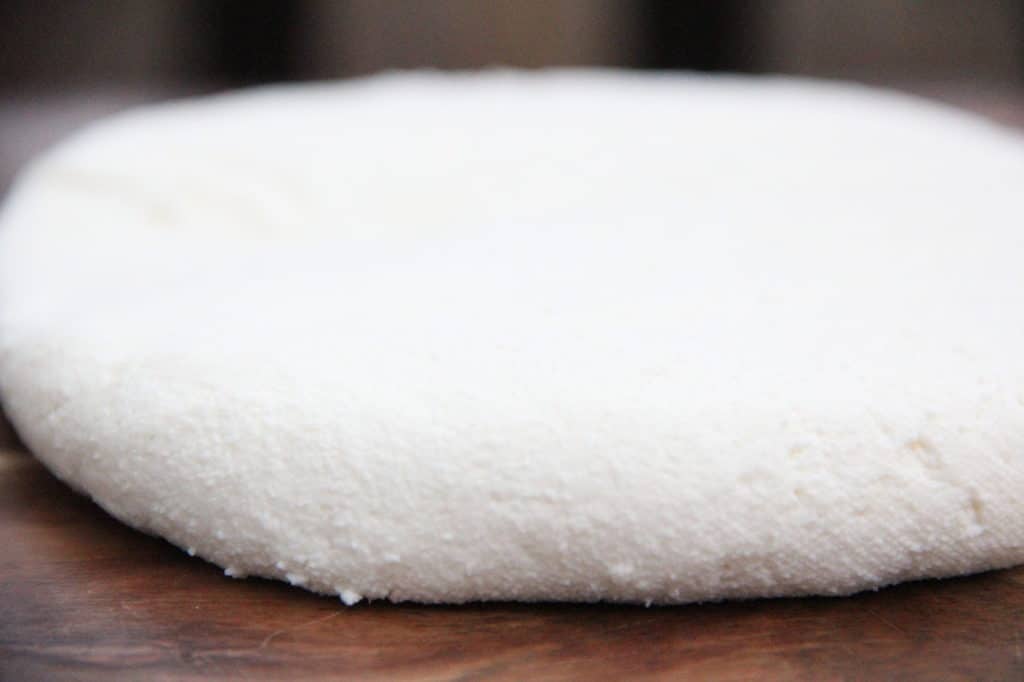
Gently remove the paneer from the cheese cloth.
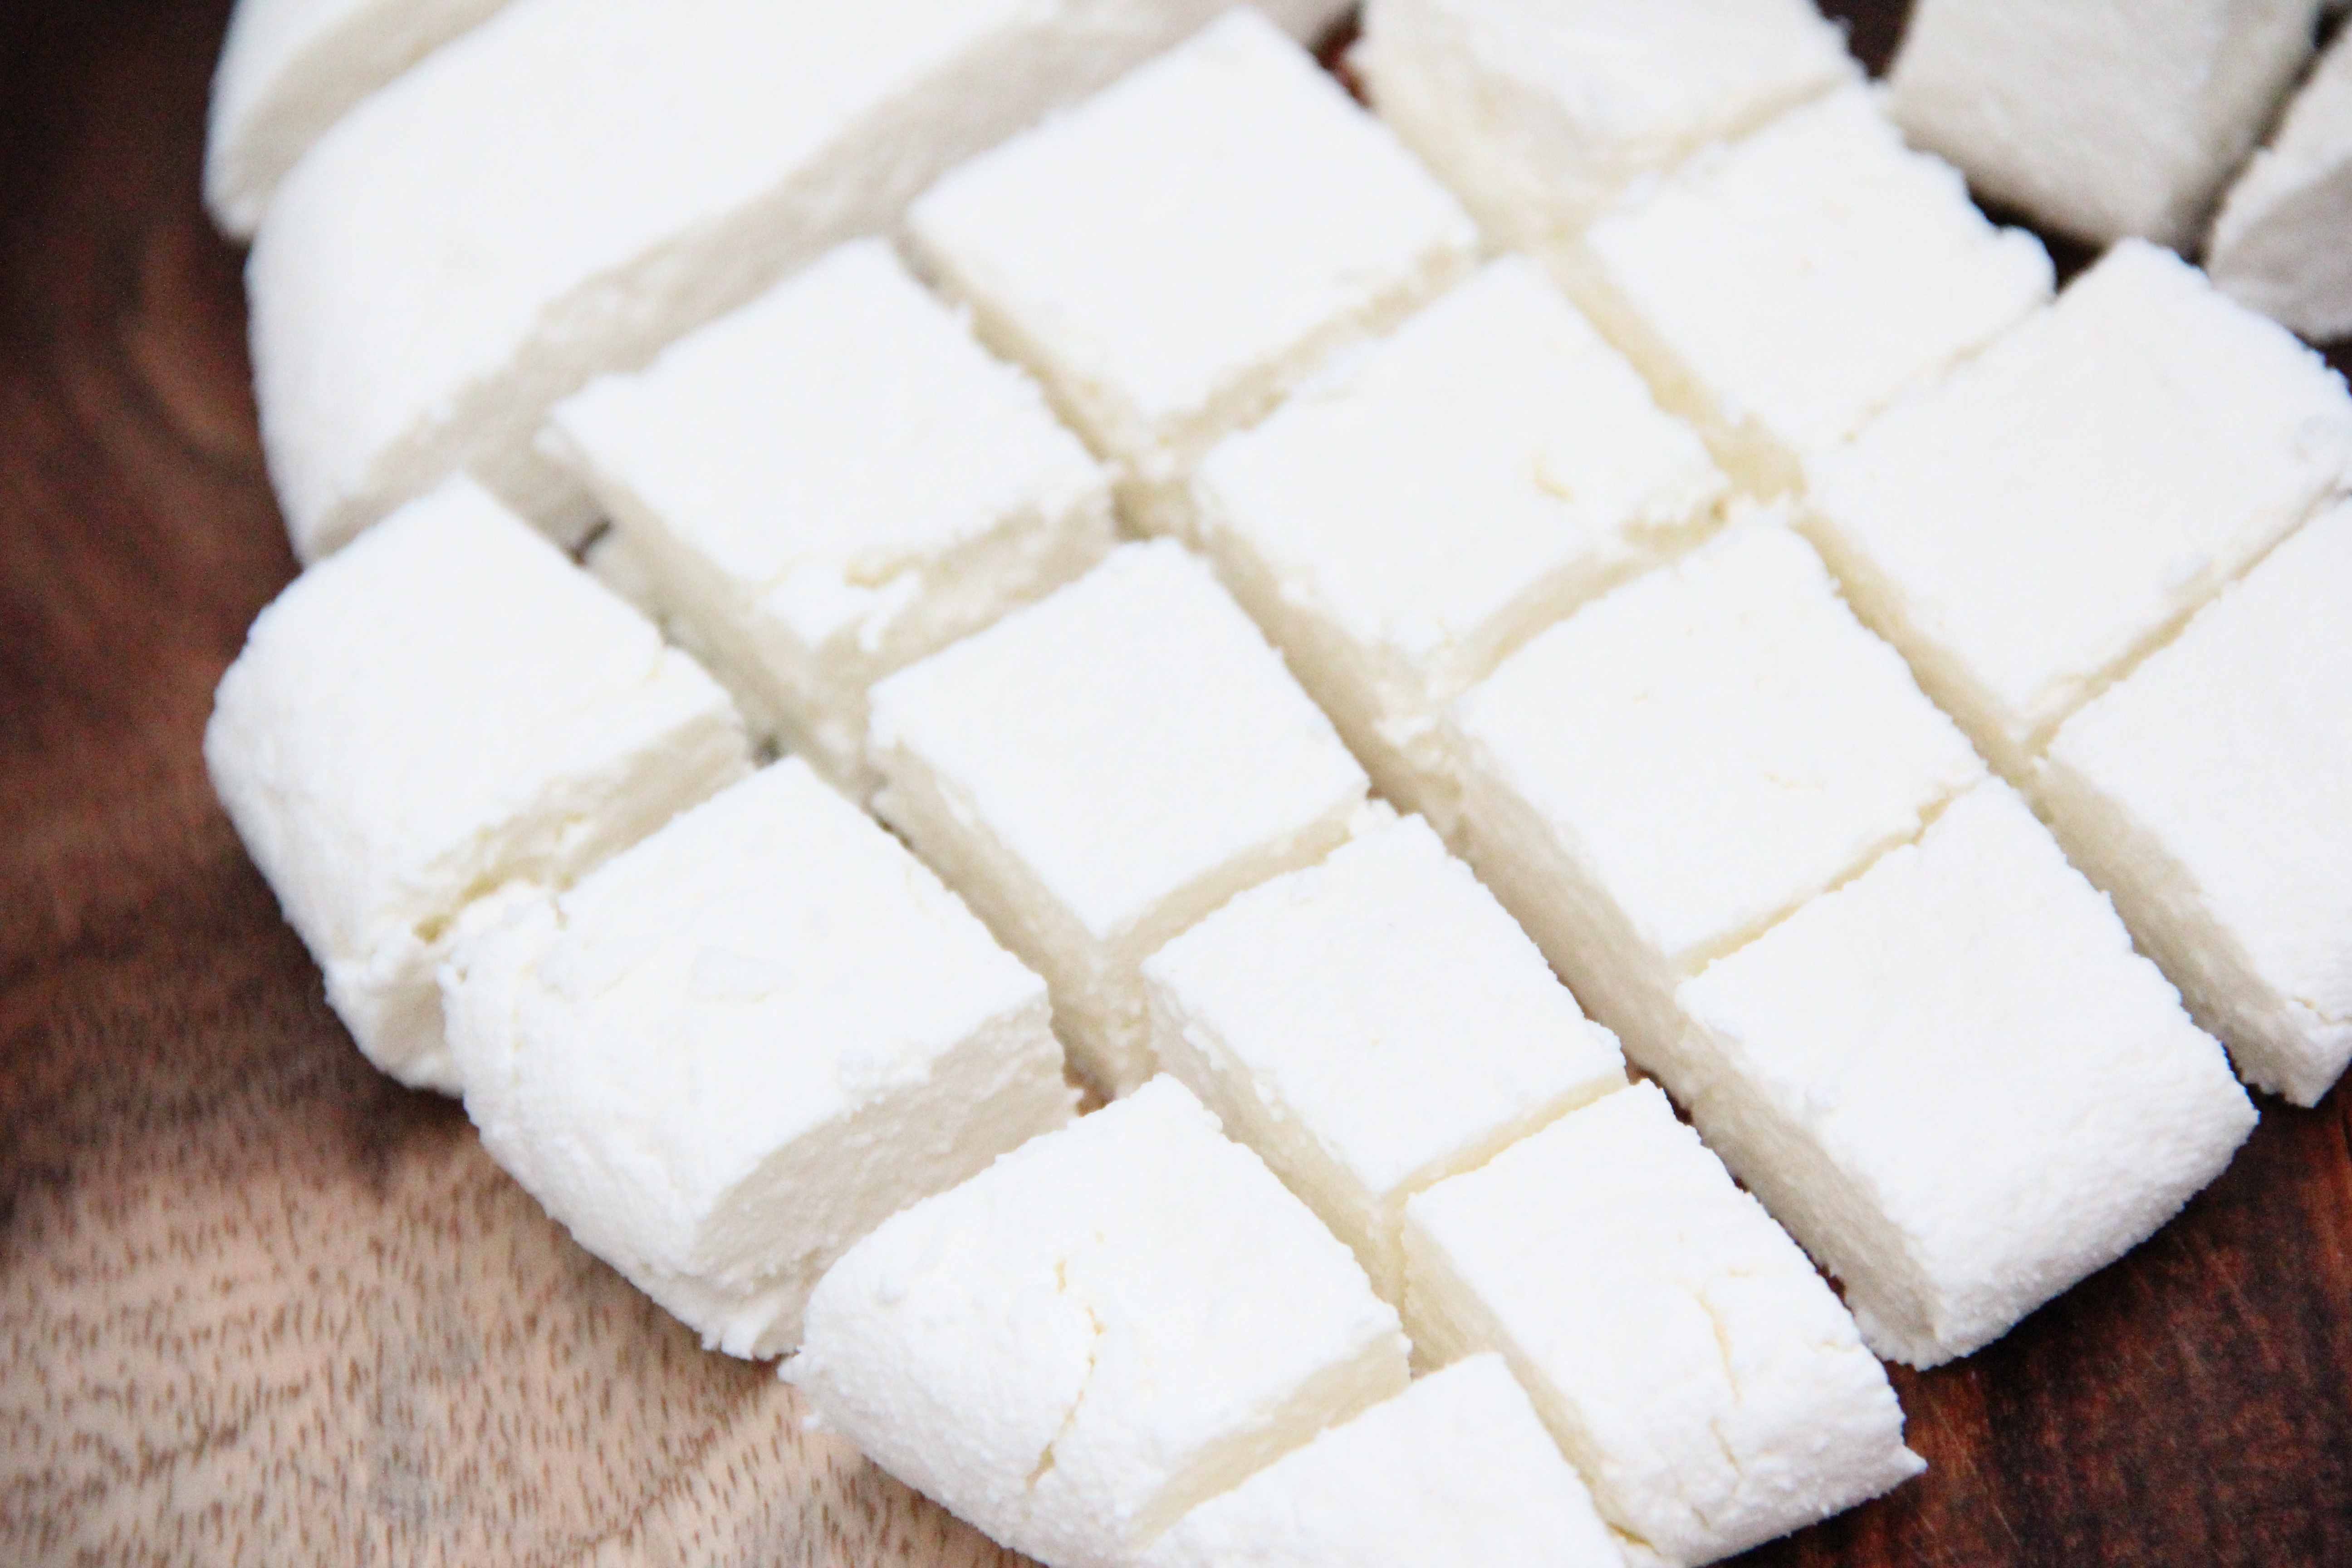
Cut the block of paneer into smaller cubes using a sharp knife.
Storing Leftover Paneer
Homemade paneer can be refrigerated for up to a week. For a longer shelf life, store it in the freezer for 2 to 3 months.
★ Tried this recipe? I'd love to hear how it turned out! Leave a comment and let me know, or snap a quick pic and upload it-I love seeing your creations. If you're on Instagram, tag @ministry_of_curry so I can check it out. Your feedback means so much to me and makes all the time I spend perfecting each recipe totally worth it. Thank you!
Recipe
Homemade Paneer
Ingredients
- ½ gallon whole milk **
- 3 tablespoons lemon juice **
Instructions
- Rinse a large heavy-bottomed pot with water. With some water coated on the bottom of the pan pour half a gallon of whole milk in it and bring it to a gentle boil, stirring frequently. Keeping some water in the pot helps the milk from sticking to the bottom of the pot.
- Once the milk comes to a gentle boil, add lemon juice 1 tablespoon at a time and stir the milk until the milk begins to curdle. I usually use 3 tablespoons of lemon juice before the milk fully curdles and clear greenish whey starts to separate. Turn the heat off immediately.
- Line a bowl with a double-layered cheesecloth that is long enough to be bundled up and hung later. Pour the curdled milk on the cheesecloth. Run cold water over it for few minutes to remove the lemon taste. Squeeze out the water from the muslin cloth bundle and hang it up for 30 mins so all the water can drain out. Place the cheesecloth between 2 cutting boards and put a heavy pot or book on top of it for an hour. Make sure you do not put too much weight as it will dry out the paneer making it very crumbly. If you do not have time to wait for the water to drain out, you can continue to gently squeeze out all the water and then knead and shape it while still in muslin cloth.
- Gently remove the Paneer from the cheesecloth. Cut into smaller cubes if using in a curry. Paneer can be refrigerated for up to a week or can be stored in the freezer for longer periods.
Notes
- To make creamy paneer add ¼ cup of heavy cream
- White vinegar can be used in place of lemon juice
Nutrition
♥ We LOVE to hear from you! Did you try this recipe? Please share your food photo with hashtag #ministryofcurry on Facebook or Instagram, so we can see it and our followers can enjoy it too! Thank you and Happy Cooking ♥ Subscribe to our Youtube Channel for tasty and easy video recipes. Looking for more Instant Pot recipes? Check out our delicious Instant Pot Recipe board on Pinterest.

woodboneandstone says
Ha! I did a paneer type thing today too! It's a great way to use up milk which is approaching the expiration date.
Archana says
I agree!
healthyindiankitchen says
Love home-made paneer! the texture and quality is always much better than the store-bought ones...thanks for sharing the recipe! 🙂
Archana says
Thank you!!
srividhya says
Wonderful.. loved your clicks. For paneer bhurji, I always go for home made ones. Great share Archana.
Freda @ Aromatic essence says
Perfect paneer! lovely pics 🙂
Monika says
Absolutely love homemade paneer.. they are so better than the store bought ones..
Archana says
Thank you Monika!
lorigreer says
So excited to try this recipe! Thank you for sharing!
Archana says
Thank you Lori! I hope you like it!!
Smitha B says
Hi Archana, Just wondering - Have you ever tried the paneer in IP ?
Archana says
Yes! Works great. Basically add milk and vinegar or lemon juice to IP. Cook on Manual(Hi) for 4 mins and then 5 min NPR (slowly release pressure) and then follow the same steps as stovetop recipe to strain and shape it.
Niharika says
Should I add the same amount of vinegar as lemon juice? When I cook on the stove, I usually use 4 tbsp vinegar for 1 gallon milk. I want to try in the instant pot though.
Archana says
Yes! You can add 4 tablespoons white vinegar for a gallon of milk.
Bishwa Basnet says
Hello,
Could you plesase tell if paneer and cottage cheese are same? As am interested to make cottage cheese for medicinal purpose because the recipe calls for cottage cheese.
Thank you.
Archana says
If its for medicinal purposes may be get the confirmation from health experts? In general terms paneer is close to cottage cheese but different cooking methods.
Neha Mittal says
Hi can you tell which brand milk do you buy? I have tried making paneer several times but it never comes great.
Archana says
Honestly any brand of whole milk should work!
Archana says
Next time I make paneer I will take notes on the brand I use and update the recipe 🙂
Seetha says
Thanks for the recipe. It turned out really well!
By the way, how many days can we store the whey water in the fridge?
Archana says
Up to 5 days or you can freeze too.
Rebecca Spencer says
Hi, i made paneer before seeing this and only placed a small plate on top, so much lighter than you suggest and it was still very dry, hence me reading this post. Do you have any other suggestions?
Archana says
Adding lemon juice or vinegar before the milk comes to a full boil can also cause the paneer to become crumbly or dry
Poonam Desai says
Can we use 2% milk instead of whole milk and if yes is there any change in the process or recipe?
Archana says
I recommend whole milk for the best results. 2% will also work but the paneer may be crumbly.
Ragini Food says
Thanks for sharing this recipe It helps to make paneer at home.
Cassandra says
Great recipe, thanks for sharing!
Archana Mundhe says
You are most welcome.