

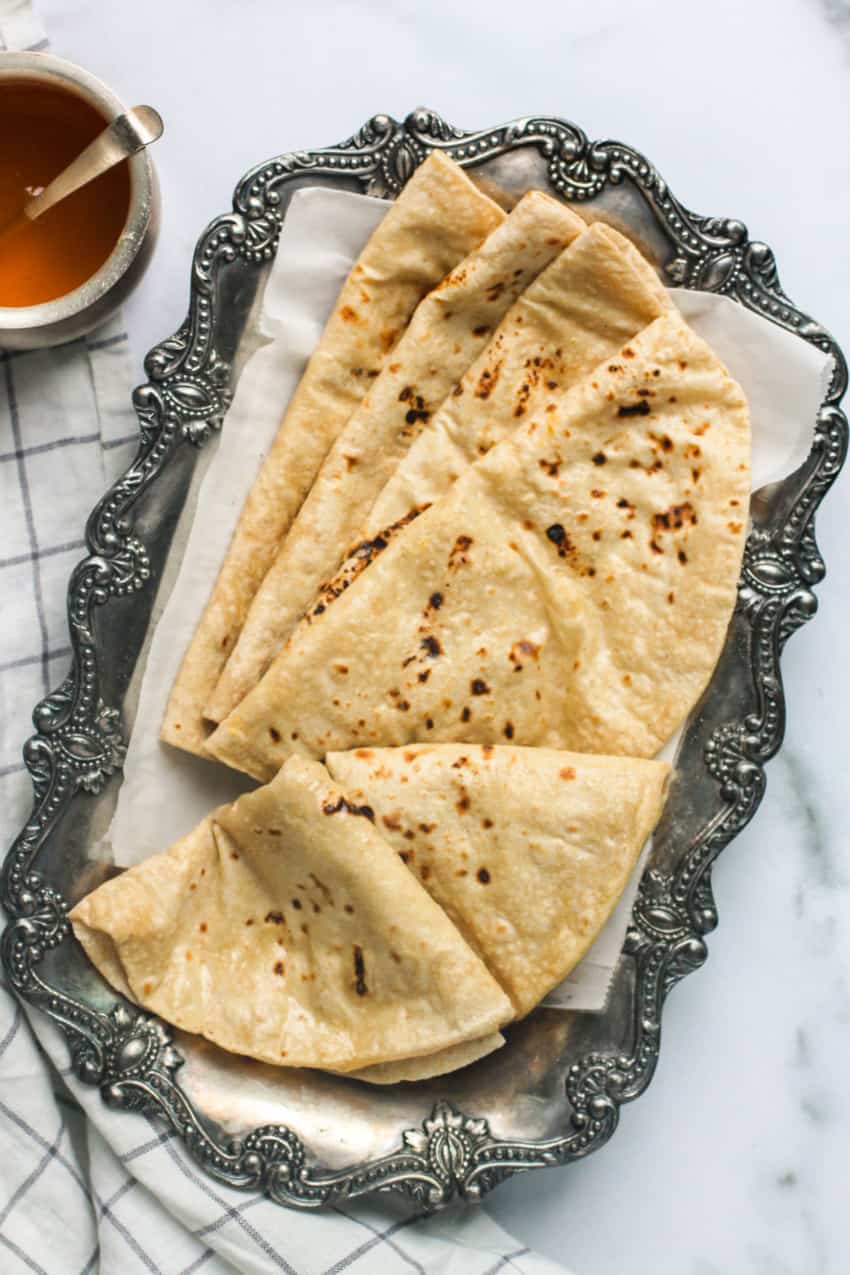
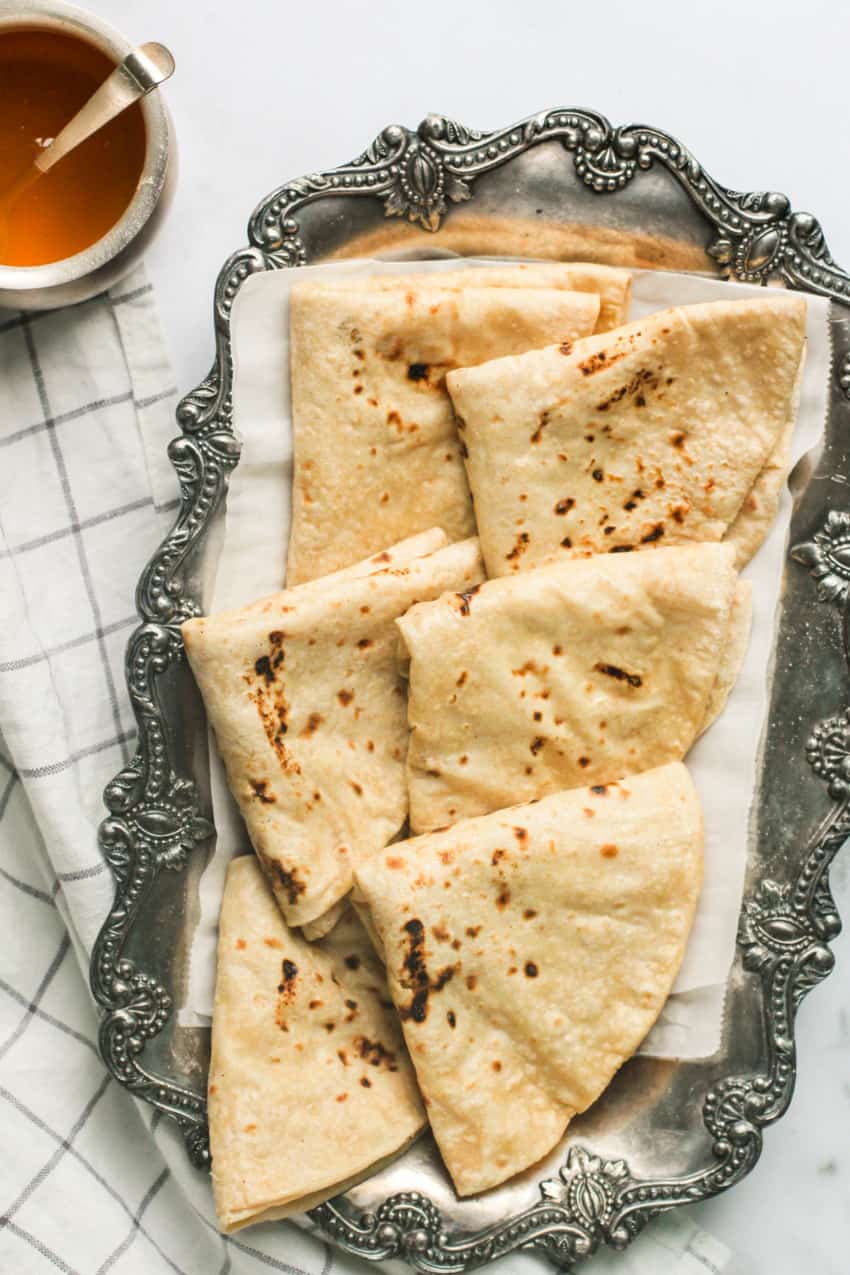
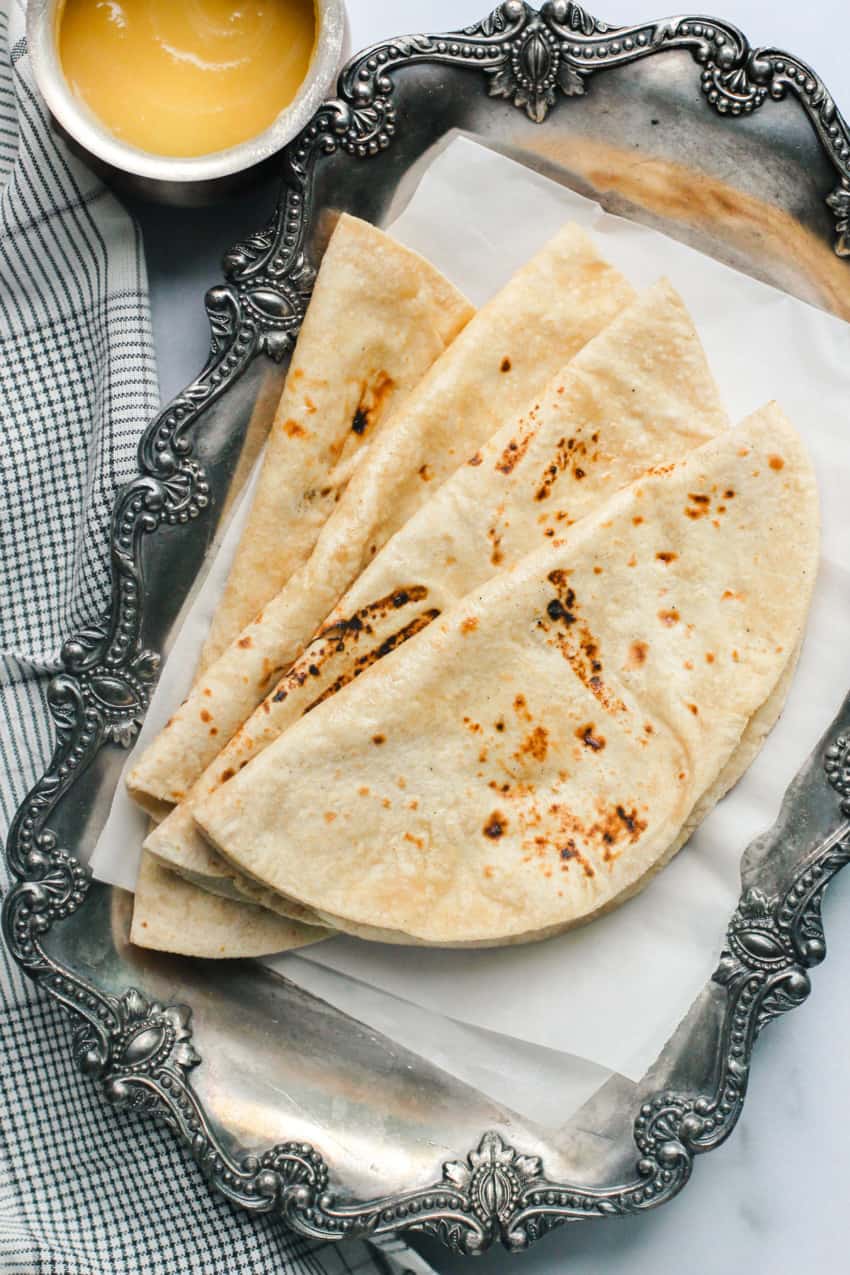
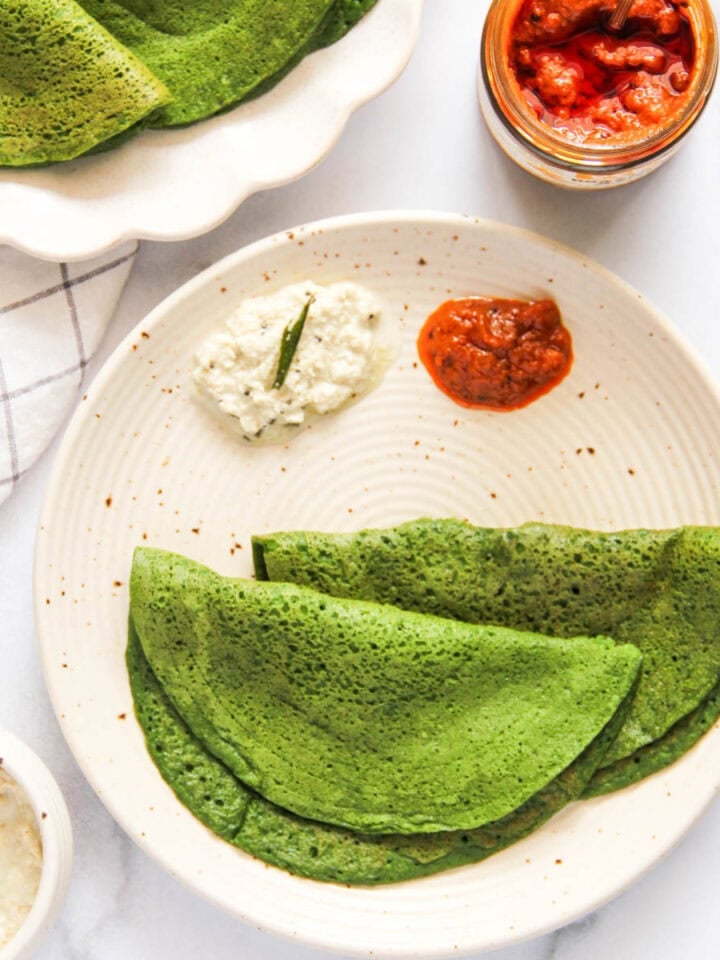
If there is one recipe that has never left my kitchen, not once, it is phulka. This thin, cloud-soft whole wheat flatbread is the heart of everyday Indian cooking, and honestly, nothing beats tearing into a warm one straight off the flame. Add a drizzle of fragrant homemade ghee, and suddenly the simplest curry on your stove becomes a meal worth remembering. Once you make these at home, store-bought roti will never feel the same again.
Want to Save This Recipe?
Enter your email & I'll send it to your inbox. Plus, get great new recipes from me every week!
By submitting this form, you consent to receive emails from Minstry of Curry
The best part about phulka is just how simple and approachable it really is. No yeast, no baking, no complicated techniques. Just a soft whole wheat dough that comes together quickly and delivers perfectly soft, pillowy rotis every single time. This is the kind of recipe that once you have it down, your hands just know what to do.
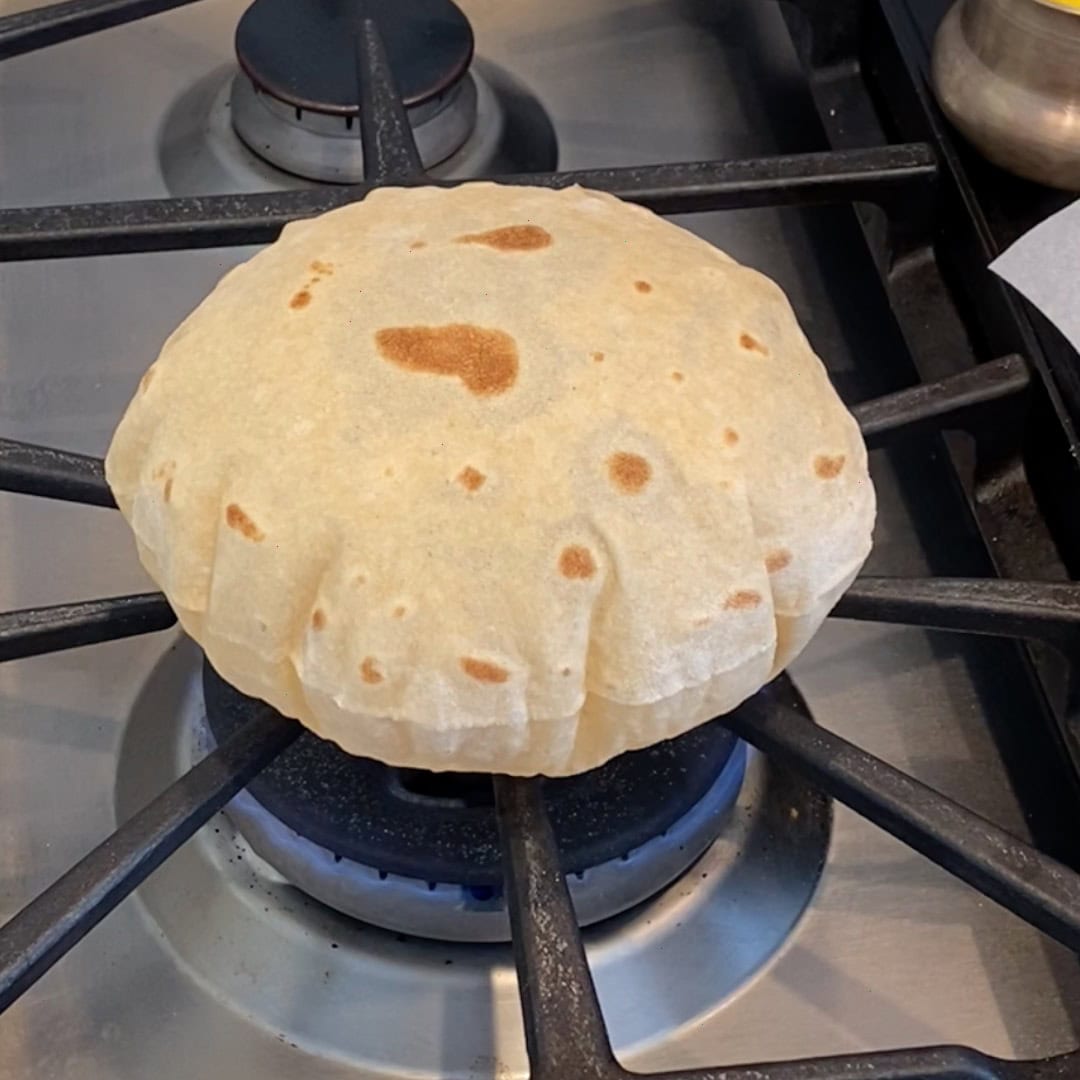
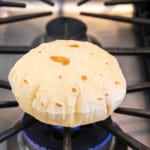
The word phulka literally means puffed up, and that little puff is everything. The secret lies in rolling your dough into thin, even circles, giving them a quick roast on a hot tawa, and then finishing them directly over an open flame to get that beautiful balloon effect. No gas stovetop at home? Not a problem at all. Simply cook them a little longer on both sides in the pan, and they will still puff up just as beautifully.
What I love most about roti is how beautifully it transforms across India, each region putting its own proud stamp on this humble bread. In Gujarat, it is rolled small and delicately thin, lovingly called Rotli. In Maharashtra, we know it as Fulka or Phulka, and we also have our own thicker, layered version called Chapati or Poli. Travel up north, and the dough gets rolled a little thicker, giving you those soft, flaky, utterly satisfying Parathas.
The technique may change from kitchen to kitchen and state to state, but one thing remains gloriously constant everywhere you go. A generous drizzle of homemade ghee ties it all together and makes every single bite absolutely irresistible. And trust me, once you start exploring the world of Indian flatbreads, there is so much delicious variety waiting for you that you will never want to stop
How to Make Homemade Roti Phulka
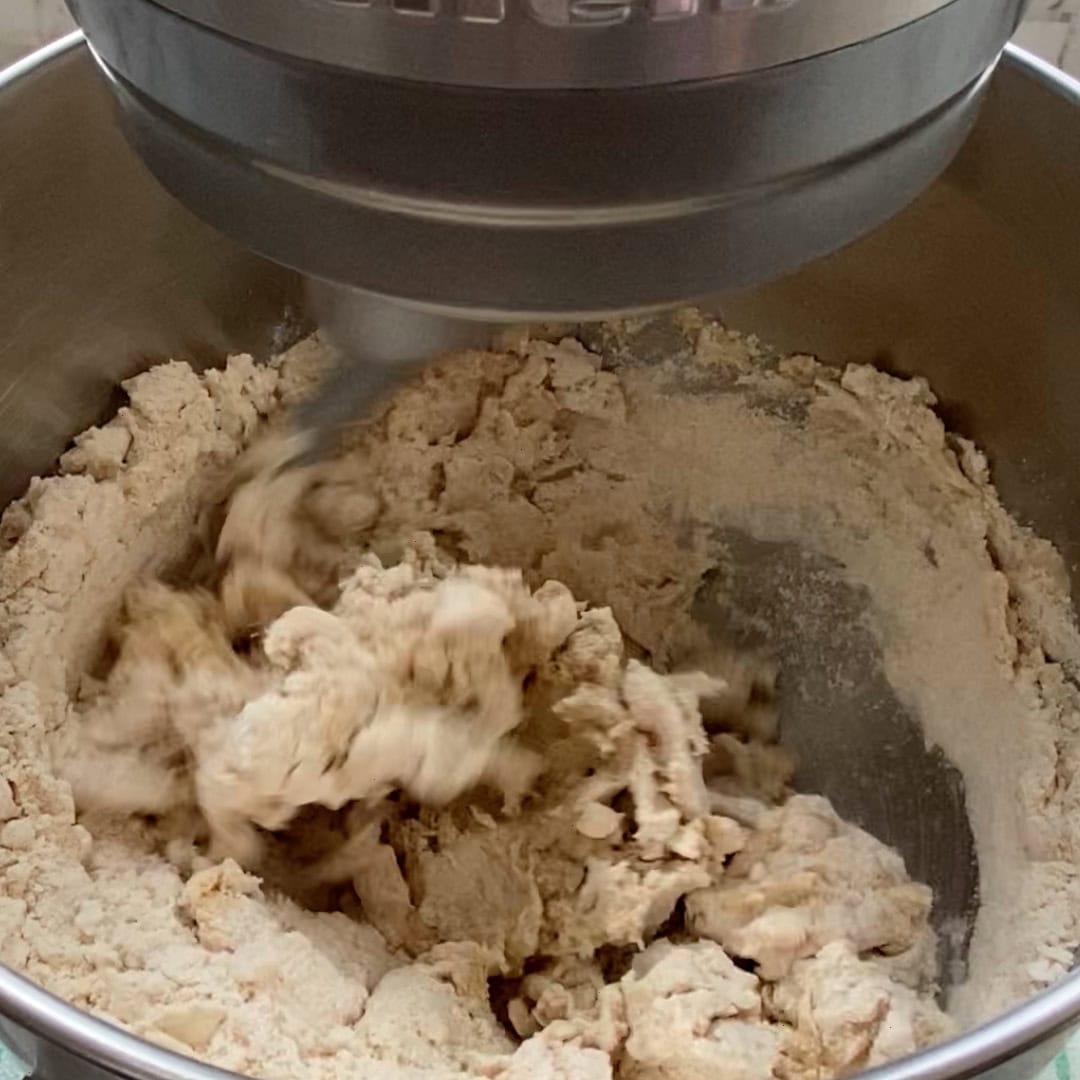
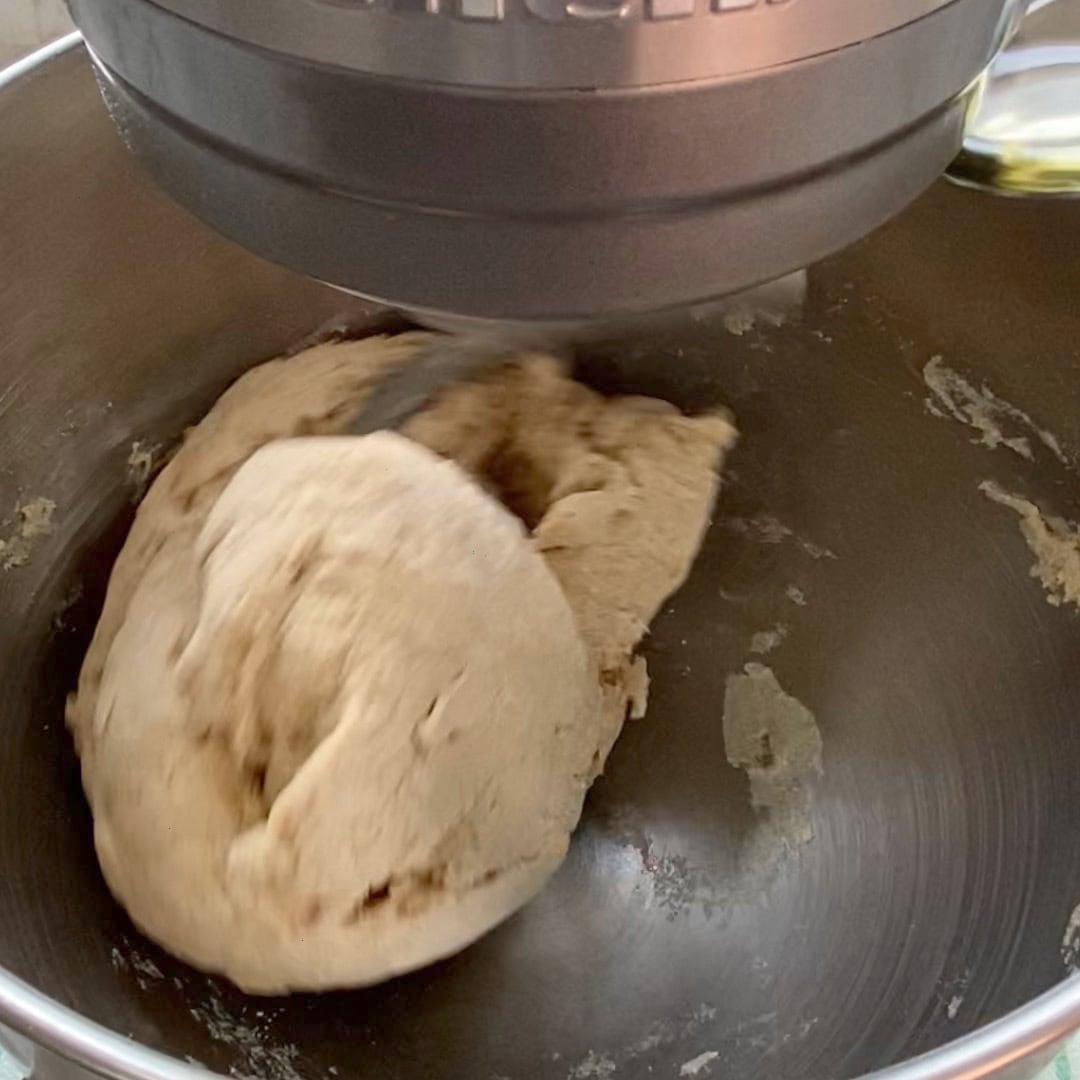
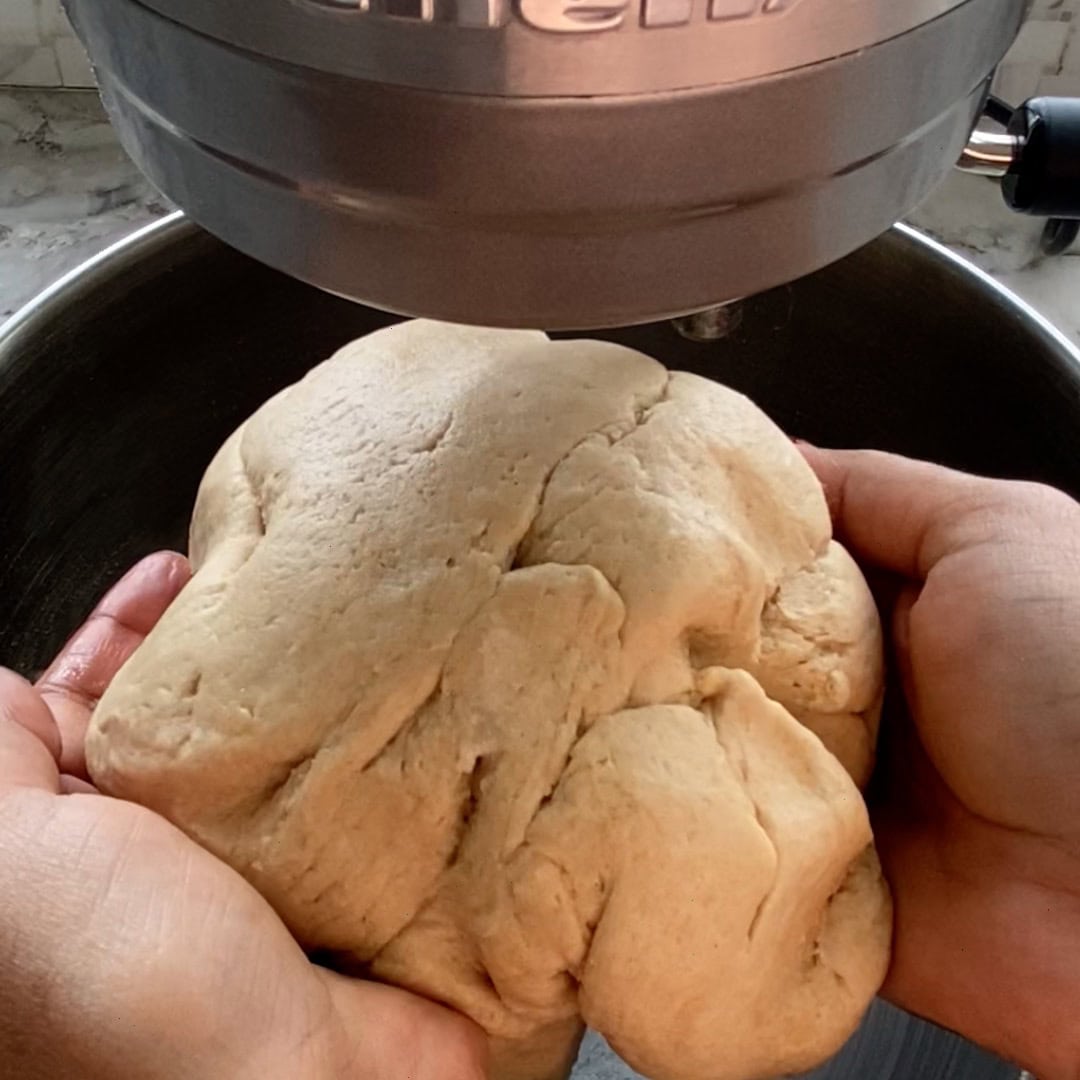
Step 1: Knead the dough
Before I explain how to make the dough using a stand mixer, please know that I have been kneading the dough by hand for years. It's easy to knead by hand and I have included the details in the recipe card.

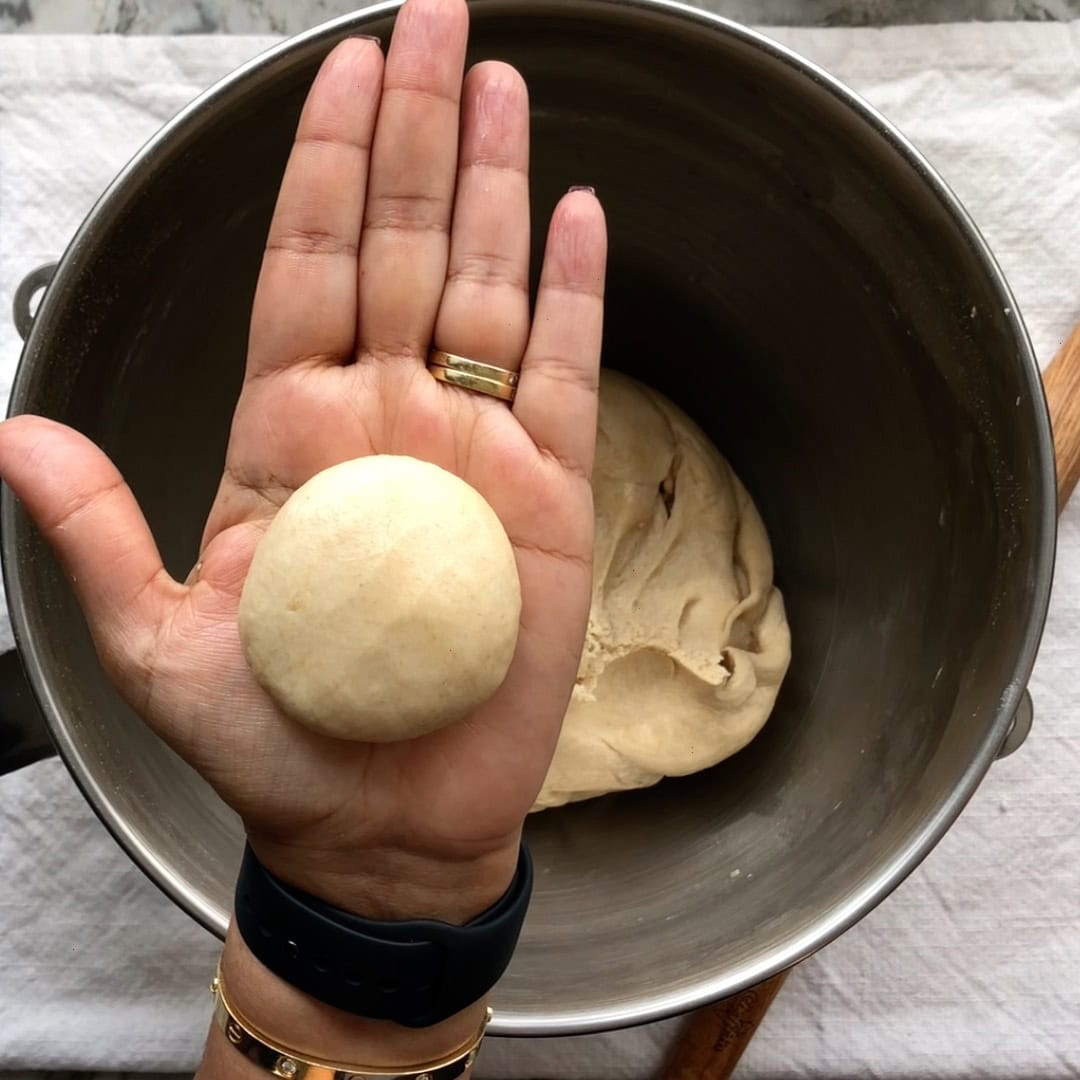
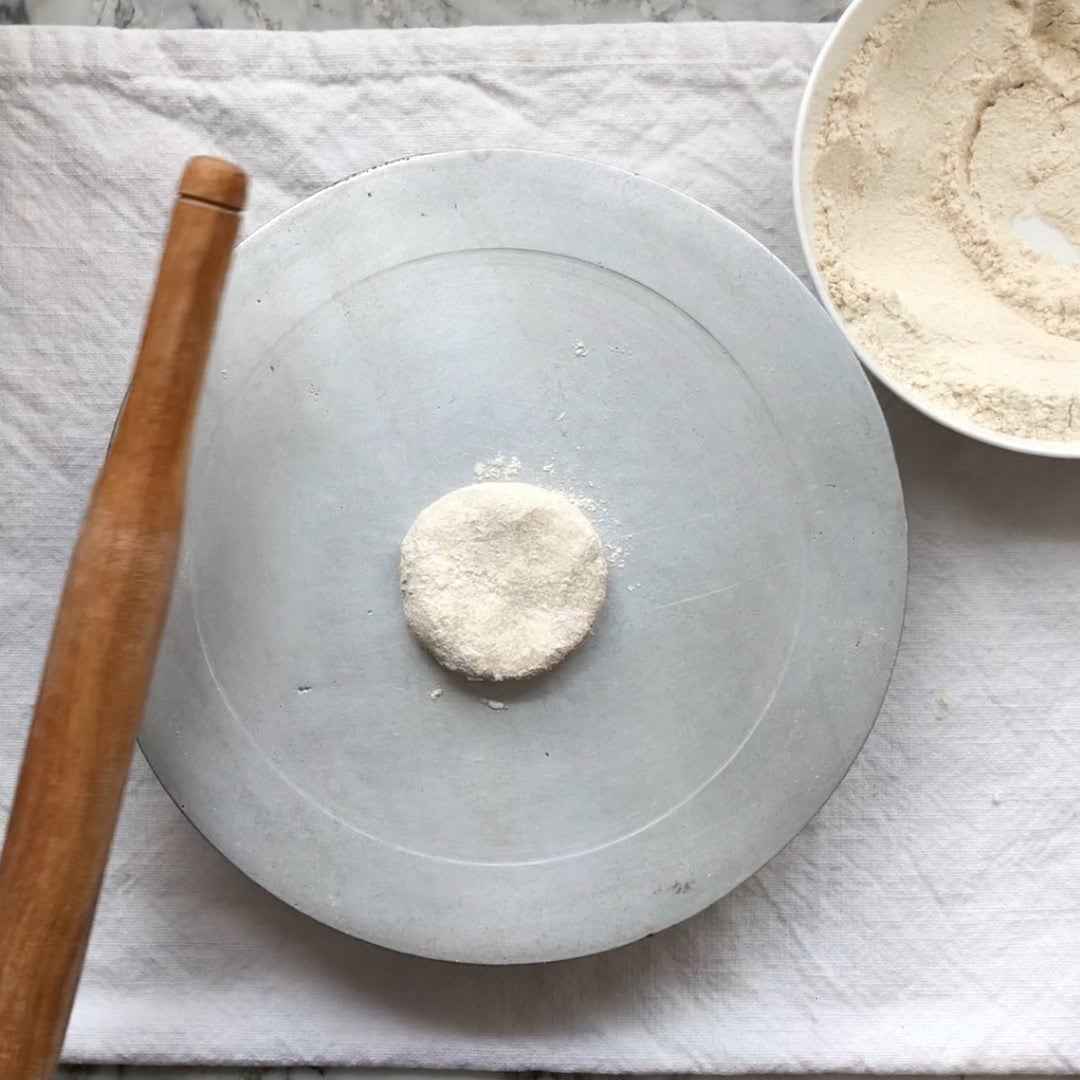
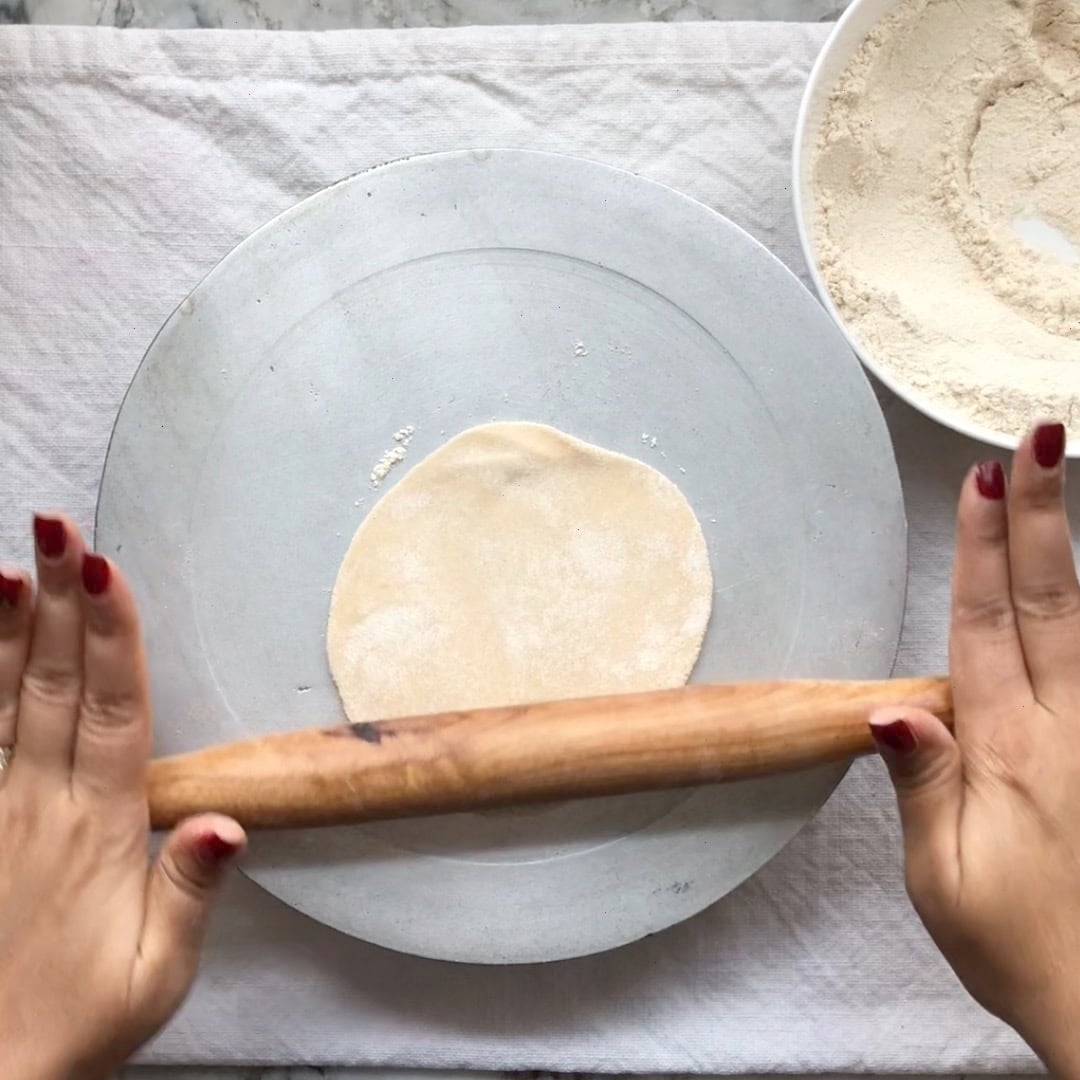
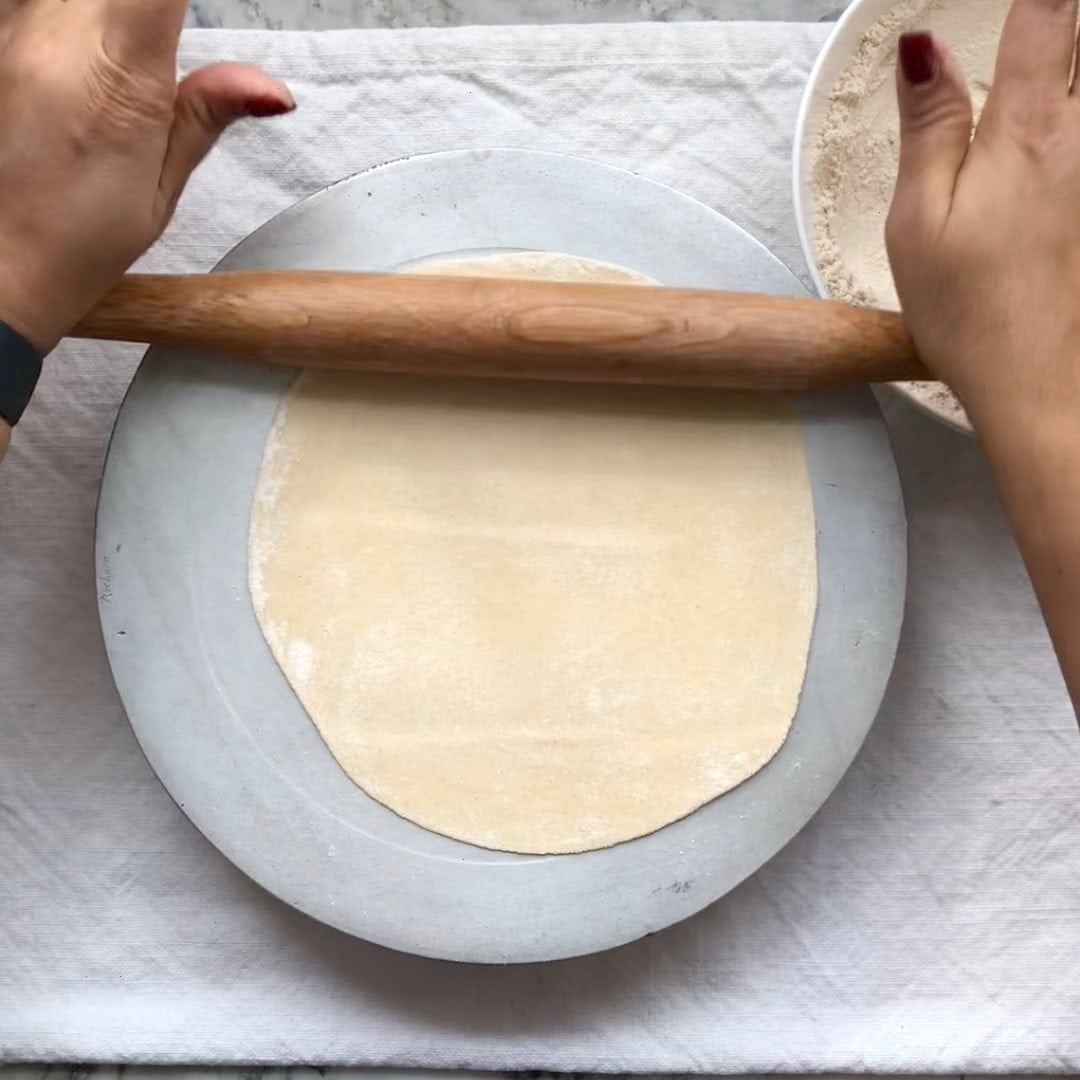
Step 2: Roll the Roti
Note: Traditionally, Rotis are rolled on a round board called "Chakla" and rolled with a rolling pin called "Belan". If you do not have the chakla, you can roll them directly on your kitchen countertops, marble boards, or pastry mats.
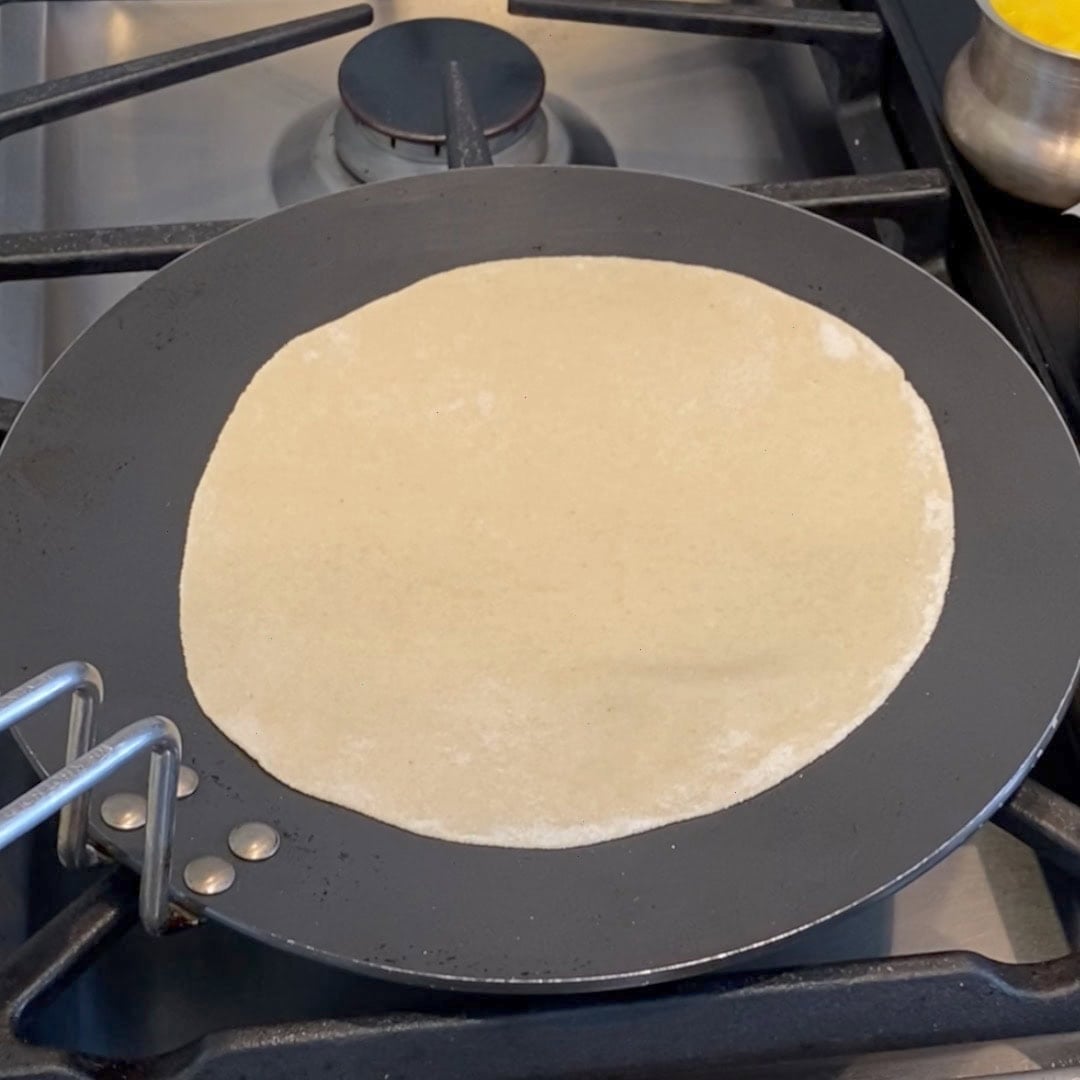
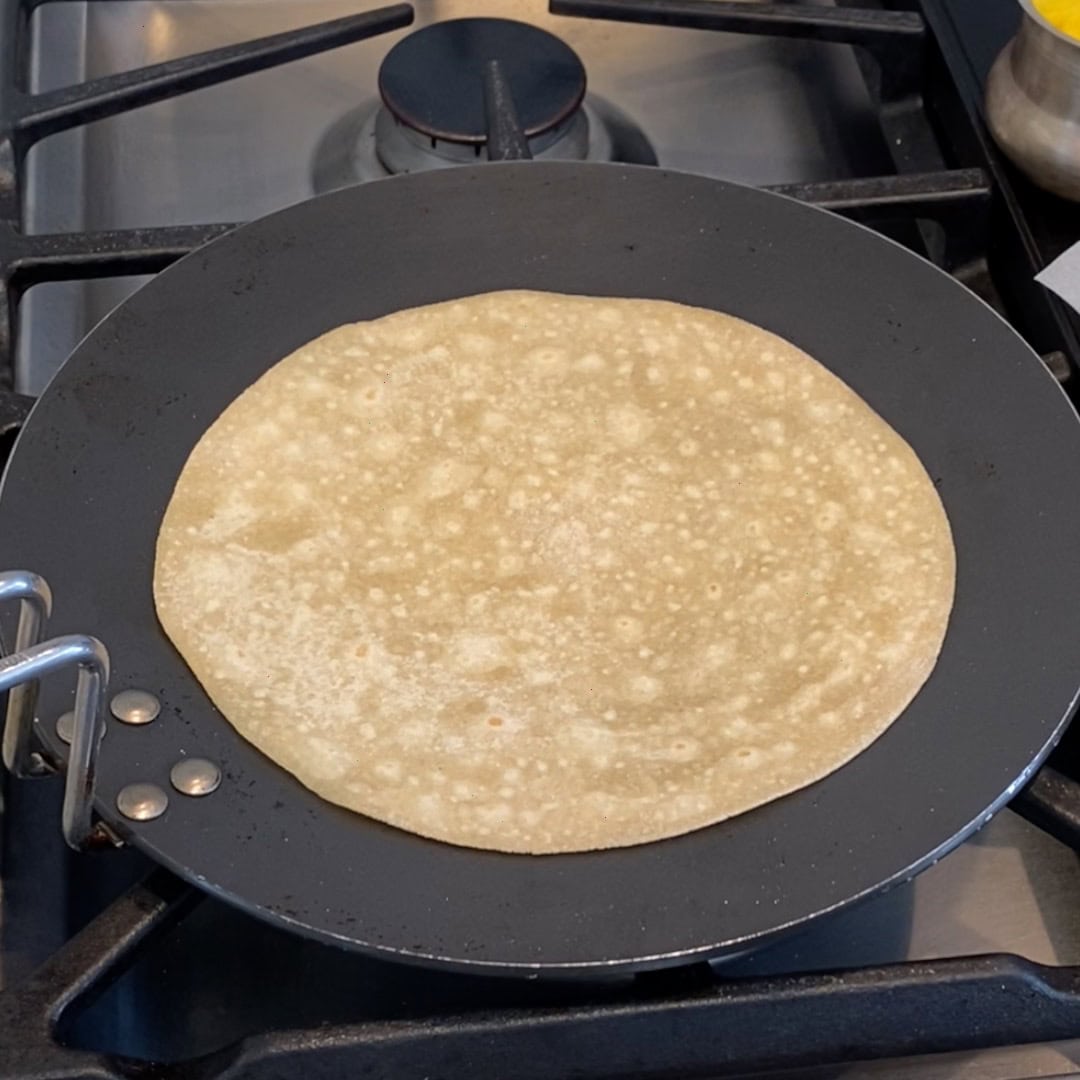
Step 3: Cook the Roti
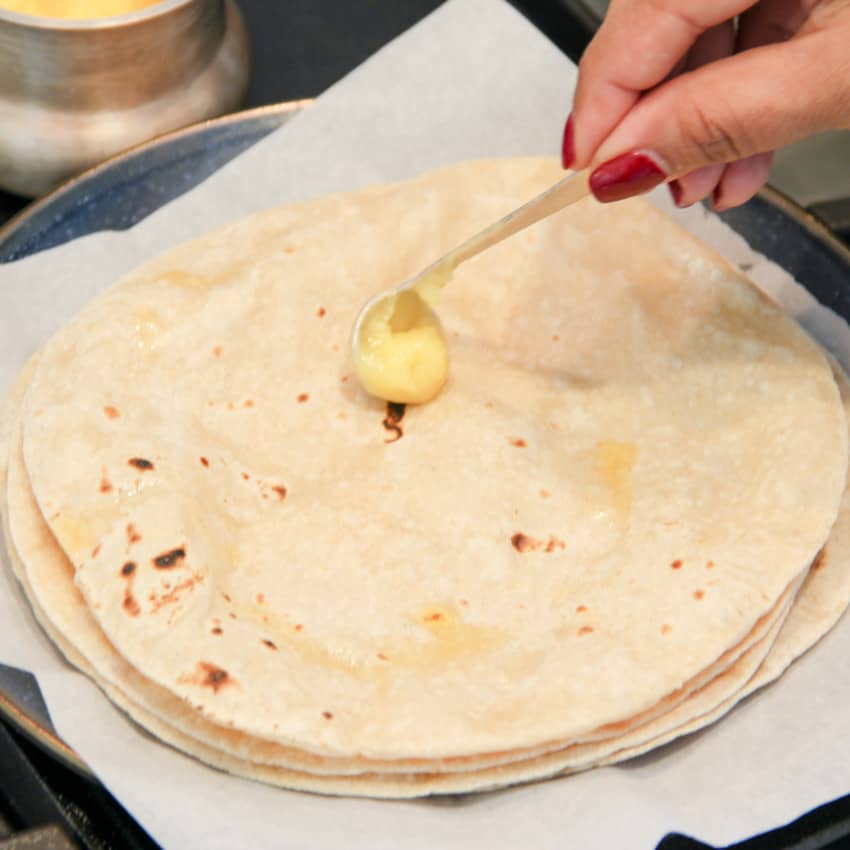
Place the roti on a plate, facing up to the side that just cooked directly on the flame. Traditionally, ghee or oil is applied on the top surface of the Roti, although this step is optional.
Serving
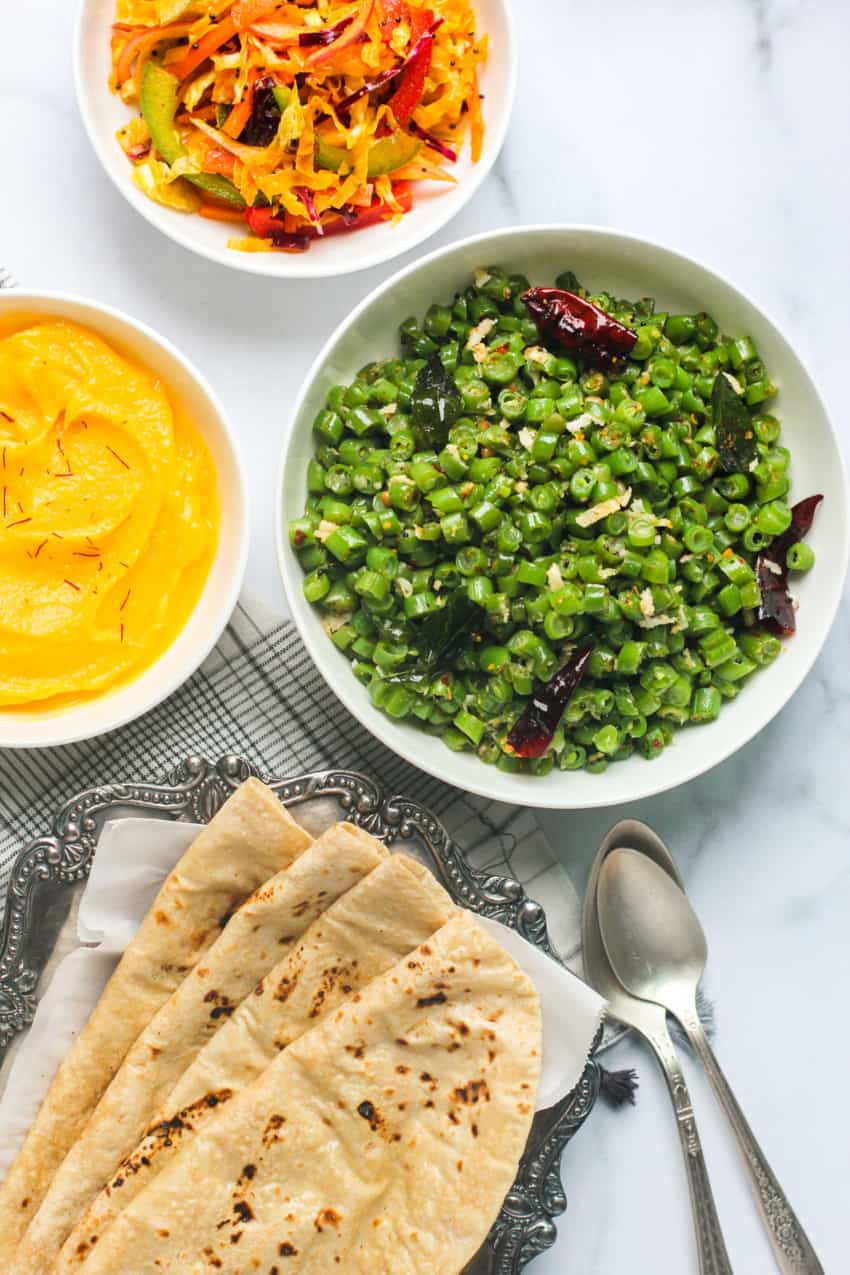
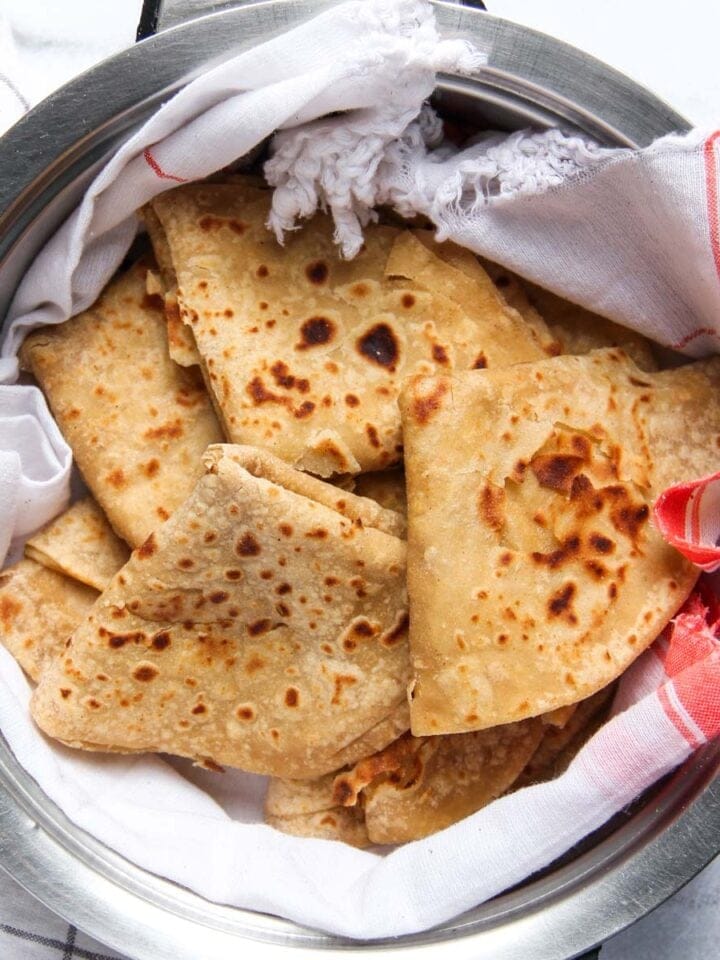
Serve hot Rotis with Curries, Dals, along with Mango Pickle. Hot Roti with ghee also makes for a great breakfast in the morning with a cup of chai. I often make a roti wrap with a veggie omelet or Egg Bhurji for lunch.
Storing
It's best to serve and enjoy hot roti immediately. If I am making them ahead of time, I keep them in a hot pot casserole that keeps the roti warm for a couple of hours. You can also refrigerate for 1 to 2 days in an airtight container or tightly wrapped in aluminum foil. For an extended shelf life, roti can also be frozen.
To reheat, simply wrap 2 to 3 roti in paper towels and microwave for 20 to 30 seconds. You can also reheat them on a stovetop pan or griddle.
Tips for Making the Perfect Roti
- Start with good-quality whole wheat flour. I love Aashirvaad atta, which you can find in most Indian grocery stores. Keep in mind that the flour-to-water ratio can vary between brands, so adjust as needed.
- Kneading is key. Aim for a medium-soft dough, adding a little salt and oil if you like; oil keeps the dough soft and non-sticky, but you can skip both if you prefer. Let the dough rest covered on your countertop for 15-20 minutes before rolling.
- When rolling, start from the center and move toward the edges, keeping them flat and thin. Avoid pressing too hard-too much pressure can make the roti uneven and hard to puff.
- Preheat your pan before placing the rolled-out roti for the best results.
- Most importantly, patience and practice are what make perfect phulkas!
Troubleshooting
Here are some of the issues you may have while making Rotis, and how to fix them:
- The dough is too hard or dry - If your dough looks hard or if you need to use a lot of pressure while rolling, your dough is too hard. Add some water and knead the dough again. This process will make your dough look sticky at first, but add only 1 to 2 tablespoons at a time and continue kneading, then finish with a light sprinkle of dry flour, which will help make it even and not sticky on the outside. Then knead with 1 to 2 teaspoons of oil. Allow the dough to rest for at least 10 minutes.
- The dough is too soft or sticky - The dough should be soft yet not sticky. You may have added more water if your dough is sticky. To fix that, simply sprinkle a little bit of dry flour at a time and knead until the dough is no longer sticky. Knead with 1 to 2 teaspoons of oil until you can easily make balls without the dough sticking to your hands. Allow the dough to rest for at least 10 minutes.
★ Tried this recipe? I'd love to hear how it turned out! Leave a comment and let me know, or snap a quick pic and upload it-I love seeing your creations. If you're on Instagram, tag @ministry_of_curry so I can check it out. Your feedback means so much to me and makes all the time I spend perfecting each recipe totally worth it. Thank you!
Recipe
Phulka Roti Recipe (Soft Indian Flatbread)
Recipe Video
Ingredients
- 4 cups whole wheat flour finely ground
- 2 cups water or as needed
- 2 teaspoons kosher salt
- 1 tablespoon oil optional
- 2 tablespoons ghee optional
Instructions
To make the dough by hand:
- Add flour and salt to a mixing bowl and mix well. Then slowly add the water little bit at a time and mix it in with the flour using finger tips of your dominant hand. Keep adding water and kneading until soft dough (but not sticky) forms. Then add the oil and knead once again for 4 to 5 minutes or until even and smooth dough forms. Cover the dough and allow it to rest for 10 to 15 minutes. Dough can stay at room temperature for an hour or so, or you can refrigerate it in an airtight container for 2 to 3 days.
To make the Dough using Stand Mixer:
- Attach the spiral dough hook to the stand mixer. Add flour, salt and 1.5 cups of water to the mixer bowl and start the mixer at speed 2. Add the remaining water as needed. Once the dough has fully formed, add the oil and let the mixer run for another 2 to 3 minutes. Take out the dough, cover it and allow to rest for 10 to 15 minutes. Dough can stay at room temperature for an hour or so, or you can refrigerate it in an airtight container for 2 to 3 days.
Rolling:
- Knead the dough once more for a minute and make small round balls from it. With 4 cups of dough you can make roughly 20 balls. Heat the tawa or a shallow pan/griddle on medium heat.
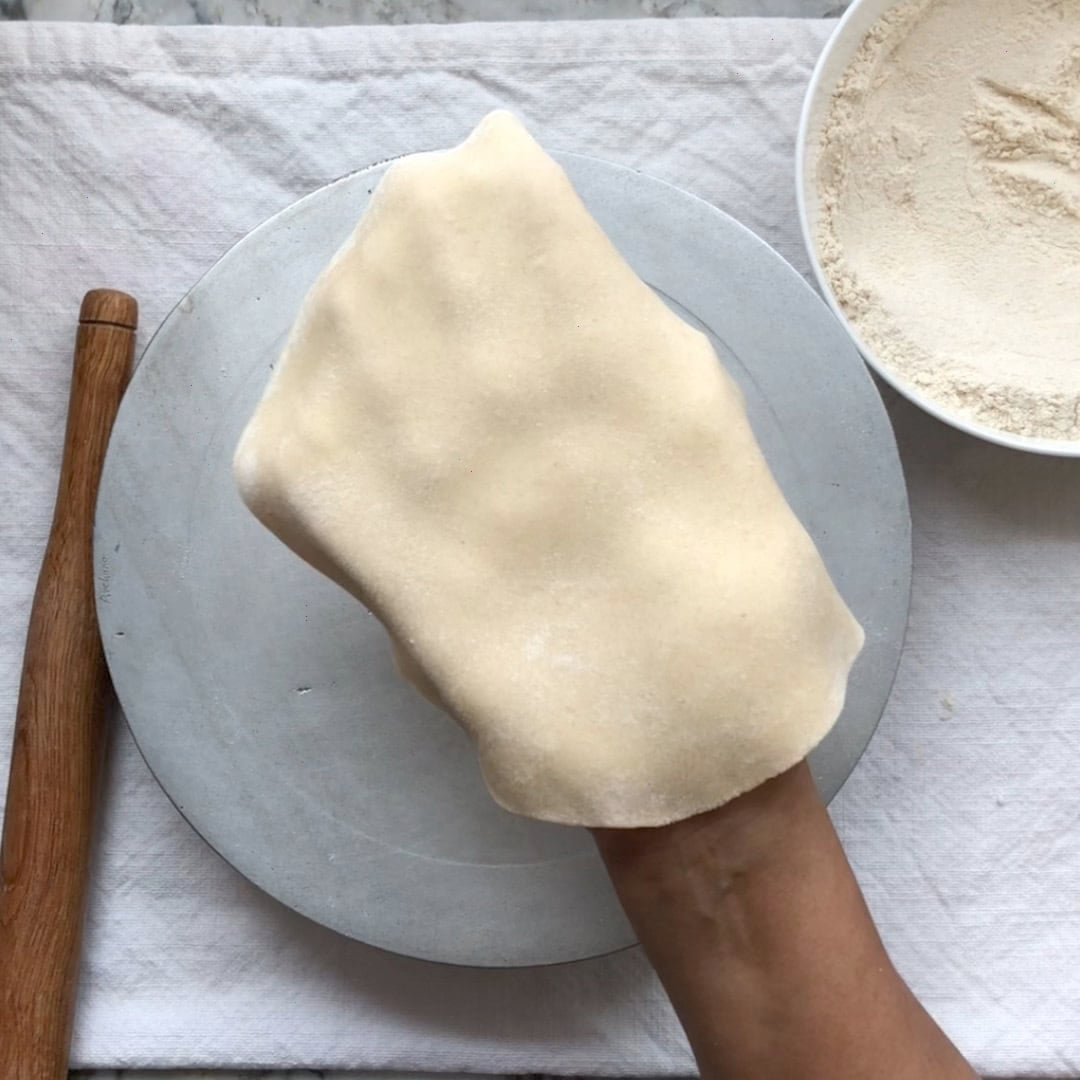
- Take one dough ball at a time and roll it in the dry flour so that it is evenly covered with flour. Gently press the dough ball to flatten it and then roll it back and forth using a rolling pin, using gentle pressure. Turn the roti around clockwise a few times, as you roll it evenly on all the sides. Dip it back in flour if it starts to get sticky and form 6 to 8 inch roti.
- Gently place the rolled roti on the preheated Tawa and cook for 30 to 45 seconds. Then flip the roti over with a pair of tongs and allow the side touching the tawa to fully cook. About a minute or so, or until the roti starts to get light brown spots over.
- Now carefully lift the tawa with one hand (non dominant) and pick up the Roti using the pair of tongs and place it upside down on medium high flame. The Roti will start to pop up, getting brown spots on it, about 20 to 30 seconds. Place the roti in a plate facing up the side that just cooked directly on the flame. Place the tawa back on the flame. Optionally apply ghee or oil, on the top surface of the Roti.
- Repeat steps 2, 3 & 4 with remaining dough balls.
Notes
- Remember that flour to water ratio can vary between different brands and varieties of whole wheat flour. Kneading the perfect dough is pretty much the key step. It should be medium soft but not sticky
- Leave the dough covered on your countertop for 15-20 minutes before rolling it out
- While rolling out, start from the center. As the dough rolls out, start rolling more toward the edges. The edges should be flat and thin
- Make sure not to put too much pressure while rolling the dough. This may make the phulka thin in parts and hard to puff up
- Preheat the pan before placing the rolled-out phulka
- Have an electric stove top? Instead of cooking the roti on the flame, simply turn it over on the pan itself. Using a kitchen towel, gently press the roti until it puffs up.
Nutrition
♥ Subscribe to our Youtube Channel for tasty and easy video recipes. Looking for more Instant Pot recipes? Check out our delicious Instant Pot Recipe board on Pinterest.
Bhagya says
Hi, looks so soft. Where can i buy the Indian tawa, rolling pin and rolling board in Sydney?
Archana says
Hi Bhagya, I am so sorry but I am not sure where you can buy in Sydney. Try your local Indian grocery stores?
Bindu says
Hi Archana
What Kitchenaid standup mixer are you using? I was thinking of buying one and wanted one which is ideal for chappati.
Archana says
I have Kicthen aid 6 QT Professional series
Aparna says
Can we knead 2 cups of flour on a 6 quart bowl or will the Bowl be too big ?
Archana says
6 QT is too big for 2 cups of flour. You may want to get a smaller one.
Maria says
Can you use white flour instead of whole wheat flour?
Archana says
yes, the texture will be a bit chewy bit the taste will be delicious.
Aarthi says
This is so perfect, I used Aashirvaad Whole Wheat Flour and the rotis were so soft for longer time.
Sne3103 says
Such a great, detailed recipe, Archana. I sure appreciate the way you have specified even little things, like the flame levels at each stage. My first time making phulkas, and they turned out so soft!
Archana says
Thank you so much for the feedback!
Gurkiran says
What is the best flame to cook the roti on- high, low or medium?
Archana says
medium hight heat
Monal says
Thank you for the detailed recipe. I have a hard time making phulkas because of the griddle over the gas range.
Which cooktop brand do you use ? Thank you
Archana says
I have GE profile double-range gas stove. You can always cook the last side on the pan itself. Use a kitchen towel to gently press which will help the phulkas puff up.
Manny says
I failed many times at making naan but was told that it is a lot easy to make roti. I wasn’t convinced until today when I watched your video. I used my KA mixer. As a first attempt the roti turned out. I used a non-stick pan on a flat top stove however it was hard not to get big dark spots when the bread was puffing up. I think next time I would transfer the roti onto a butane portable stove to puff them up with the pan during the last step. My family and I really enjoyed the rotis along with your Instant Pot chickpeas masala. As for the masala I love that the tomatoes were added after it was cooked. Love your site! Keep up the good work!
Archana says
Hi Manny, Love that your Roti is puffing up at first attempt. It does take a little bit of a practice as the heat levels and thickness of the pan can vary for each of us. I like the idea of cooking on direct flame, but if you still see dark spots then simply lower the heat. And I am so glad you enjoyed the chickpeas masala. I think adding tomatoes in the end keeps the dish fresh and vibrant.
Christina Scott says
Delicious and fun to make! Your video really helped me figure out the proper way to cook this wonderful recipe. When I've run out of wheat flour, I've made this with regular flour, and it came out just as good.
Archana says
Thank you for the lovely feedback!