

It's very important to do an initial water test with a brand new Instant Pot. Follow these steps and tips so you can get to know your Instant Pot before you use it to cook.

Want to Save This Recipe?
Enter your email & I'll send it to your inbox. Plus, get great new recipes from me every week!
By submitting this form, you consent to receive emails from Minstry of Curry
Jump to:
What Is An Instant Pot Water Test
The water test is recommended by the Instant Pot company for everyone to do before they use their new pressure cooker on a recipe.
It's an initial test run only using water that makes sure your device is working as expected.
This is also a really great way to familiarize yourself with the Instant Pot terminology before you cook.
How To Do The Initial Water Test
Here's how to do your own water test. I also have a video at the bottom of this post that you can watch, showing you how to do all of these steps. I am using the 6 Quart Instant Pot Duo in the photos and video.
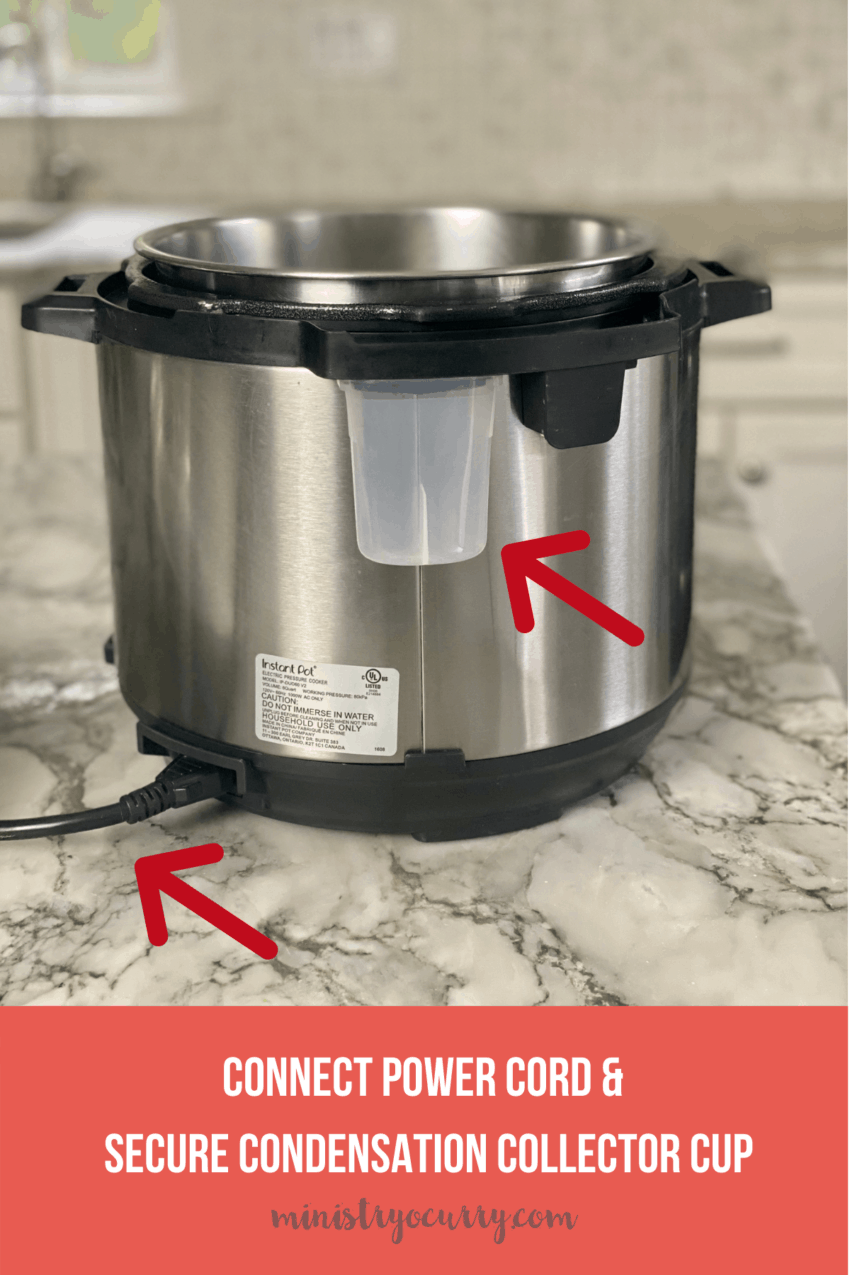
Step 1: Plug In Your Instant Pot
A brand new Instant Pot will come with the cord detached in the box. Plug it into the Instant Pot and secure it to a 120V outlet. Secure the condensation collector cup to the back of the Instant Pot.
Step 2: Insert The Pot & add water
Then, place the inner pot into the base of the pressure cooker. Remember, the inner pot must be used for cooking. Never pour food or liquid into the cooker base without the inner pot in place. Next, add 2 cups of water to the inner pot of the Instant Pot.

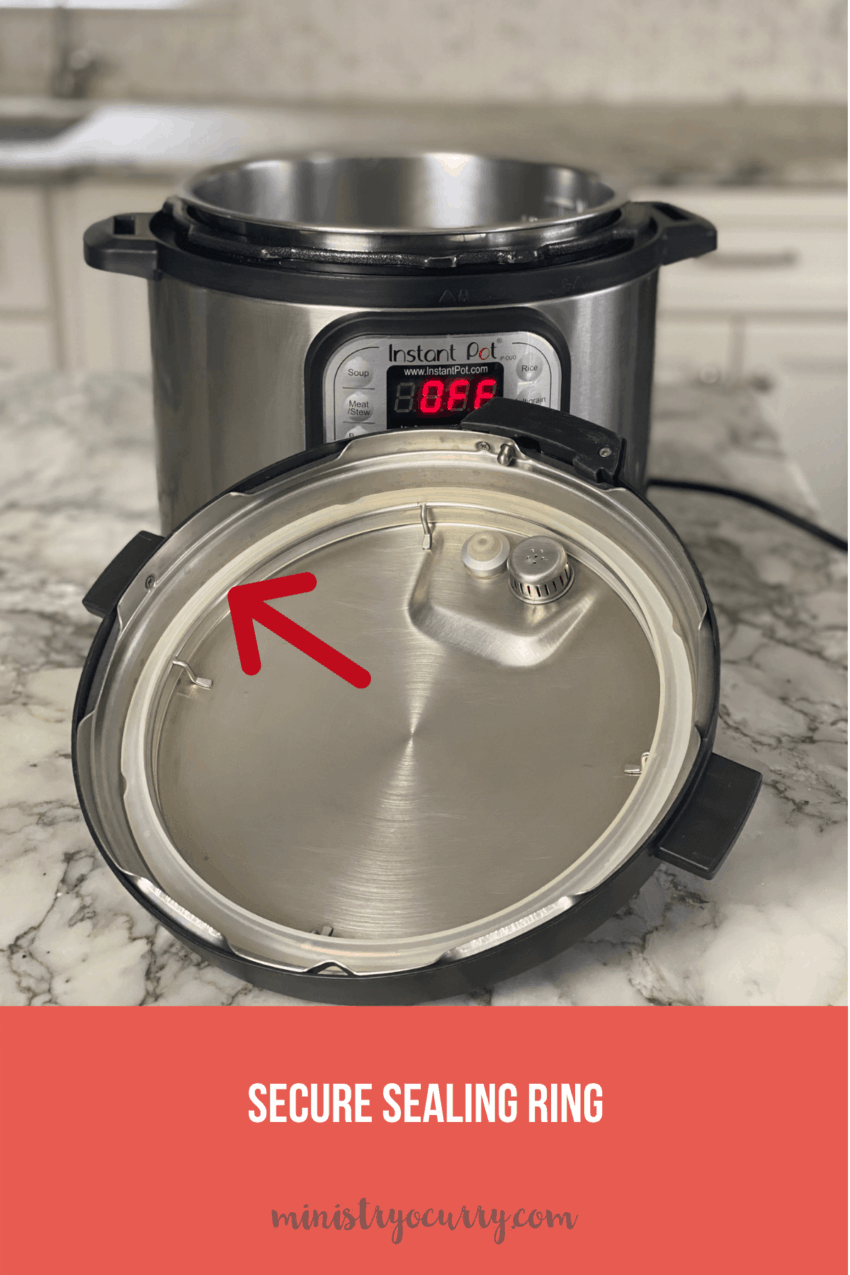
Step 3: Double Check The Sealing Ring
Before you begin, make sure the sealing ring is installed correctly on the sealing ring rack. When it is in place, you should not be able to remove it easily.
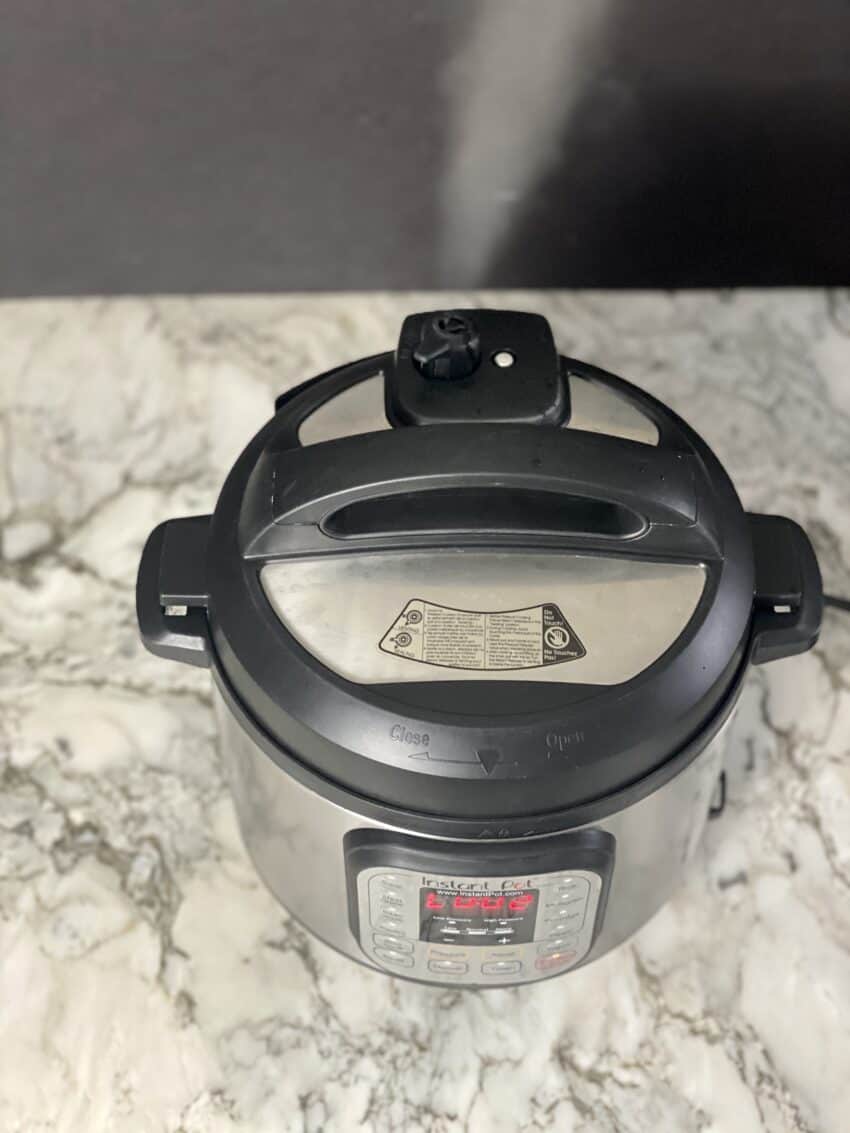
Step 4: Close The Lid
Place the lid on top of the pressure cooker. Turn it clockwise until it is fully closed. The cooker will chime when the lid is opened and closed.
Step 6: Set the Steam Release
On the Instant Pot, set the steam release to the "Sealing" position. The Ultra Instant Pot automatically sets the steam release to the "sealing" position when you close the lid.
Then, select steam option.
Step 7: Adjust Cook Time
Use the +/- keys or the dial to adjust the cook time to 2 minutes. The display will indicate "2" on some models and "00:02" on others.
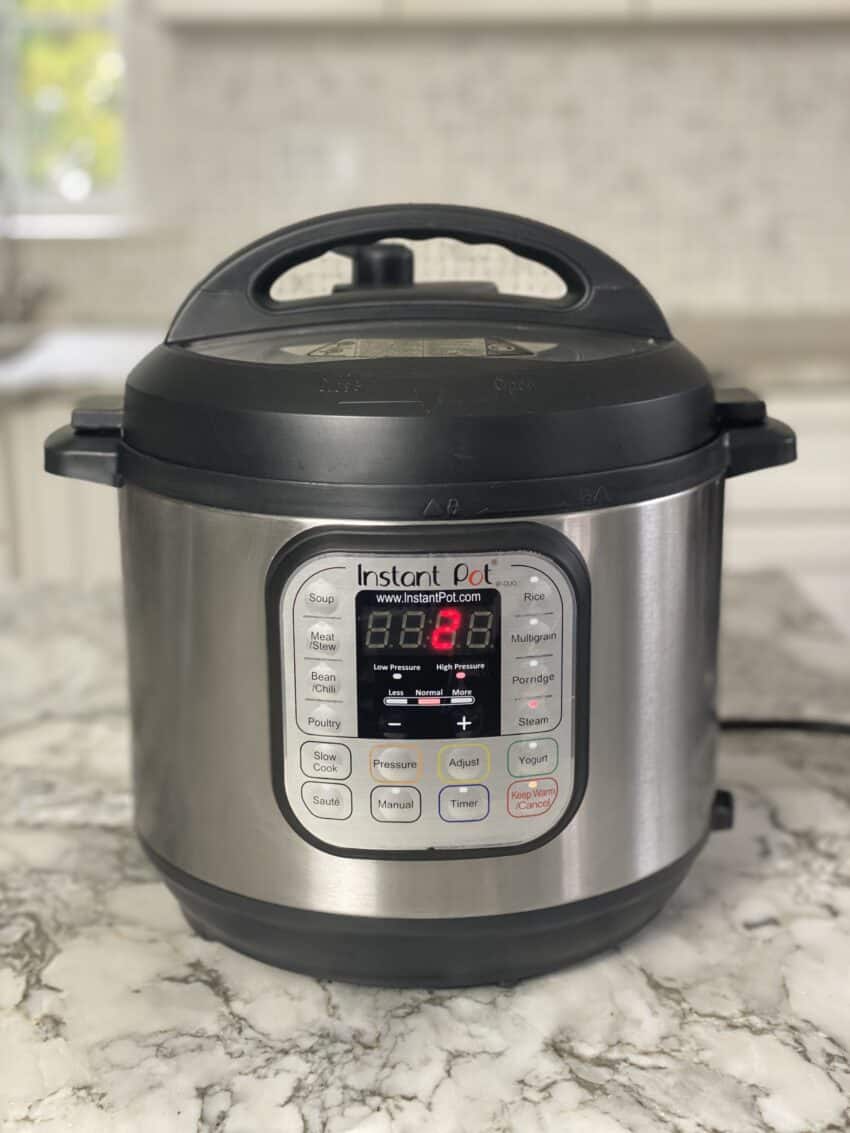
At this point, the cooker will begin the pre-heating cycle after about 10 seconds. As it does this, the display will indicate "on" while it heats.
Step 8: Keep Warm
After the cooking cycle has completed, the pressure cooker will beep and switch to Keep Warm if it is on.
Step 9: Vent The Pressure Cooker
Finally, use the Quick Release (QR) venting method to release the pressure.
Water Test Venting Methods
There are two different ways an Instant Pot vents. Here's a bit of information about what they are and how they work.
Natural Release (NR) or Natural Pressure Release (NPR)
With NR, you basically do nothing. You allow the cooker to cool off naturally and release the heat and pressure over time. You will know that the cooker is no longer pressurized when the float valve drops into the lid.
It could take anywhere from 10-40 minutes for this to complete. Depressurization times vary based on the volume of the liquid and the food.
Quick Release (QR)
To do a QR, you turn the steam release handle from the "sealing" position to the "venting" position. If the machine spatters, turn the steam release handle back to the "sealing" position and try again after a few minutes.
The float valve will drop into the lid when the Instant Pot has depressurized.
Video
Here is a quick video showing how to set up the Instant Pot and do the initial water test run:
Three Stages Of The Water Test
The reason you do a water test is to get to know your Instant Pot and how it works before you use it to cook.
Every time you cook with an Instant Pot, there are three stages that your pressure cooker cycles through.
Heating and Pressurization
The very first thing that your pressure cooker does is preheat. This creates the steam that is required for it to build up pressure.
After enough steam pressure has built up, the float valve will pop up and pressurize the cooker.
During the water test, this step could take 5-15 minutes. Do not press down on the lid. The float valve will rise when enough steam pressure has built up.
Until the cooker pressurizes and the float valve has popped, the lid will be removable. After it is pressurized, the lid will lock.
Cook Cycle
The Instant Pot will not start the countdown right away. It has to come to pressure first. Within 5 minutes of pressurization, it will beep once and the countdown will appear on the display.
When the timer reaches "00:00," the pressure cooker will beep 10 times to signal that cooking has completed.
Smart Programs allow you to make changes to time, temperature, and pressure levels.
Depressurization and Keep Warm
This is the final step. After the pressure cooking has completed, follow your recipe's directions when selecting a venting method.
This is very important. You should always make sure the float valve has dropped completely before attempting to open the lid. In case the lid won't turn, do not try and force it to open.
If "keep warm" is turn on after the cook cycle completes, the timer will count up and if it isn't turned on, it will return to standby.
Final Thoughts
It's very important that you run this initial test, even if you think you already know how to use a pressure cooker. This way, if there are any missing parts or your pressure cooker doesn't work correctly, you can catch that before you cook your first recipe.
Easy Instant Pot Recipes
After you have done the initial water test run, you are ready to begin using it to make your favorite recipes.
I compiled all of my favorite recipes in my cookbook, The Essential Indian Instant Pot Cookbook. There are 75 recipes here for every meal of the day. I share everything from contemporary recipes to my Indian favorites.
Here are some more of my family's favorite recipes that you can find right here on my blog.
- Instant Pot Chicken Biryani
- Instant Pot French Onion Soup
- Jeera Rice
- Vegetable Thai Green Curry
- Green Bean Curry
- Paneer Butter Masala
- Masala Mac and Cheese
- Instant Pot Bread Pudding
- Spicy Misal Pav
- Curd Rice - South Indian Yogurt Rice

Ashu Tandon says
Hi Archana -
Thank you for your blog and videos. I cook for my wife and kids but don't use the IP much. I typically take inspiration and ideas from your recipes and add my twist (or jugaad to it).
I want to use the IP and phase out the pressure cookers at home. My question is how to do I convert the whistle / heat level used in pressure cookers to IP. e.g. if my pressure cooker recipe calls for 3 whistles, then how do i convert that into IP instructions. If you already have a blog on it, please direct me to that link.
Thanks so much,
Ashu Tandon (fellow NJ resident)